Showing posts with label Brushos. Show all posts

Thursday, August 24, 2017

Peace, Be Still


Hi Friends!
 
I had a chance to finish off another card this evening using Sweet ‘n Sassy Stamps The Sea (designed by Korin Sutherland) for the Inkspirational #141 Wave Challenge along with the Tuesday Throwdown #357 “Add Metal” Challenge and the Addicted to Stamps and More #256 "Anything Goes" Challenge.

If you have not had a chance to visit the above challenge sites or SNSS Blog/FB Page yet, I encourage you to do so- fabulous inspiration from all!

To create this card:

1). Using a clean paint brush, apply clear water to the lower portion of a piece of white cardstock, drop a bit of Turquoise Brusho® onto a craft mat, pick up the color with the paint brush and watercolor the lower portion of the cardstock.  Dry with a heat tool, repeat the process for the sky using Yellow, Red and a bit of Purple Brusho®.

 
2). Once the panel has thoroughly dried, de-static with an embossing powder tool, ink the main image from The Sea with Versafine™ Onyx Black Ink, stamp onto the panel (lining up the horizon line with the turquoise water color), apply clear embossing powder and heat set with the heat tool.

3). Once the embossing has cooled, apply a bit more blue with Faber-Castell® Metallic Blue and Blueberry Gelatos™, rub off the excess from the embossed areas and die cut the panel with a stitched banner die.

4). Dry emboss a piece of white cardstock, trim and mount onto a piece of black cardstock, add the watercolor/embossed banner with dimensional foam.

5). Stamp the sentiment from The Sea using Versafine™ Onyx Black Ink, heat emboss with clear embossing powder,  die cut with a stitched circle die and mount onto a die cut piece of black cardstock.  Adhere to the card front with dimensional foam overlapping a portion of the focal image banner.

6). Add silver brads to a strip of black cardstock, mount at the top of the focal image banner with dimensional foam.


7). To finish off the card, use a clear glitter pen to add shimmer to the sky and sea as well as a water brush with the Metallic Blue Gelatos™ over the sentiment followed with the clear glitter pen.


Ink/Mediums: Versafine™ Onyx Black, Brusho®- Turquoise, Red, Yellow, Purple; Spectrum Noir™ Clear Glitter Pen, Faber-Castell® Gelatos™- Metallic Blue, Blueberry

Paper/Cardstock: Whisper White, Basic Black

Accessories/Tools: Big Shot™, Stitched Jumbo Fishtail Banners STAX , Stitched Circle STAX (both MFT), Tim Holtz® Sizzix™ Alterations French Script Embossing Folder, Embossing Buddy®, Clear Embossing Powder, Heat Tool, AquaPainter™, Silver Brads, 5/16" Handheld Punch


Thanks again for taking the time to stop by- hugs and I hope all of you have a blessed week!  

Saturday, April 9, 2016

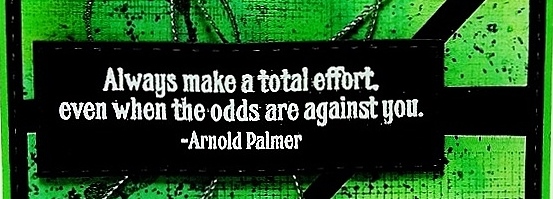
Always Make A Total Effort

Hi Friends!

Today I am sharing my weekly card post on the Artistic Outpost (AO) blog – this Mixed Media card was created using the new AO March Release stamps, Grunge Elements and The Golf Club.

I had posted this card as one of the two designs created for the new March release announcement with a promise that details would be shared at a later date (so here are the details:-)).

To create this card:

Add Ranger® Tim Holtz® Distress Stains along with Gelatos® and Leaf Green Brusho® to a piece of watercolor paper, spritz and allow the colors to run, repeat until you have the desired effect. 

Dry the panel with the Heat Tool and stamp the images from Grunge Elements (AO) with Stāz-On® Jet Black Ink.

Trim the panel and cut on an angle (I used the Splitcoaststampers' SC584 Sketch and MIX155 "Let It Flow" Mix-Ability Challenge for inspiration).

With the Big Shot™ and the largest die from the ODBD Double Stitched Rectangle Dies, cut a stitched panel from Basic Black cardstock, mount onto the Cucumber Crush card base and add the background watercolor panels.

De-static a piece of Basic Black cardstock with the Embossing Buddy®, ink the sentiment from The Golf Club with Versamark™ Ink and stamp onto the prepared cardstock, apply Stampin’ Emboss® White Embossing Powder and heat set with the Heat Tool.

Cut the sentiment panel with the Big Shot™ and the ODBD Double Stitched Rectangle Dies.

Adhere the looped Silver Cord (I used Hot Glue for this step) onto the card front and mount the sentiment over the Silver Cord using dimensional foam to finish off the card.

Stamp Sets: GrungeElements, The Golf Club (Artistic Outpost)

Ink: Stāz-On® Jet Black, Ranger® Tim Holtz® Mowed Lawn and Squeezed Lemonade Distress Stains, Leaf Green Brusho®, Green Tea Gelatos®

Paper: Watercolor, Basic Black

Accessories: Big Shot™, ODBD Double Stitched Rectangle Dies, Embossing Buddy®, Stampin’ Emboss® White Embossing Powder, Heat Tool, Silver Cord 


Thanks again for stopping by- hugs and I hope all of you have a fantastic weekend!

Wednesday, March 2, 2016

TCC50 Let All That You Do Be Done In Love


Hi Friends!!

It’s time for new The Card Concept #TCC50 "Shamrocks, Patterns and Greens" Challenge!  March signals the start of spring along with the celebration of Easter and Saint Patrick’s Day so I decided to use the colors in the inspiration photo for my Mixed Media card.

Just a reminder that the Card Concept is a bi-weekly challenge that has an inspiration photo along with a number of design styles that you can choose from to create your card- Clean and Simple, Clean and Graphic, Clean and Layered, Shabby Chic, Freestyle Collage, Classy and Elegant and Mixed Media.  


I hope you have a chance to visit us at The Card Concept and check out the rest of our Design Team samples as well as the other challenge sites- fabulous inspiration from all!!

To create this card:

Apply Gesso® to a piece of Whisper White cardstock, allow the Gesso® to dry (or use the Heat Tool to speed up the process), add Gelatos®- Aqua Dolce, Green Tea and Metallic Mint, spritz the background with water to allow the colors to run and merge together, dry with a Heat Tool, apply additional Gelatos® along with Leaf Green Brusho®, spritz and dry again with the Heat Tool.

Once the background color has dried, place the Memory Box™ (MB) Stencil over the background and use a dampened cloth to remove some of the color.

Trim the panel and mount onto a piece of Whisper White cardstock, trim again and mount onto a piece of Crumb Cake cardstock.

Add the crocheted lace trim and mount the panel onto the Cucumber Crush card base.

Ink the sentiment from the Our Daily Bread Designs (ODBD) Boho Love stamp set using Stāz-On® Jet Black Ink and stamp onto a piece of Whisper White cardstock. 

Trim the sentiment, mount onto a piece of Cucumber Crush cardstock and adhere directly to the card front.

Ink the floral image from Flower Shop and the butterfly from Papillon Potpourri (both Stampin’ Up!) with Stāz-On® Jet Black Ink and stamp three of the flowers and two butterflies  onto a piece of Whisper White cardstock.

Use the Sahara Sand Stampin’ Write Marker to add color to the butterflies and flowers, fussy cut the flowers and use the Elegant Butterfly Punch to punch out the butterflies.

Use the Martha Stewart (MS) Leaf Punch to punch leaves from Cucumber Crush cardstock, adhere the leaves to the back of the flowers and add the flowers along with the butterflies to the card front.

Add the white highlights to the center of the flowers with the Faber-Castell® Pitt Penn White Marker and once dried, darken the centers with the Faber-Castell® Bold Black Pitt Pen Marker.

Add Pearls to the centers of the butterflies to finish off the card.

Stamp Sets: Flower Shop, Papillon Potpourri (Stampin’ Up!), Boho Love (ODBD)

Ink: Stāz-On® Jet Black; Stampin Write Marker- Sahara Sand; Gelatos®- Aqua Dolce, Metallic Mint, Green Tea, Brusho® Leaf Green; Faber-Castell® Pitt Penn White & Black Markers

Paper: Whisper White, Crumb Cake, Cucumber Crush

Accessories: Gesso®, Heat Tool, MB Pattern Heartwood Stencil, Water Spritzer, Elegant Butterfly Punch (SU!), Leaf Punch (MS), Crochet Lace, Pearls


Thanks again for taking the time to visit- I hope you can gather your supplies and pick a style to create your own card for our gallery at The Card Concept!

Wednesday, February 17, 2016

TCC49 A Friend Loves At All Times


Hi Friends!!

It’s time for new TheCard Concept #TCC49 Floral Radiance Challenge!  I just love this spring inspiration photo with all of the beautiful flowers and glass- I was inspired by the colors, flowers and glass for my Mixed Media card!

Just a reminder that the Card Concept is a bi-weekly challenge that has an inspiration photo along with a number of design styles that you can choose from to create your card- Clean and Simple, Clean and Graphic, Clean and Layered, Shabby Chic, Freestyle Collage, Classy and Elegant and Mixed Media.  

I also linked this card to the Just Us Girls #330 Trend Week (Add a Tag) Challenge :-)

I hope you have a chance to visit us at The Card Concept and check out the rest of our Design Team samples as well as the gallery at Just Us Girls- fabulous inspiration from all!

This background for this card was created by applying Gelatos®, Distress Inks and Brusho® to a piece of Watercolor Paper, drying between layers, add Gesso® with the MB Fishnet Stencil, trim and mount onto Basic Black cardstock, trim and mount onto the Whisper White card base.

On another piece of Watercolor Paper, apply orange, yellow and pink Gelatos®, dry with a Heat Tool, prep the paper with an Embossing Buddy®, stamp the flower with Versamark™ Ink, apply Black Stampin’ Emboss® Embossing Powder, heat set with the Heat Tool and fussy cut the flower.  Add Clear Wink of Stella® to the petals (difficult to see in the photo).

Create the leaves in the same manner using Green Gelatos™ and add to the card front using dimensional foam.

Heat emboss the sentiment using Stampin’ Emboss® White Embossing Powder onto Basic Black cardstock, punch out with the Note Punch and mount onto the card front using dimensional foam to finish off the card.

Stamp Sets: Choose Happiness, Blessed by God

Ink: Ranger® Tim Holtz® broken China, Faded Jeans  Distress Stains; Gelatos®- Metallic Blue, Blueberries, Orange, Lemon, Pink, Brusho® Turquoise; Faber-Castell® Pitt Penn White Marker; Clear Wink of Stella®

Paper: Whisper White, Basic Black, Watercolor

Accessories: Gesso®, MB Fishnet Stencil, Embossing Buddy®, Heat Tool, Stampin’ Emboss® White and Black Embossing Powder, Water Spritzer


Thanks again for taking the time to visit- I hope you can gather your supplies and pick a style to create your own card for our gallery at The Card Concept!

Friday, January 29, 2016

Loving God's Word Bible Journaling Kit

Happy Friday Sweet Friends!!

Woohoo!!  Last week Sweet 'n Sassy Stamps (SNSS) announced their exciting new brand, Creative Worship Bible journaling stamps! 

Creative Worship stamps were designed with Bible Journaling in mind, but they can be used for card making, scrapbooking and so much more!

Today we are celebrating the new release of the very first Creative Worship Bible Journaling Kit-  Loving God’s Word Bible Journaling Kit with a fun blog hop and the kit is available until February 11th or while supplies last for $30.95 (plus s/h)!


The Loving God’s Word Bible Journaling Kit includes two brand new stamp sets- His Word and Decorative Banners designed by Krista Hamrick along with a fun bookmark designed by Rebecca Rios as well as some die cut hearts, baker’s twine and a heart doily.   
This kit is a great way to get started on your Bible Art Journaling journey or a wonderful addition to your Bible Art Journaling supplies.  

After February 11th, the stamp sets will be available to be purchased separately at their regular price - His Word $19.95 and Decorative Banners $11.95 - so you can save money on the set plus receive some of the fun extras that are in the kit :-)

His Word
Decorative Banners
Some of you may be like me and are new to Bible Art Journaling :-)  I have found that Bible Art Journaling is a great way to express worship through the study God's Word.  I love focusing on the Scripture as I create plus it helps me memorize verses as well- an added bonus :-)

For this blog hop, I decided to create a card along with a Bible Journaling panel that could be used as a bookmark or as a “tip in”.  

I understand that a “tip-in” is just something that you create outside of your Bible (such as this project) and you can attach it to your Bible using Washi Tape or other adhesives.  Since my “official” Journaling Bible is on pre-order from Amazon and is not expected to ship until March (the Inspire NLT Bible), I decided to stamp on cardstock to create my Bible Art Journaling page. 

For this bookmark/tip-in, I used the new Loving God’s Word Bible Journaling Kit stamps, His Word and Decorative Banners along with a few stamps from Message of Hope (a previous SNSS release).  

OK, now I am going to share a secret and please do not faint- lol! but I decided to carefully cut some of the words apart on both sets to make them more versatile :-)

Yes, I did it and the stamps did not scream at me!! :-)  Cutting them apart apparently does not hurt your photopolymer stamps :-) and you can always re-position the original words back together for stamping later (as I did in the card).

From the His Word set I cut apart “Your” from the “Lord, I long to hear “Your” Voice stamp, “of” from “Word of Life” and “Teach Me” (but the latter, I did not use on this bookmark).
From the Message of Hope set, I cut the word “Righteous” from “Righteousness” (used on this bookmark), “With” from “Without”, “Faith” from “Faithful” (well, you are getting the idea- right?)...

I have several clear blocks  and used a larger one (5” x 3 ¼”) for the layout of the first part of the bookmark and two smaller blocks for the second half. 

I choose the words to create the verse along with positioning banners for some of the hand lettered words, placed them onto the cardstock and pressed the block over the words to keep them in the position for stamping.

I did trim it down a bit on the sides after taking this photo :-)
I stamped the images onto Whisper White cardstock (although they could be stamped directly into the margins of your Bible) using Memento™ Tuxedo Black Ink and colored with Faber-Castell® Polychromos pencils (any coloring medium would work).

The lettering in the banners I did by hand as well as the Scripture Verse reference using a Pigma Micron™ pen and created shadows with a black colored pencil.

The second project was a quick and easy card using watercolor paper, Brusho® Colour Crystals and stamps from His Book along with two sets from throwback releases- Nature Silhouettes and Grunge Elements.   

I also decided to use the Splitcoaststampers’ SC576 Sketch Challenge for my layout (Splitcoaststampers (SCS) has a wonderful gallery of over 575 sketches that you can use for your layouts- check the master gallery out here).

Spritz water onto a piece of watercolor paper and shake a few of the Brusho® Colour Crystals onto the wet paper (I used Yellow, Purple and Turquoise).  Allow the Brusho® Colour Crystals to spread and merge – it is amazing to watch how they react to water and dry with a Heat Tool.

Ink the sentiment from His Book using Elegant Eggplant Classic Ink and stamp onto the watercolor panel.

Ink the floral images from Nature Silhouettes using Elegant Eggplant Classic Ink, stamp off onto scrap paper before stamping onto the panel and then add a few images without stamping off.

Nature Silhouettes
Ink the bird image from Nature Silhouettes using Elegant Eggplant Classic Ink and stamp onto the panel in the upper corner, trim the panel and mount onto a piece of Tempting Turquoise cardstock, trim again and mount onto Elegant Eggplant cardstock.


Grunge Elements
Ink the Grunge Elements splatter stamp with Tempting Turquoise and stamp a bit onto a piece of Whisper White cardstock, trim the panel add the strips of Elegant Eggplant cardstock and mount onto the Elegant Eggplant card base.

Add the focal image panel to the card front using dimensional foam and the card is finished!

I hope you’ve enjoyed these two projects and that you will take the time to check out the rest of the SNSS Design Team projects on the blog hop!!


Inspiration galore and I cannot wait to see what you create with the new Loving God's Word Bible Journaling Kit!   Share your Bible Journaling creations with us on the Creative Worship Bible Journaling Facebook Page (just click on join and Korin will add you) - you do not have to use SNSS stamps to participate but, of course, we love it when you do!! 

You can also find us on Instagram (@sweetnsassystamps) and our Sweet 'n Sassy Stamps Facebook page :-)

Thanks again for visiting- have a blessed weekend, my friends!

Sunday, October 25, 2015

Name Above All Names- A CAS Christmas Card

Hi Friends!!

I wanted to share another card with one of the new sets from Sweet ‘n Sassy Stamps' October 2015 release, Name Above All Names. 

In addition to being a great set for Bible Art Journaling, it also is fun for quick cards to share with your loved ones!


I hope you will take the time to visit the blog post over at Sweet ‘n Sassy Stamps to check out how I created this quick and easy card for Christmas- it would be really easy to create multiples of this card :-)


I just love the new Name Above All Names set, don’t you? 

Saturday, October 24, 2015

JUGS316 Thinking of You


Hi Friends!!

It’s time for the new Just Us Girls #316 “Photo Week” Challenge and I decided to create a fun Mixed Media background using Gelatos® and Brusho® Colour Crystals.

I hope you will have a chance to check out the rest of the fabulous Just Us Girls Design Team projects and come join in on the fun!
 
I am also linking this card to the Splitcoaststampers’ TLC554 "WatercolorThose Die Cuts" Challenge. 

To create this card:

Spritz a piece of Watercolor Paper with water and add the Lemon, Cherry and Blueberry Gelatos®, spritzing again and allowing the colors to blend.

Portion of watercolored background
prior to cutting with the die
Dry with the Heat Tool, spritz the paper again and add the Brusho® Colour Crystals  (I  used Brilliant Red, Turquoise and Yellow) adding additional water as needed to dilute the crystals swirling the colors around on the paper, dry with the Heat Tool and once dried cut out with the Big Shot™ using the Docrafts® Bee Keeper Die.

Cut another honeycomb piece using the same die from Basic Black cardstock (set aside the small black honeycomb shapes for another day:-))

Lay the watercolored honeycomb die cut frame onto a piece of Whisper White cardstock and adhere each individual hexagon onto the card front.

Add the Basic Black honeycomb die cut frame off center a bit to mimic the shelves in the photo.

Trim the panel and mount onto a piece of Basic Black cardstock, trim again and mount onto the Whisper White card base.

Add the Silver Metallic Thread (looping and adhering the thread behind the area that the sentiment will cover).

De-static a piece of Basic Black cardstock using the Embossing Buddy®, stamp the sentiment from the October 15 Paper Pumpkin set, Blissful Bouquet using Versamark™ Ink, apply Stampin’ Emboss White Embossing Powder and heat set with the Heat Tool.

Wrap a few pieces of the Silver Metallic Thread around the edges, punch the ends with the Hexagon Punch to create the banner and mount to the card using Stampin’ Dimensionals® to finish off the card.

Stamp Sets:  Blissful Bouquet (Stampin’  Up! Oct15 Paper Pumpkin set)

Ink: Versamark™; Gelatos®- Lemon, Cherry, Blueberry, Brusho® Colour Crystals- Brilliant Red, Yellow, Turquoise

Paper: Watercolor, Whisper White, Basic Black

Accessories: Big Shot™, Docrafts® Bee Keeper Die, Embossing Buddy®, Stampin’ Emboss® White Embossing Powder, Heat Tool, Hexagon Punch, Silver Metallic Thread


Thanks again for stopping by- I hope you have a wonderful week and come play along with us at Just UsGirls!
Related Posts Plugin for WordPress, Blogger...