Showing posts with label MFT Blueprints 20. Show all posts

Monday, March 28, 2016

You Are Not Forgotten


Hi Friends!

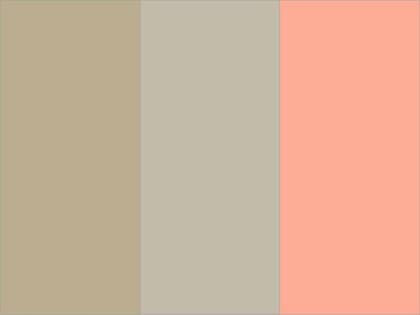
I had a chance to spend some time stamping this evening and decided to create a card using the MFTWSC273 Sketch Challenge along with the MFT #42 Color Challenge and the Splitcoaststampers’ WT576 “Book Pages or Print” Challenge.

If you have not had a chance to visit the above galleries yet, I hope you will find the time to do so- wonderful Design Team samples and inspiration from all!

To create this card:

With the Big Shot™ and the MFT Stitched Rectangle STAX, cut a piece of Whisper White cardstock with the #4 and #6 Stitched Rectangle Dies and cut another piece of Whisper White cardstock with the stitched rectangle die from the MFT Blueprints 20 Dies.

Ink the Forget Me Not from My Favorite Things (MFT) stems using Steel Gray ink and stamp onto the #4 Stitched Rectangle Die cut piece of Whisper White cardstock.

Ink the larger Forget Me Not petal with retired Cameo Coral Classic Ink, stamp onto the Whisper White panel, re-ink the image with retired Poppy Parade Classic Ink (stamping off a bit) and stamp onto the previously stamped petals.

Ink the smaller petal from Forget Me Not with Cameo Coral Classic Ink and add to the panel, ink the center of the stamp with the Poppy Parade Stampin’ Write marker and stamp over the Cameo Coral image.

Create a mask for the floral images, ink the text border image from Forget Me Not (MFT) with Marina Mist Classic Ink and add to the background.

Lightly sponge Marina Mist Classic Ink over the edges and spray the image with Frost White Shimmer Paint Spray.

Use the Faber-Castell® White Pitt Pen Marker to add white highlights to the flower centers.

Mount the floral image panel onto a piece of Marina Mist cardstock, trim and mount onto a piece of Basic Gray cardstock and set aside.
Repeatedly stamp the text border image from Forget Me Not (MFT) with Marina Mist Classic Ink onto the #6 Stitched Rectangle die cut, sponge Marina Mist Classic Ink over the edges and mount onto a piece of Basic Gray cardstock.

Repeat the stamping process as noted above on the Marina Mist Stitched die cut.

Use the Big Shot™ with the Woodgrain Textured Impressions™ Embossing Folder to emboss a piece of Whisper White cardstock, trim and mount onto a piece of Marina Mist cardstock, trim and mount onto the Basic Gray card base.

Add the stamped Marina Mist panel along with the stamped text layered panel.

Cut the banner die from MFT Blueprints 20 from Cameo Coral and Poppy Parade cardstock, split in the center (behind the focal image) to create the lengths needed per the sketch.

Add the banners and mount the focal image with dimensional foam.

Stamp the sentiment from Forget Me Not (MFT) with Steel Grey ink onto Whisper White cardstock and create the flag end with the Hexagon Punch.

Mount the sentiment along with the gray button and Pearls to finish off the card.

Stamp Sets: Forget Me Not (MFT)

Ink: Steel Grey (MFT), Stampin’ Up!- Marina Mist, retired Cameo Coral and Poppy Parade, Frost White Shimmer Paint, Faber-Castell® White Pitt Pen Marker

Paper: Whisper White, Marina Mist, Basic Gray, retired Cameo Coral and Poppy Parade (all Stampin’ Up!)

Accessories: Big Shot™, MFT Stitched Rectangle STAX, MFT Blueprints 20 Dies, Woodgrain Textured Impressions™ Embossing Folder, Hexagon Punch, Sponge Dauber, Pearls, retired Basic Gray button


Thanks again for taking the time to visit- hugs and have a wonderful week!!

Monday, March 21, 2016

CAS Spring Bunny Retreat


Hi Friends!

I hope all of you are having a marvelous Monday!  I had a chance to create a few cards this weekend and will be sharing over the next few days.


If you have not had a chance to visit the above galleries yet, I hope you will find the time to do so- fabulous inspiration from all!

This card was very easy to create:

Ink the Bunny Retreat image from Inkadinkado® using Stāz-On® Jet Black Ink onto Whisper White cardstock and color the images using an AquaPainter™ with Crumb Cake, Sahara Sand and Crisp Cantaloupe (retired) Classic Ink along with colored pencils to define some of the shadows and fur.

Stamp the verse from the Our Daily Bread Designs (ODBD) Scripture Collection 2 with Stāz-On® Jet Black Ink below the rabbit image and use a Sponge Dauber with Crisp Cantaloupe Classic Ink (retired) with the Mini Punchenella stencil by Balzar Designs® to stencil the dots.

Use the Big Shot™ with the My Favorite Things™ (MFT) Blueprints 20 Die to cut the panel into a rectangle, layer the cut panel onto a piece of Basic Black cardstock and trim the edges.

Emboss a piece of Crumb Cake cardstock with the Woodgrain Textured Impressions™ Embossing Folder, trim and mount onto a piece of Basic Black cardstock.
Original version without the stenciling 

Add a piece of 1” Black Satin Ribbon across the embossed background, add the ¼” Peach Satin Ribbon and mount the background panel onto the Whisper White card base.

Mount the bunny image panel onto the card front using dimensional foam to finish off the card.

Stamp Sets: Bunny Retreat (Inkadinkado®), Scripture Collection 2 (ODBD)

Ink: Stāz-On® Jet Black, Crumb Cake, Sahara Sand, Crisp Cantaloupe (retired)

Paper: Whisper White, Basic Black, Crumb Cake

Accessories: Big Shot™, MFT Blueprints 20 Dies, Woodgrain Textured Impressions™ Embossing Folder, Sponge Dauber, 1” Black Satin Ribbon and ¼” Peach Satin Ribbon (from my stash), Colored Pencils- various manufacturers


Thanks again for taking the time to visit- hugs and have a wonderful week, my friends!

Saturday, February 6, 2016

Mojo337 Purr-fect Thank You :-)


Hi Friends!

I am working on a few pet themed cards for a card drive at Splitcoaststampers and decided to use the Mojo337 Sketch for the layout.

I love this sketch- it was fun to work with and you should see all of the gorgeous examples in their gallery!

Bermuda Bay is another color that seems a bit difficult to photograph- it
is not as bright blue/turquoise as it appears here :-)
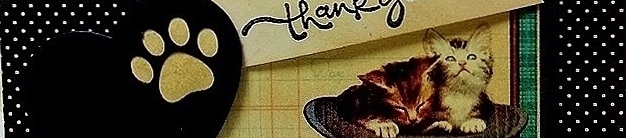
To create this card-  emboss a piece of Bermuda Bay cardstock with the Darice® Paw Print Background Embossing Folder, trim and mount onto Basic Black cardstock, add the Graphic45® Raining Cats and Dogs designer paper to the stitched Basic Black frame, add the strip of polka dot paper along with the framed designer paper, sentiment and paw print heart and you are finished!

Stamp Sets: Short & Sweet (retired Stampin’ Up!)

Ink: Stāz-On® Jet Black, Ranger® Tim Holtz® Old Paper Distress Ink

Paper: Very Vanilla, Basic Black, Bermuda Bay; Graphic45® Raining Cats and Dogs

Accessories: Big Shot™, Darice® Paw Prints Background Embossing Folder, My Favorite Things© (MFT) Pet Accents Dies,  MFT Blueprints 20 Die, Hexagon Punch


Thanks again for taking the time to stop by- hugs and have a great week, my friends!

Friday, November 20, 2015

F4A300 Prayerful Thoughts Quilt

Hi Friends!!


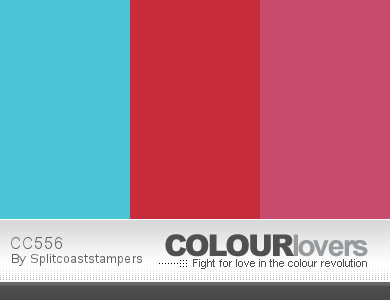
The 300th challenge details are to create a project using one of the first ten “Free For All” Challenges and I chose the F4A7 “Make a Quilt” Challenge along with the CC556 Color Challenge and CAS350 “To Grandma’s House We Go” Challenge (although this card could also qualify for the F4A1 "Textures, Colors & Patterns" that you normally would not use together- I truly struggle with pinks and reds together :-)).

I always remember the colorful quilts at my grandmother’s house- they were made from scraps and most of them were what she called popcorn quilts but I decided to create a bright colorful quilt for my card.

I hope you will find the time to come play along- check out the gallery for the F4A300 entries as well as the CC556 Gallery and CAS350 Gallery- wonderful inspiration from all!!

I chose the Sweet ‘n Sassy Stamps (SNSS) Prayerful Thoughts for the sentiment (I thought it would be perfect for this quilt theme)- if your day is sewn together with prayer, it is definitely less likely to become unraveled for sure!

This is a very easy card to create- emboss the background with the Chevron and retired Square Lattice Embossing Folders, cut the quilt from the different color challenge cardstocks along with white, put the quilt together onto scrap paper, emboss with the Square Lattice Embossing Folder, punch apart with the 1” Square Punch, layer with dimensional foam onto cardstock, stamp the sentiment from the SNSS stamp set and cut with a stitched square die, layer onto Real Red cardstock, add the lace onto the embossed card front, mount the quilt panel and sentiment, add the Bow Builder Punched Paper Bow with the button along with Pearls to finish off the card.


Ink: Real Red

Paper: Whisper White, Real Red, Tempting Turquoise, retired Primrose Petals

Accessories: Big Shot™, Chevron and retired Square Lattice Textured Impressions™ Embossing Folders, MFT Stitched Square STAX Dies, MFT Blueprints 20 Dies, Bow Builder Punch, 1” Square Punch, retired Brights Collection Button, White Crochet Lace from my stash, Pearls


Thanks again for stopping by- I hope you have a fantastic Friday, my friends!

Sunday, November 1, 2015

HYCCT1531A Romantic Rose- Thinking of You

Hi Again Friends!


I decided to pull out a long ago retired stamp, Romantic Rose for this card (this stamp has not seen ink in years but it is a classic for sure).

This card was fairly easy to create- stamp the rose image using Stāz-On® Jet Black Ink onto Watercolor Paper and paint the color with an AquaPainter™ using Melon Mambo, Mossy Meadow and Wisteria Wonder Classic Ink.

Add additional water and keep layering color until you are satisfied with the results.
 
Add white accents with a fine tip brush and White Titanium Acrylic Paint.

Use the Big Shot™ with the MFT Blueprints 20 Die to cut out the image, mount onto Mossy Meadow cardstock, add the sentiment and Wisteria Wonder Seam Binding bow and mount the panel onto the card front using dimensional foam.

I hope you will have time to visit the galleries linked above and check out all of the gorgeous inspiration!


Stamp Sets:  Romantic Rose, Kind & Caring Thoughts (retired Stampin’ Up!)

Ink: Stāz-On® Jet Black, Melon Mambo, Mossy Meadow, Wisteria Wonder Classic Ink and Stampin’ Write Markers; Titanium White Acrylic Paint

Paper: Watercolor, Very Vanilla, Mossy Meadow

Accessories: Big Shot™, retired Beautifully Baroque Textured  Impressions™ Embossing Folder, AquaPainter™, Water Spritzer Bottle, Hexagon Punch, 3/8” Wisteria Wonder Seam Binding, Pearls


Thanks again for stopping by- I will be sharing a few more of the final Hope You Can Cling To Challenge cards this evening!  Have a great week, my friends!

HYCCT1530SURVIVOR Simply Soft- You've Got This

Hi Again Friends!

This card was created for the Splitcoaststampers’  “Hope You Can Cling To” HYCCT1530SURVIVOR  Ceal’s  “You’ve Got This” Challenge to create a card for encouragement.

This card was fairly easy to create- stamp and mask the images from the retired Simply Soft stamp set, stamp the sentiment and color using Stampin’ Write Markers.

Die cut the panel, add the Silver Cord, mount onto the embossed card front with dimensional foam and add the brads with Rhinestones to finish off the card 

***FYI- I remove the prongs on the brads and use Hot Glue to adhere the brads to the card front with the final step to add the self-adhesive Rhinestones to the brad centers.

I hope you will have time to visit the HYCCT1530SURVIVOR gallery and check out all of the gorgeous inspiration!

Stamp Sets:  You’ve Got This, Simply Soft(retired)

Ink: Stāz-On® Jet Black, Stampin’ Write Markers- Blushing Bride, Tip Top Taupe, Pear Pizzazz

Paper: Whisper White, Basic Black, Tip Top Taupe

Accessories: Big Shot™, My Favorite Things™ Blueprints 20 Die, retired Lacy Brocade Textured  Impressions™ Embossing Folder, Silver Cord, retired Circle Brads, Rhinestones


Thanks again for stopping by- have a fabulous Sunday, my friends!
Related Posts Plugin for WordPress, Blogger...