Showing posts with label Seashells. Show all posts

Tuesday, March 29, 2016

By The Tide- Thinking of You

Hi Friends!

I hope all of you are having a great week so far!  I decided to create a masculine card using one of my favorite Stampin’ Up! sets, By The Tide along with Gorgeous Grunge and Teeny Tiny Wishes.

I just love the By The Tide stamp set for masculine as well as feminine cards and can always use a few "Thinking of You" cards in my stash :-)

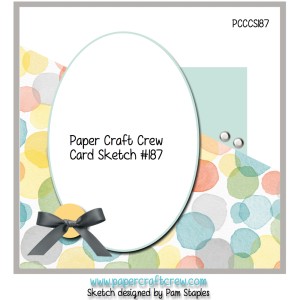
This card was designed using the Paper Craft Crew Challenge #187 Sketch along with the Can You Case It #113 Color Challenge and the Just Us Girls #336 InspirationPhoto for inspiration.

If you have not had a chance to visit the above galleries yet, I hope you will find the time to do so- wonderful designs by all!

All items used to create this card are from Stampin’ Up! with basic stamping techniques- if you have any questions, please feel free to let me know in the comments :-)

Stamp Sets: By The Tide, Gorgeous Grunge, Teeny Tiny Wishes

Ink: Basic Gray, Crumb Cake, Night of Navy, Stāz-On® Jet Black, Champagne Mist Shimmer Paint, White Gel Pen

Paper: Whisper White, Basic Gray, Crumb Cake, retired Crumb Cake and Pocketful of Posies DSP

Accessories: Big Shot™, Oval Framelits™, retired Fancy Fan Textured Impressions™ Embossing Folder, Hexagon Punch, Word Window Punch, Brayer, retired Crumb Cake Button, Natural Linen Thread, Rhinestones


Thanks again for taking the time to visit- hugs and I hope you have a fabulous week!!

Sunday, July 26, 2015

By The Seashore- Thinking of You


Hi Again Stampers! 

I had a chance to complete one more card Saturday evening and decided to play along with the Pals Paper Arts PPA261 Sketch Challenge as well as the Splitcoaststampers’ Mix-Ability MIX120 “Just Beachy” Challenge (see details here and gallery here) and the F4A273 “Sand Between My Toes” Challenge (see details here and gallery here).

When I organized my stamping area (a while ago :-)), I found some previously pre-printed My Digital Studio (MDS) images that had already been colored and “fussy-cut” and decided to use for these images for the main design.   Of course, you could stamp the images if you do not have MDS...

Again, if you have not stopped by any of the challenge sites yet, I hope you will find the time to do so- fantastic inspiration from all!!

To create this card:

Open a blank document in My Digital Studio (MDS), position the By The Seashore images (re-sizing all a bit) and print out using Black Printer Ink onto Whisper White cardstock.

The sand has alot of shimmer and sparkle that is difficult to see in the photo :-)
Color the images using Blushing Bride and Sahara Sand Stampin’ Write Markers.
Fussy-cut each image and use an AquaPainter™ to apply retired Frost White Shimmer Paint to each image.

Tear a piece of scrap paper to create the edge for the shoreline, mask a portion of Whisper White cardstock and using Sponge Daubers apply Sahara Sand Classic Ink for the sand area.

Remove the mask and replace over the sand (extending a bit for the “foam”) and sponge Pool Party, Marina Mist and Lost Lagoon Classic Ink for the ocean.

Mask the water area again and spritz Champagne Mist Shimmer Paint (mixed with rubbing alcohol) over the sand area, lift the mask and re-mask the sand area to spray Frost White Shimmer Paint over the ocean area.

Ink the Gorgeous Grunge large splatter stamp using Sahara Sand and stamp over the sand area.

Add a few white highlights over the water with the Faber-Castell® White Pitt Pen Marker as well as highlights on the shell images, etc.

Use a Faber-Castell® Black Pitt Pen S Marker to add the definition for the shore line.

Stamp the sentiment using Stāz-On® Jet Black Ink and trim the panel, mount onto Tip Top Taupe cardstock, trim again and mount onto the Whisper White card base.

Mount the seashell images using Stampin’ Dimensionals® to finish off the card.

Stamp Sets:  By The Seashore (MDS version), Wetlands

Ink: Printer Ink- Black, Stāz-On® Jet Black, Lost Lagoon, Marina Mist, Pool Party, Sahara Sand; Stampin’ Write Markers- Blushing Bride, Sahara Sand; Faber-Castell® Pitt Pen Markers- White and Black “S”, Shimmer Paint- Champagne Mist and Frost White

Paper: Whisper White, Tip Top Taupe

Accessories: AquaPainter™,  Sponge Daubers, scrap paper for masking


Thanks again for stopping by- I hope all of you have a wonderful and relaxing Sunday!

Wednesday, April 22, 2015

By The Seashore - A CAS Watercolor for Two Challenges :-)


Hi Stampers! 

I had a chance to relax and stamp into the wee hours this morning and decided to create a Clean and Simple (CAS) card with a watercolor technique for the Nance's  PP241 CAS Watercolor Challenge using this week's "summery"  CQC288 ColourQ Challenge Palette. 

Again, if you have not visited the above sites, I hope you will do so- great inspiration from all!

To create this card:

Ink the main starfish and conch shell image from the soon to be retired, By The Seashore with Stāz-On® Jet Black Ink and stamp onto a piece of Naturals White cardstock.  Stamp another image of each onto a piece of scrap paper or a sticky note, cut out and use these images as masks. 

Mask the two stamped images and stamp the sand dollars along with the additional starfish using Stāz-On® Jet Black Ink.

Wet the paper and use a paintbrush or AquaPainter™ to apply Bermuda Bay and retired Kiwi Kiss Classic Ink to the background along with Crumb Cake Classic Ink to the shells and lower portion of the panel.  

Spritz with additional water and apply more ink as needed.

Dry the panel thoroughly with a Heat Tool and use the Crumb Cake Stampin’ Write Marker to add shadows and more definition to the shells, spritzing as needed to blend the ink.

Spritz the background lightly and stamp the large splatter stamp from Gorgeous Grunge using Bermuda Bay Classic Ink, clean the stamp and stamp the splatter again with Crumb Cake Classic Ink at the bottom.

Dry the panel again thoroughly with the Heat Tool and stamp the sentiment from Trust God using Stāz-On® Jet Black Ink.

Use a Faber-Castell® Black Pitt Pen marker to fill in any gaps in the images and add a few highlights to the shells with the Faber-Castell® White Pitt Pen marker.

Trim the panel and mount onto a piece of Basic Black cardstock, trim again and mount onto the Whisper White card base to finish off the card.

Stamp Sets: By The Seashore, Trust God, Gorgeous Grunge

Ink: Stāz-On® Jet Black, Bermuda Bay, Crumb Cake, retired Kiwi Kiss, Faber-Castell® Black and White Pitt Pen Markers

Paper/Cardstock:  Naturals White, Whisper White, Basic Black

Accessories: AquaPainter™, Water Spritzer Bottle


Thanks again for visiting- I hope you have a wonderful Wednesday!!

Monday, August 25, 2014

PPA216 Seashells Thinking of You

Hi Stampers! 
 
I wanted to share one more card with you that I created this past weekend using the PPA216 Sketch at Pals Paper Arts.  

Again, I hope you will find time to check out the Design Team samples as well as the rest of the gallery- it always amazes me that so many ideas can come from one sketch!

To create this card:

Ink the Hardwood background stamp with Smoky Slate Classic Ink and stamp onto a piece of Very Vanilla cardstock.  Trim the background panel for the vertical strip in the sketch.

Ink the sand dollar stamp from By The Seashore using Memento™ Tuxedo Black Ink and stamp onto the background.  Stamp another image onto a piece of sticky paper (or scrap paper) to create a mask and stamp the starfish image.

Using the same steps as above, create a mask for the starfish, place the mask for the sand dollar and starfish over the images and stamp the remaining shell image.

Color the seashells using a Sponge Dauber with Crisp Cantaloupe Classic Ink and apply a bit of Crisp Cantaloupe Classic Ink over the woodgrain background. 

Add additional details to the shells using the Light Calypso Coral Stampin’ Blendabilities™ marker and shadows with the Sahara Sand Stampin’ Write marker.  Use the Chalk Marker to add a few highlights and apply retired Frost White Shimmer Paint with the AquaPainter™. 

Mount the panel onto a piece of Basic Gray cardstock, trim and mount again onto Basic Black cardstock. 

Stamp the sentiment using Memento™ Tuxedo Black Ink onto Very Vanilla cardstock.  Punch the sentiment using the 2 ½” Circle Punch, cut across the top and layer onto circles from Basic Gray and Basic Black cardstock.

Adhere the sentiment to the top of the layer and add a few corners of Basic Black cardstock (from the remaining halves of the circle).

Mount a panel of Typeset Designer Series Paper (DSP) onto a piece of Basic Gray cardstock, trim and mount again onto Basic Black cardstock.

Use the Big Shot™ with the Woodgrain Textured Impressions™  Embossing Folder to emboss a piece of Basic Gray cardstock- trim and adhere to the lower edge of the panel.

Ink the Woodgrain background stamp using Basic Gray Classic Ink and stamp onto a piece of Crisp Cantaloupe cardstock.  Trim and mount onto a piece of Basic Gray cardstock, trim and mount onto the Basic Black card base.

Adhere the frayed 1 ¼” Burlap ribbon to the DSP panel and mount the panel onto the card front adding the retired Antique Pewter Hodgepodge Hardware to the lower corner.

Add the focal image panel using Stampin’ Dimensionals® to finish off the card.

Stamp Sets: By The Seashore, Woodgrain, World Map, Wetlands

Ink: Memento™ Tuxedo Black Ink , Crisp Cantaloupe, Smoky Slate; Sahara Sand Stampin’ Write Marker, Light Calypso Coral Stampin’ Blendabilities™ marker, Chalk Marker

Paper/Cardstock:  Whisper White, Basic Black, Basic Gray, Crisp Cantaloupe, Typeset DSP

Accessories: Big Shot™, Woodgrain Textured Impressions™ Embossing Folder, AquaPainter™, Sponge Dauber,  scrap paper for masking, 2 ½” Circle Punch, 1 ¼” Burlap Ribbon, retired Antique Pewter Hodgepodge Hardware, retired Frost White Shimmer Paint


Thanks again for stopping by- I hope all of you have a marvelous Monday!
Related Posts Plugin for WordPress, Blogger...