Showing posts with label Wetlands. Show all posts

Sunday, November 22, 2015

Wetlands- Happy 55th Birthday!!

Hi Friends!!

I had a chance to stamp today and decided to create a card for my brother (today was his birthday so this card will be late...I hope he does not check my blog and see it before receiving it :-)).  
I decided to use the Mojo Monday 424 Sketch Challenge along with the Nacho Average #168 Color Challenge and the Seize the Birthday 11/19/15 “Anything Goes” Challenge.

 Again, if you have not already visited the above sites, I hope you will take a moment to do so- wonderful inspiration from all!

This card is very easy to create:  

Stamp the Canadian goose image using Stāz-On® Jet Black Ink onto Whisper White cardstock, mask the goose and create a moon mask with a 1 1/4" Circle Punch (from scrap paper), place the masks over the goose and where you would like your "moon" and use a Sponge Dauber to apply Rich Razzleberry Classic Ink. 

Remove the masks and use an AquaPainterc to soften your sponged area and pulling some of the ink over the moon.

Use an Old Olive Stampin’ Write Marker to color the grass and the Big Shot™   with the MFT Stitched Rounded Rectangular Dies to cut out the image and cutting another die from Early Espresso cardstock.

Cut the Early Espresso die cut in half and adhere behind the goose image.

Use the Big Shot™   with the Arrows Textured Impressions™  Emobssing Folder to emboss a piece of Whisper White cardstock, trim and mount onto Old Olive cardstock, trim and mount onto the Early Espresso card base.

Use the banner punch to create a few banners from retired Old Olive and Rich Razzleberry Designer Series Paper (DSP) and also cut a strip of Old Olive DSP (mount onto Early Espresso cardstock).

Add the vertical Old Olive striped strip and banners to the card front.

Pull the 1 1/2" Burlap Ribbon into threads and adhere behind the goose image area, mount the goose image panel onto the card front using Stampin' Dimensionals®.

Stamp the sentiment onto a piece of Whisper White cardstock, punch out with the 2" Circle Punch and create a frame from the 2" Circle Punch from Early Espresso cardstock (cut this frame in half and mount behind the sentiment).

Create the numbers from Early Espresso cardstock using the retired GoGo Boots™  Sizzlets™ , spray with Champagne Mist Shimmer Paint and when dry, mount onto a 1 1/4" Punched Circle.

Add the sentiment with the numbers along with the retired Hodgepodge Hardware Clip to finish off the card.

***Optional ****  I felt that the card was a bit too "white" so I applied a bit of Ranger™ Tim Holtz™ Old Paper Distress Ink (plus this helped cover a bit of the glue around the numbers :-))

Stamp Sets:  Wetlands

Ink:  Stāz-On® Jet Black, Early Espresso, Rich Razzleberry; Stampin’ Write Markers- Old Olive, Basic Gray; Ranger™ Tim Holtz™ Old Paper Distress Ink

Paper: Whisper White, Early Espresso, Old Olive, retired Old Olive and Rich Razzleberry DSP

Accessories: Big Shot™ , Arrows Textured Impressions™  Embossing Folder, GoGo Boots™  Sizzlets™ , Punches- Banner, 2" and 1 1/4" Circle; 1 1/2" Burlap Ribbon, Hodgepodge Hardware Clip, Sponge Daubers, AquaPainter™

Thanks again for stopping by- have a wonderful week, my friends!

Tuesday, August 11, 2015

Get Well Wishes for a Color, Sketch and Inspiration Challenge :-)


Hi Stampers!!

I had a chance to stamp in the wee hours this morning and decided to create a card using the Pals Paper Arts PPA262 Color Challenge along with the Just Add Ink JAI274 Inspiration Photo  (I was inspired by the natural elements along with the contrast and bit of green). 

I  also used the FMS198 Sketch Challenge for the layout (but I am too late to link to the actual challenge at FMS :-)). 

Again, if you have not already done so, I hope you will find the time to visit the above challenge sites to check out the wonderful Design Team samples as well as their fabulous galleries!

This card was fairly easy to create- use a Sponge Dauber to sponge Pool Party and Mint Macaron Classic Ink onto a Chalk Talk label created from Whisper White cardstock.  

Stamp the goose image using  Stāz-On® Jet Black Ink onto another piece of Whisper White cardstock, color with Tip Top Taupe Classic Ink and Stampin’ Write Markers, fussy cut out the goose and ink the grass only from the goose stamp using a Basic Black Stampin’ Write Marker onto the sponged tag. 

Adhere the goose image using Stampin' Dimensionals® onto the tag, layer another Chalk Tag tag from Basic Black cardstock behind the  focal image tag and add the additional white layered tag per the sketch.

Add  a few strips of Basic Black cardstock (I used scraps and punched the ends with the Hexagon Punch) onto the embossed Tip Top Taupe background panel, trim and mount onto Mint  Macaron, trim and mount onto the Basic Black card front.

Use the Bow Builder Punch to create a bow from Basic Black cardstock bow, add to the tag along with a retired Pool Party button.

Mount the layered tags to the card front using Stampin' Dimensionals® and the sentiment to finish off the card. 

Stamp Sets:  Wetlands, Teeny Tiny Wishes

Ink:  Stāz-On® Jet Black, Mint Macaron, Pool Party, Tip Top Taupe; Stampin’ Write Marker- Tip Top Taupe, Basic Black

Paper: Mint Macaron, Tip Top Taupe, Basic Black, Whisper White

Accessories: Big Shot™, Chalk Talk Framelits™, Boho Chic Textured Impressions™ Embossing Folder, Sponge Daubers, Punches- Bow Builder, Hexagon;  retired Pool Party Sycamore Street button


Thanks again for visiting- I hope all of you have a terrific Tuesday!!

Sunday, July 26, 2015

By The Seashore- Thinking of You


Hi Again Stampers! 

I had a chance to complete one more card Saturday evening and decided to play along with the Pals Paper Arts PPA261 Sketch Challenge as well as the Splitcoaststampers’ Mix-Ability MIX120 “Just Beachy” Challenge (see details here and gallery here) and the F4A273 “Sand Between My Toes” Challenge (see details here and gallery here).

When I organized my stamping area (a while ago :-)), I found some previously pre-printed My Digital Studio (MDS) images that had already been colored and “fussy-cut” and decided to use for these images for the main design.   Of course, you could stamp the images if you do not have MDS...

Again, if you have not stopped by any of the challenge sites yet, I hope you will find the time to do so- fantastic inspiration from all!!

To create this card:

Open a blank document in My Digital Studio (MDS), position the By The Seashore images (re-sizing all a bit) and print out using Black Printer Ink onto Whisper White cardstock.

The sand has alot of shimmer and sparkle that is difficult to see in the photo :-)
Color the images using Blushing Bride and Sahara Sand Stampin’ Write Markers.
Fussy-cut each image and use an AquaPainter™ to apply retired Frost White Shimmer Paint to each image.

Tear a piece of scrap paper to create the edge for the shoreline, mask a portion of Whisper White cardstock and using Sponge Daubers apply Sahara Sand Classic Ink for the sand area.

Remove the mask and replace over the sand (extending a bit for the “foam”) and sponge Pool Party, Marina Mist and Lost Lagoon Classic Ink for the ocean.

Mask the water area again and spritz Champagne Mist Shimmer Paint (mixed with rubbing alcohol) over the sand area, lift the mask and re-mask the sand area to spray Frost White Shimmer Paint over the ocean area.

Ink the Gorgeous Grunge large splatter stamp using Sahara Sand and stamp over the sand area.

Add a few white highlights over the water with the Faber-Castell® White Pitt Pen Marker as well as highlights on the shell images, etc.

Use a Faber-Castell® Black Pitt Pen S Marker to add the definition for the shore line.

Stamp the sentiment using Stāz-On® Jet Black Ink and trim the panel, mount onto Tip Top Taupe cardstock, trim again and mount onto the Whisper White card base.

Mount the seashell images using Stampin’ Dimensionals® to finish off the card.

Stamp Sets:  By The Seashore (MDS version), Wetlands

Ink: Printer Ink- Black, Stāz-On® Jet Black, Lost Lagoon, Marina Mist, Pool Party, Sahara Sand; Stampin’ Write Markers- Blushing Bride, Sahara Sand; Faber-Castell® Pitt Pen Markers- White and Black “S”, Shimmer Paint- Champagne Mist and Frost White

Paper: Whisper White, Tip Top Taupe

Accessories: AquaPainter™,  Sponge Daubers, scrap paper for masking


Thanks again for stopping by- I hope all of you have a wonderful and relaxing Sunday!

Sunday, July 12, 2015

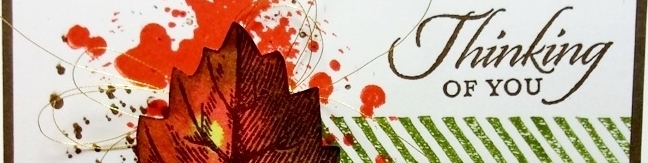
Vintage Leaves- Thinking of You


Hi Again Stampers! 

I wanted to share another card that I created this past weekend using the Stampin’ Royalty SR285 Color Challenge along with the CCEE1528 “Cheer Up the Lonely” Challenge and the Splitcoaststampers' TLC536 "Splatter It Up" Challenge (see details here and gallery here).  

If you have not had a chance to do so, I hope you will find the time to visit the above challenge sites to check out the Design Team samples as well as their galleries- fantastic inspiration from all!

To create this card:

Using Old Olive and Tangelo Twist Classic Ink, pat your craft mat and spritz the ink with water.  

Take a piece of Watercolor Paper and swirl face down through the wet ink allowing the ink to run and merge, repeat and allow to dry.

Ink the leaf image from the new set, Vintage Leaves using Soft Suede Classic Ink and stamp onto the background piece of Watercolor Paper- carefully cut out the leaf image by hand.

Stamp the sentiment from Wetlands onto the Very Vanilla card front using Soft Suede Classic Ink, add the striped border from Gorgeous Grunge using Old Olive Classic Ink and the splatters with Tangelo Twist and Soft Suede Classic Ink.

Trim the panel and mount onto the Soft Suede card base.

Add a bit of Gold Metallic Thread and mount the leaf using Stampin’ Dimensionals® to finish off the card.

Quick and easy- I will need to make a few more of these for my stash :-)

Stamp Sets: Vintage Leaves, Gorgeous Grunge, Wetlands

Ink: Soft Suede, Old Olive, Tangelo Twist

Paper: Watercolor, Very Vanilla, Soft Suede

Accessories: Gold Metallic Thread, Water Spritzer Bottle


Thanks again for visiting- I hope all of you have a great evening!

Nautical Mixed Media Thinking of You


Hi Stampers!

I hope all of you are having a great day!   We had a wonderful time in worship this morning and I had a chance to create a card this afternoon using the Pals Paper Arts PPA259 Color Challenge along with the Splitcoaststampers' Mix-Ability MIX127 "Red, White and Blue" Challenge (see details here and gallery here), the Hand Stamped Sentiments HSSIC215 Inspiration Challenge as well as the TGIF Challenge! TGI11 Sketch and the Addicted to Stamps and More #152 “Make Your Mark” Challenge (the last two are "new" challenge sites for me :-)). 

Again, if you have not visited the challenge sites yet, I hope you will find time to do so- terrific Design Team designs and as well as their galleries!!

To create this Mixed Media card:

Use Ranger® Tim Holtz® Picket Fence Distress Stain to tone down the Pacific Point striped Designer Series Paper (DSP) from the retired High Tide.

Using a sewing machine, stitch the panel onto a piece of Whisper White cardstock and distress the edges with the retired Distressing Tool. 

Adhere the distressed panel to a piece of Real Red  cardstock and mount onto the Pacific Point card base.

Create a tag from Whisper White cardstock (approx. 1 ¾” wide) and stamp the coral, seahorse and Nantucket images from By The Tide using Pacific Point Classic Ink.  

Ink the large splatter stamp from Gorgeous Grunge with Pacific Point Classic Ink, stamp off onto scratch paper and stamp onto the tag.

Stamp the script image repeatedly using Real Red Classic Ink, create the top of the tag with the Scallop Tag Topper Punch and mount onto a piece of Real Red cardstock (also using the Scallop Tag Topper Punch to create the top of the tag).

Stamp the coral image using Pacific Point onto a scrap piece of Whisper White cardstock, punch out the image using the 2 ½” Circle Punch and mount another 2 ½” Circle of Real Red cardstock behind the coral image and adhere this element onto the card front per the sketch.

Mount the tag to the card front using Stampin’ Dimensionals® and add the Real Red paper bow (created with the Bow Builder Punch) along with the retired silver Star Brad.

Stamp the lobster image using Stāz-On® Jet Black Ink onto Whisper White cardstock, color using an AquaPainter™ with Real Red Classic Ink pad and the Stampin’ Write Real Red marker and carefully “fussy-cut” out the image. 

Use the Big Shot™  to cut the anchor die cut from Silver Foil and add the Natural Linen Thread “rope”- adhere to the card front with Stampin’ Dimensionals® and a Mini Glue Dot (under the bow).

De-static a piece of Pacific Point cardstock using the Embossing Buddy and stamp the sentiment from Wetlands with Versamark™ ink.  Apply Stampin’ Emboss White Embossing Powder and heat with the Heat Tool.

Trim the sentiment, create the banner points with the Hexagon Punch, mount onto a piece of Silver Foil, trim and create the banner points again using the Hexagon Punch and repeat the above steps once more with Real Red cardstock.

Mount the sentiment to the card front using Stampin’ Dimensionals® on the left hand side and regular adhesive flush with the tag on the right.

Add the lobster to the card front using Stampin’ Dimensionals® to finish off the card.

Stamp Sets: By The Tide, Wetlands, Gorgeous Grunge

Ink:  Stāz-On® Jet Black, Versamark™, Pacific Point, Real Red; Stampin’ Write Markers- Real Red; Ranger® Tim Holtz® Picket Fence Distress Stain

Paper: Whisper White, Real Red, Pacific Point, Silver Foil; retired High Tide DSP

Accessories: Big Shot™, Anchor Die (not sure of manufacturer), Punches- Bow Builder, Hexagon, 2 ½” Circle; Embossing Buddy®, Stampin’ Emboss White Embossing Powder, Heat Tool, retired silver Star Brad, Natural Linen Thread, retired Distressing Tool,  sewing machine, white thread


Thanks again for stopping by- I hope all of you have a wonderful evening!

Sunday, April 26, 2015

Birthday Greetings- A Color, Sketch and Theme Card


Hi Stampers! 


If you have not had a chance to do so, I hope you will find the time to visit the above sites- they have wonderfully diverse Design Team samples as well as inspiration from their galleries!

To create this card:

Using Stāz-On® Jet Black Ink, stamp the background stamp and sentiment onto a piece of Vellum.

Color the image from behind using Stampin’ Write Markers- Wild Wasabi and Soft Sky and add the highlights with a stylus and piercing mat (again, from the underside of the stamped image).

Trim the vellum panel and mount onto a piece of Soft Sky cardstock (the same size of the vellum panel). 

Add the strip of Basic Gray cardstock along with the Basic Gray bow created with the Bow Builder Punch.

Use the Big Shot™ to emboss a piece of Wild Wasabi cardstock with the Chevron Textured Impressions™ Embossing Folder, trim and add a strip of Basic Gray cardstock at the top of the embossed panel.

Mount the embossed panel onto a piece of Whisper White cardstock, trim and mount onto a piece of Basic Gray cardstock, trim and mount onto the Soft Sky card base.

Mount the focal image panel using Stampin’ Dimensionals® and add the retired Wild Wasabi button to the bow center to finish off the card.

 Stamp Sets: Corner Garden, Wetlands

Ink: Stāz-On® Jet Black Ink, Stampin’ Write Markers- Wild Wasabi, Soft Sky

Paper: Whisper White, Basic Gray, Soft Sky, Wild Wasabi

Accessories: Big Shot™, Chevron Textured Impressions™ Embossing Folder, Bow Builder Punch, retired Wild Wasabi Button


Thanks again for stopping by- I have had fun this weekend stamping and will share a few more cards later today :-)

Thursday, April 16, 2015

By the Tide- Thinking of You a Color, Sketch and Theme Challenge :-)


Hi Stampers! 

I had a chance to stamp late Wednesday evening (into morning) and decided to design a card using the Paper Players PP240 Color Challenge with the Freshly Made Sketches FMS183 Sketch and the theme from the Splitcoaststampers Way to Use It WT525 "Elements- Earth, Wind, Fire and Water" Challenge (see details here and gallery here).
 
If you have not had a chance to do so, I hope you will find the time to visit all of the above sites- they have wonderfully diverse Design Team samples as  well  as inspiration from their galleries!

To create this card:

Using Stāz-On® Jet Black Ink, stamp the seahorse and fish image from By The Tide onto Whisper White cardstock.
   
Use  Stampin’ Write Markers to color the images- Strawberry Slush and Coastal Cabana for the seahorse, Pistachio Pudding, Coastal Cabana and Strawberry Slush for the fish.

Fussy-cut the images and add a few white highlights to the fish using the Faber-Castell® White Pitt Pen marker.

Ink the coral image using Strawberry Slush Classic Ink and stamp repeatedly onto a piece of Whisper White cardstock. 

Ink the script image using Pistachio Pudding and repeatedly stamp the script stamp as well.


Use Coastal Cabana Classic Ink to stamp the Nantucket Inn image onto the panel  (my stamp originally was not completely clean so I had to add a  bit of Strawberry Slush Classic Ink with the AquaPainter™ and add shadows with the Sahara Sand Stampin’ Write Marker to hide the error- now you know- lol!! :-))

Stamp the large splatter stamp from Gorgeous Grunge using Coastal Cabana Classic Ink (to mimic water bubbles) :-)

Trim the panel and mount onto a piece of Strawberry Slush cardstock, trim again and mount onto a piece of Whisper White cardstock, trim once more and mount onto the Coastal Cabana card base.

Stamp the sentiment using Stāz-On® Jet Black Ink onto Whisper White cardstock.

“Huff” onto the script stamp to re-moisten the Pistachio Pudding Classic Ink and repeatedly stamp over the sentiment.

Create the banner points using the Hexagon Punch and mount onto a piece of Strawberry Slush cardstock (creating the points on this layer as well with the punch). 

Add two additional layers of Pistachio Pudding and Coastal Cabana cardstock along with the scrap piece of Strawberry Slush on the right hand side.

Re-moisten the ink on the splatter stamp (by “huffing on it”) and stamp over all layers.

Mount the sentiment, seahorse and fish image using Stampin’ Dimensionals®.

Add the Rhinestones to finish off the card.

Stamp Sets: By The Tide, Wetlands, Gorgeous Grunge

Ink: Stāz-On® Jet Black Ink, Classic Ink- Coastal Cabana, Pistachio Pudding, Strawberry Slush;  Stampin’ Write Markers- Coastal Cabana, Pistachio Pudding, Strawberry Slush; Faber-Castell® White Pitt Pen marker

Paper: Whisper White, Coastal Cabana, Pistachio Pudding, Strawberry Slush

Accessories: Rhinestones, Hexagon Punch


Thanks again for stopping by- have a terrific Thursday, my friends!

Sunday, March 22, 2015

Thinking of You- Wetlands with Moon Lake :-)


Hi Again Stampers! 

Here is another card that I created this weekend using the CQC283 ColourQ Challenge along with the FMS178 Freshly Made Sketches Challenge. 

If you have not had a chance to do so, I hope you will find the time visit the above sites- wonderful Design Teams and inspiration from both galleries!

To create this card:

Using My Digital Studio, position the Wetlands Canadian Goose image onto a blank screen and print out onto Whisper White cardstock. 

Use the Big Shot™ with the Circle Collection Framelits™ to cut out the image along with a circle the same size from Basic Black cardstock.

Color the image using an AquaPainter™ with Smoky Slate Classic Ink for the body (in place of Going Gray) and Stampin’ Write markers- Lucky Limeade (in place of Kiwi Kiss) for the grass and Basic Black to darken the neck and head areas as well as add a few more details on the feathers.

Split the Basic Black cardstock circle in half and adhere behind the goose image to allow just a bit of the layer to show.

Adhere two strips of retired Lucky Limeade Designer Series Paper (DSP) to strips of Basic Black cardstock and mount onto the piece of Moonlight DSP. Trim the panel and mount onto a piece of Basic Black cardstock, trim again and mount onto the Whisper White card base.

Add the two strips of Basic Black cardstock (I had these in my scraps and they were previously embossed with the retired Square Lattice Textured Impressions™ Embossing Folder). 

Add the 1 ¼” Burlap Ribbon strips to the retired Antique Pewter Hodgepodge Hardware and secure with brads to the focal image.

Stamp the sentiment using Memento™ Tuxedo Black Ink onto Whisper White cardstock and punch out with the Word Window Punch.  Create the points using the Hexagon Punch and punch another Word Window piece from Basic Black cardstock, use the Hexagon Punch to create the banner, split in half and mount behind the stamped sentiment.

Mount the focal image onto the card front and add the sentiment with Stampin’ Dimensionals® to finish off the card.

Stamp Sets: Wetlands (MDS version), Moon Lake

Ink: Printer Ink- Black; Memento™ Tuxedo Black, Smoky Slate Classic Ink, Stampin’ Write Markers- Basic Black and retired Lucky Limeade

Paper: Whisper White, Basic Black, Moonlight DSP, retired Lucky Limeade DSP

Accessories: Big Shot™, Circle Collection Framelits™, Square Lattice Textured Impressions™ Embossing Folder, Punches- Word Window, Hexagon; 1 ¼” Burlap Ribbon, retired Antique Pewter Hodgepodge Hardware


Thanks again for visiting- have a great Sunday!!

Monday, March 16, 2015

FM200 Birthday Butterfly- A CAS Mixed Media Card


Hi Stampers! 

I had a chance to play around in my craft room this evening and decided to create another quick Mixed Media card for the 200th Challenge at the Friday Mash Up!  using the FM1 "Butterflies" with the FM5 "Nature with Embossing" Challenges  (plus- I was able to Mash It Up! for both challenges as well- woohoo! :-)) along with the Splitcoaststampers "Free For All" F4A254 "True Free for All" Challenge (here are the challenge details and the gallery is here)

If you have not had a chance to do so, I hope you will find the time visit both challenge sites to see the terrific Design Team samples as well as the wonderful inspiration from the galleries!

To create this quick card:

Apply the Sweet Sadie Washi Tape strips to a piece of Whisper White cardstock and use the Big Shot™ to emboss with the Honeycomb Textured Impressions™ Embossing Folder.

Trim the panel and mount onto a piece of Rich Razzleberry cardstock, trim and mount onto a piece of Whisper White cardstock, trim and mount onto the Basic Black card base.

Using My Digital Studio (MDS), position the Swallowtail image (reduce in size) as well as the greeting from Wetlands and print out onto Whisper White cardstock.

Color the butterfly using Stampin’ Write Markers- Daffodil Delight, Crisp Cantaloupe, Pear Pizzazz and Rich Razzleberry. 

Use a Faber-Castell® Black Pitt Pen Marker to darken the black areas of the butterfly, carefully “fussy-cut” the image and apply Mod Podge® with a foam brush.

Use a Faber-Castell® White Pitt Pen marker to add the white highlights to the wings.
Trim the sentiment and create the banner using the Hexagon Punch. 

Mount the sentiment onto a piece of Rich Razzleberry cardstock,  punch the banner points with the Hexagon Punch, mount again onto a piece of Basic Black cardstock and punch the banner points once more.

Stamp the large splatter stamp from Gorgeous Grunge using Rich Razzleberry Classic Ink over the embossed background panel and mount the sentiment using Stampin’ Dimensionals®.

To finish the card, use Stampin’ Dimensionals® under the wing tips of the butterfly (to give the wings dimension) and Tombow® Mono-Adhesive under the body to securely fasten to the card front.

Stamp Sets: Swallowtail and Wetlands (MDS versions), Gorgeous Grunge

Ink: Rich Razzleberry, Printer Ink- Black; Stampin’ Write Markers- Crisp Cantaloupe, Daffodil Delight, Pear Pizzazz, Rich Razzleberry; Faber-Castell® Black and White Pitt Pen Markers

Paper: Whisper White, Basic Black, Rich Razzleberry

Accessories: Big Shot™, Honeycomb Textured Impressions™ Embossing Folder, Foam Paint Brush, Mod Podge®, Sweet Sadie Washi Tape Collection, Hexagon Punch


Thanks again for visiting- have a fabulous Monday, my friends!!
Related Posts Plugin for WordPress, Blogger...