Showing posts with label By The Seashore. Show all posts

Wednesday, June 23, 2021

TCC158 Cast Your Cares


Hi Friends!

Welcome to The Card Concept #158 {Long Summer Days} Challenge!


For those of you who are not familiar with
The Card Concept Challenge, we are a bi-weekly challenge that uses an inspiration photo for you to create a card. 

You can choose one card-making style or a combination of styles, the choice is yours!  Plus, our Design Team of ten ladies create a card to help give you even more inspiration!

 I love this photo, don't you? The beach theme, the colors as well as the textures inspired me to create a Mixed Media card using a few retired Stampin’ Up! stamps as well as a retired Verve stamp set for the sentiment.

Also, FYI- this will be our last challenge for the summer (but we will return in the fall). 

Normally our challenge would end in two weeks, but we have decided to keep the challenge open all summer to allow you to participate as you have time. 

We will resume with The Card Concept Challenges on Sept. 1st with our DT announcement and our first challenge on Sept. 8th.

Also, as those of you who follow me know, I have a personal goal to create a card for each of the Splitcoaststampers Sketch Challenges and incorporated the #SC594 Sketch Challenge into the design. 

I am also joining the More Mixed Media Challenge June "Anything Goes Optional Purple" along with the Double Trouble #87 "It's Hip to Be Square" Challenge (for Thing #1, I used a circle and Thing #3- I heat embossed the sentiment). 

If you have not had a chance to visit The Card Concept, or the other challenge sites yet, I encourage you to do so- gorgeous inspiration from all! 

To create this card:

Trim a piece of kraft cardstock to 4” x 5 ¼”.  Repeatedly stamp the script image (retired Notable Notions) with ground espresso distress ink over the background.


De-static the lower right-hand area, stamp the verse sentiment (retired Verve stamps) with Versafine™ Onyx Black ink, apply clear embossing powder and heat set with a heat tool.

Apply pearl texture paste using a scallop stencil onto the background area.  Allow the paste to dry for approx. one hour.

Ink the Seaside Sketches (retired Stampin’ Up!) image with Versafine™ Onyx Black ink and stamp onto a piece of white cardstock.

Watercolor the image with watercolor pencils, distress ink and distress oxide inks and once satisfied with the coloring, die cut with a stitched circle die. 

Mount onto another larger circle die cut from light blue cardstock.

Stamp the seashells from Stippled Shells and By the Seashore with Versafine™ Onyx Black ink onto white cardstock, heat set with a heat tool.

Watercolor with Stampin’ Write markers, distress ink and fussy cut the images.  Use a black marker to edge the shell images.

Mount the stenciled background onto white cardstock, trim close to the edge.

Add the blue checked layered panel of designer paper, the cream burlap ribbon, and the light blue grosgrain ribbon (wrapping the ends of the blue ribbon behind the background panel).          

Mount the panel onto light blue cardstock and adhere to a white card base.

Mount the die cut focal image with dimensional foam (or chipboard), add the seashells around the edges (again, with dimensional foam/chipboard).

Use a clear glitter pen to add shimmer to the seashells as well as the water.

Finish off the card with rhinestones on the upper left and lower right-hand corners.

Stamp Sets: Seaside Sketches, Stipple Shells, By the Seashore, Notable Notions (all retired Stampin’ Up!), Faith Medley (retired Verve Stamps)

Ink/Mediums: Versafine™ Onyx Black Ink, Watercolor Pencils- Derwent, Stampin’ Up!, etc. –Blues, Browns, Beige, Tim Holtz™ Distress Ink- Ground Espresso, Faded Jeans, Pumice Stone, Distress Oxide- Tumbled Glass; Spectrum Noir™ Clear Glitter Marker, Pitt Penn Black Marker, Dreamweaver™ Pearlescent Embossing Paste

Paper/Cardstock: Whisper White, Bashful Blue, Crumb Cake, retired blue check designer paper (all current and retired Stampin’ Up!)

Tools/Accessories: Gemini, Jr., Stitched Circle STAX Dies (My Favorite Things), Matting Circle Dies (Divinity Designs LLC), Scallop Stencil (Memory Box), Palette Knife, Heat Tool, Embossing Buddy™, Clear Embossing Powder, 1” Light Blue Grosgrain Ribbon, Cream Burlap Ribbon, Rhinestones

Thanks again for stopping by!  We hope you will have the time to create a card based on our inspiration photo and join us at The Card Concept! The challenge is open until August 25th  at noon EDT.

Monday, March 16, 2020

By The Seashore- Thy Word


Hi Friends!

Here is another fairly quick and easy card!  This is the first time I have stamped the verse image for this card (although I have owned it for at least a year)!  I love the mixed fonts on this, don't you?  

I am so thankful that I had the time to pull out this verse stamp along with the seashore set and combine it with this retired paper!  I have been hoarding this paper and when I saw the inspiration photo at the Just Add Ink #436 Inspiration Challenge, I thought it would be perfect!  Obviously, I was inspired by the starfish, the beach and water, well all of it for my card :-) 

In addition to the Just Add Ink Challenge, I am playing along with the As You See It #221 “Preferences-My Fav Card to Make is …. ” Challenge.  My favorite card to make is any card using Scripture.  

I love to use a particular Scripture/Bible Verse on a card to encourage the recipient (even on birthday cards) and I know that some of the recipients have told me that they display the cards year round.   

This card uses the Typografia in Faith set, Thy Word is a Lamp (from STAMPlorations) for the sentiment and the retired By the Seashore (Stampin' Up!) for the seashell/starfish images and the splatter image from One Wild Ride (currently available from Stampin' Up!) around the sand and seashells.  

To create this card:

De-static the piece of designer paper (I used the retired Scenic Scenery Designer Series Pack from Stampin’ Up!).  I thought this piece of dsp looked just like the photo (or almost, lol!). 
Stamp the verse image, Thy Word is a Lamp directly onto the designer series paper (dsp) with archival black ink and heat emboss with clear embossing powder.

Stamp the shell/starfish images onto white cardstock with archival black ink, heat emboss with clear embossing powder and once cooled, watercolor with water-based markers and fussy cut.

Layer the background panel onto black cardstock, stamp the “sand” with the splatter stamp around the bottom and side of the panel with archival brown ink and adhere the seashells/starfish using dimensional foam (or chipboard, my preference lately).

Mount onto black cardstock, trim and mount onto the white card base.

Use a clear glitter pen to add shimmer to the sand and shells and the card is finished!

Stamp Sets: By the Seashore, One Wild Ride (retired/current Stampin’ Up!), Thy Word is a Lamp (current STAMPLorations)

Ink/Mediums: Versafine™ Onyx Black; Stampin’ Write Markers- Crumb Cake, Flirty Flamingo; Tim Holtz® Distress Archival Vintage Photo; Spectrum Noir™ Clear Glitter Pen

Cardstock/Paper:  Whisper White, Basic Black; retired Scenic Scenery DSP pack (all Stampin’ Up!)

Accessories: AquaPainter™, Embossing Buddy®, Heat Tool

Thanks again for taking the time to stop by- I hope all of have a wonderful week staying healthy, sweet friends!

Sunday, July 26, 2015

By The Seashore- Thinking of You


Hi Again Stampers! 

I had a chance to complete one more card Saturday evening and decided to play along with the Pals Paper Arts PPA261 Sketch Challenge as well as the Splitcoaststampers’ Mix-Ability MIX120 “Just Beachy” Challenge (see details here and gallery here) and the F4A273 “Sand Between My Toes” Challenge (see details here and gallery here).

When I organized my stamping area (a while ago :-)), I found some previously pre-printed My Digital Studio (MDS) images that had already been colored and “fussy-cut” and decided to use for these images for the main design.   Of course, you could stamp the images if you do not have MDS...

Again, if you have not stopped by any of the challenge sites yet, I hope you will find the time to do so- fantastic inspiration from all!!

To create this card:

Open a blank document in My Digital Studio (MDS), position the By The Seashore images (re-sizing all a bit) and print out using Black Printer Ink onto Whisper White cardstock.

The sand has alot of shimmer and sparkle that is difficult to see in the photo :-)
Color the images using Blushing Bride and Sahara Sand Stampin’ Write Markers.
Fussy-cut each image and use an AquaPainter™ to apply retired Frost White Shimmer Paint to each image.

Tear a piece of scrap paper to create the edge for the shoreline, mask a portion of Whisper White cardstock and using Sponge Daubers apply Sahara Sand Classic Ink for the sand area.

Remove the mask and replace over the sand (extending a bit for the “foam”) and sponge Pool Party, Marina Mist and Lost Lagoon Classic Ink for the ocean.

Mask the water area again and spritz Champagne Mist Shimmer Paint (mixed with rubbing alcohol) over the sand area, lift the mask and re-mask the sand area to spray Frost White Shimmer Paint over the ocean area.

Ink the Gorgeous Grunge large splatter stamp using Sahara Sand and stamp over the sand area.

Add a few white highlights over the water with the Faber-Castell® White Pitt Pen Marker as well as highlights on the shell images, etc.

Use a Faber-Castell® Black Pitt Pen S Marker to add the definition for the shore line.

Stamp the sentiment using Stāz-On® Jet Black Ink and trim the panel, mount onto Tip Top Taupe cardstock, trim again and mount onto the Whisper White card base.

Mount the seashell images using Stampin’ Dimensionals® to finish off the card.

Stamp Sets:  By The Seashore (MDS version), Wetlands

Ink: Printer Ink- Black, Stāz-On® Jet Black, Lost Lagoon, Marina Mist, Pool Party, Sahara Sand; Stampin’ Write Markers- Blushing Bride, Sahara Sand; Faber-Castell® Pitt Pen Markers- White and Black “S”, Shimmer Paint- Champagne Mist and Frost White

Paper: Whisper White, Tip Top Taupe

Accessories: AquaPainter™,  Sponge Daubers, scrap paper for masking


Thanks again for stopping by- I hope all of you have a wonderful and relaxing Sunday!

Wednesday, April 22, 2015

By The Seashore - A CAS Watercolor for Two Challenges :-)


Hi Stampers! 

I had a chance to relax and stamp into the wee hours this morning and decided to create a Clean and Simple (CAS) card with a watercolor technique for the Nance's  PP241 CAS Watercolor Challenge using this week's "summery"  CQC288 ColourQ Challenge Palette. 

Again, if you have not visited the above sites, I hope you will do so- great inspiration from all!

To create this card:

Ink the main starfish and conch shell image from the soon to be retired, By The Seashore with Stāz-On® Jet Black Ink and stamp onto a piece of Naturals White cardstock.  Stamp another image of each onto a piece of scrap paper or a sticky note, cut out and use these images as masks. 

Mask the two stamped images and stamp the sand dollars along with the additional starfish using Stāz-On® Jet Black Ink.

Wet the paper and use a paintbrush or AquaPainter™ to apply Bermuda Bay and retired Kiwi Kiss Classic Ink to the background along with Crumb Cake Classic Ink to the shells and lower portion of the panel.  

Spritz with additional water and apply more ink as needed.

Dry the panel thoroughly with a Heat Tool and use the Crumb Cake Stampin’ Write Marker to add shadows and more definition to the shells, spritzing as needed to blend the ink.

Spritz the background lightly and stamp the large splatter stamp from Gorgeous Grunge using Bermuda Bay Classic Ink, clean the stamp and stamp the splatter again with Crumb Cake Classic Ink at the bottom.

Dry the panel again thoroughly with the Heat Tool and stamp the sentiment from Trust God using Stāz-On® Jet Black Ink.

Use a Faber-Castell® Black Pitt Pen marker to fill in any gaps in the images and add a few highlights to the shells with the Faber-Castell® White Pitt Pen marker.

Trim the panel and mount onto a piece of Basic Black cardstock, trim again and mount onto the Whisper White card base to finish off the card.

Stamp Sets: By The Seashore, Trust God, Gorgeous Grunge

Ink: Stāz-On® Jet Black, Bermuda Bay, Crumb Cake, retired Kiwi Kiss, Faber-Castell® Black and White Pitt Pen Markers

Paper/Cardstock:  Naturals White, Whisper White, Basic Black

Accessories: AquaPainter™, Water Spritzer Bottle


Thanks again for visiting- I hope you have a wonderful Wednesday!!

Thursday, January 8, 2015

HYCCT1417 Rocky Seas

Hi Stampers!

I finally have a chance to finish posting the cards that I created for this past year’s annual Hope You Can Cling To Challenge (HYCCT) Card Drive at Splitcoaststampers.   There were a total of thirty-five challenges and I did not start creating them until a week before the deadline- duh!!!   Lord Willing, next year, I am determined to start at the beginning of October versus the end :-)

We have been busy the past few months with doctor’s appointments, chemo treatments, scans, etc. for my husband Dave (he is doing as well as possible at this time) and of course, the holidays, so I apologize that I am a bit off schedule :-)

This card was created for HYCCT1417 Edna15’s “All That Binds Us” Challenge - (see the gallery here and the details here).  

I love the saying on this Graphic 45 By The Sea paper- it seemed to be an encouraging thought for those who are struggling with cancer, or other challenges in life, so I decided to leave it ”as is” versus adding another sentiment. 

To create this card:

Ink the seashell images from By The Seashore using Memento™ Tuxedo Black Ink and stamp onto Whisper White cardstock.

Use Sponge Daubers with Baked Brown Sugar, Midnight Muse and Tangerine Tango Classic Ink to color the images.   Add the highlights using a Faber-Castell White Pitt Pen and “fussy-cut” each image.

Adhere a piece of the By The Sea paper to a Tangerine Tango panel and adhere to the Midnight Muse card base and add the Retro Fresh Washi Tape to the folded edge.

Mount the By The Sea image onto a piece of Tangerine Tango cardstock, trim and mount again onto a piece of Midnight Muse cardstock.

Add the focal image to the card front and adhere the fussy-cut shells to the card using Stampin’ Dimensionals®.

Stamp Sets: By The Seashore

Ink: Memento™ Tuxedo Black Ink, Baked Brown Sugar, Midnight Muse, Tangerine Tango, Faber-Castell White Pitt Pen

Paper: Tangerine Tango, retired Midnight Muse; Graphic 45 By The Sea

Accessories: Retro Fresh Washi Tape, White Gel Pen

Thanks again for stopping by- have a fantastic day, my friends!

Monday, August 25, 2014

PPA216 Seashells Thinking of You

Hi Stampers! 
 
I wanted to share one more card with you that I created this past weekend using the PPA216 Sketch at Pals Paper Arts.  

Again, I hope you will find time to check out the Design Team samples as well as the rest of the gallery- it always amazes me that so many ideas can come from one sketch!

To create this card:

Ink the Hardwood background stamp with Smoky Slate Classic Ink and stamp onto a piece of Very Vanilla cardstock.  Trim the background panel for the vertical strip in the sketch.

Ink the sand dollar stamp from By The Seashore using Memento™ Tuxedo Black Ink and stamp onto the background.  Stamp another image onto a piece of sticky paper (or scrap paper) to create a mask and stamp the starfish image.

Using the same steps as above, create a mask for the starfish, place the mask for the sand dollar and starfish over the images and stamp the remaining shell image.

Color the seashells using a Sponge Dauber with Crisp Cantaloupe Classic Ink and apply a bit of Crisp Cantaloupe Classic Ink over the woodgrain background. 

Add additional details to the shells using the Light Calypso Coral Stampin’ Blendabilities™ marker and shadows with the Sahara Sand Stampin’ Write marker.  Use the Chalk Marker to add a few highlights and apply retired Frost White Shimmer Paint with the AquaPainter™. 

Mount the panel onto a piece of Basic Gray cardstock, trim and mount again onto Basic Black cardstock. 

Stamp the sentiment using Memento™ Tuxedo Black Ink onto Very Vanilla cardstock.  Punch the sentiment using the 2 ½” Circle Punch, cut across the top and layer onto circles from Basic Gray and Basic Black cardstock.

Adhere the sentiment to the top of the layer and add a few corners of Basic Black cardstock (from the remaining halves of the circle).

Mount a panel of Typeset Designer Series Paper (DSP) onto a piece of Basic Gray cardstock, trim and mount again onto Basic Black cardstock.

Use the Big Shot™ with the Woodgrain Textured Impressions™  Embossing Folder to emboss a piece of Basic Gray cardstock- trim and adhere to the lower edge of the panel.

Ink the Woodgrain background stamp using Basic Gray Classic Ink and stamp onto a piece of Crisp Cantaloupe cardstock.  Trim and mount onto a piece of Basic Gray cardstock, trim and mount onto the Basic Black card base.

Adhere the frayed 1 ¼” Burlap ribbon to the DSP panel and mount the panel onto the card front adding the retired Antique Pewter Hodgepodge Hardware to the lower corner.

Add the focal image panel using Stampin’ Dimensionals® to finish off the card.

Stamp Sets: By The Seashore, Woodgrain, World Map, Wetlands

Ink: Memento™ Tuxedo Black Ink , Crisp Cantaloupe, Smoky Slate; Sahara Sand Stampin’ Write Marker, Light Calypso Coral Stampin’ Blendabilities™ marker, Chalk Marker

Paper/Cardstock:  Whisper White, Basic Black, Basic Gray, Crisp Cantaloupe, Typeset DSP

Accessories: Big Shot™, Woodgrain Textured Impressions™ Embossing Folder, AquaPainter™, Sponge Dauber,  scrap paper for masking, 2 ½” Circle Punch, 1 ¼” Burlap Ribbon, retired Antique Pewter Hodgepodge Hardware, retired Frost White Shimmer Paint


Thanks again for stopping by- I hope all of you have a marvelous Monday!

Thursday, July 10, 2014

Friend to Friend- By The Sea :-)


Hi Stampers!


I love the ocean,  beach and all of the scenery, but since I tend to burn as soon as the sun hits me (no matter how much sunscreen I apply), I am able only to either visit when the sun goes down or drive by -)  I have always loved scenes with lighthouses and when I saw the ColourQ Challenge, I finally had a chance to use this beautiful Graphic45 paper I had on hand :-)

Again, if you have not already had a chance to visit the sites above, I urge you to do so- all three have amazing Design Teams and fantastic galleries of entries!

To create this card:

Trim the lighthouse image (this image is from Graphic45’s By The Sea Collection) and mount onto a piece of Poppy Parade cardstock, trim and mount onto Coastal Cabana cardstock, trim and mount again onto Whisper White cardstock. 

Emboss a piece of Poppy Parade cardstock using the Big Shot™ along with the Chevron Textured Impressions™ Embossing Folder and a piece of Island Indigo using the Woodgrain Textured Impressions™ Embossing Folder.

Use the Big Shot™ with the Finishing Touches Edgelit™ to cut a piece of Whisper White cardstock.  Layer the emboss Poppy Parade piece over a piece of Coastal Cabana cardstock (or use two scrap strips to layer down the sides) and add the edgelit™ to the right hand side of the vertical strip.

Layer the embossed panel of Island Indigo onto a piece of Whisper White cardstock. 
Ink the World Map background stamp using Island Indigo Classic Ink and stamp onto a piece of Coastal Cabana cardstock.  Trim and mount onto a piece of Poppy Parade cardstock.

Adhere the embossed Island Indigo panel onto the World Map panel and add the vertical strip of Poppy Parade/Coastal Cabana.

Mount the By The Sea focal image and add the Antique Copper Hodgepodge Hardware element to the upper left hand corner.

Stamp the starfish images from By The Seashore and the seashell/sand dollar images from Stipple Shells using Memento™ Tuxedo Black Ink onto Whisper White cardstock.  
Color the starfish using the More Mustard Stampin’ Write marker and the seashell with the Poppy Parade Stampin’ Write marker (both markers are retired).   Use a Sponge Dauber with a bit of More Mustard and Poppy Parade Classic Ink to lightly sponge the sand dollar.

A closeup of the shell and rope detail :-)
Knot a few strands of the 1 ¼” Burlap Ribbon (pieces from a previous project where I had pulled the ribbon apart).  Adhere to the card front (I used a Hot Glue Gun) and add the shell, starfish and sand dollar images using Stampin’ Dimensionals®.

Stamp the sentiment from Teeny Tiny Wishes onto Whisper White cardstock (I used a previously printed sentiment from My Digital Studio), punch out with the Word Window Punch and lightly sponge More Mustard and Poppy Parade around the edges and in the center.  Add the sentiment to the shell area with Stampin’ Dimensionals®.

Mount the entire panel onto the Whisper White card base to finish off the card.

Stamp Sets: By The Seashore, Teeny Tiny Wishes, World Map, retired Stipple Shells

Ink: Memento™ Tuxedo Black, Island Indigo, retired More Mustard and Poppy Parade; Stampin’ Write Markers- retired More Mustard and Poppy Parade

Paper: Whisper White, Coastal Cabana, Island Indigo, retired Poppy Parade, Graphic 45 By The Sea DSP (non SU!)

Accessories: Big Shot™, Woodgrain  and Chevron Textured Impressions™ Embossing Folders,  Finishing Touches Edgelits™, Sponge Daubers, Word Window Punch, 1 ¼” Burlap Ribbon (strands ), retired Antique Copper Hodgepodge Hardware


Thanks again for stopping by- I hope all of you are having a great week!!  I have had a very interesting one and will share more details later :-)  I hope you enjoy this card and now I want to take a trip up the Coast to see lighthouses - lol!!!

Tuesday, July 1, 2014

Seascape Birthday- Having Fun with Blendabilities :-)

Hi Stampers! 

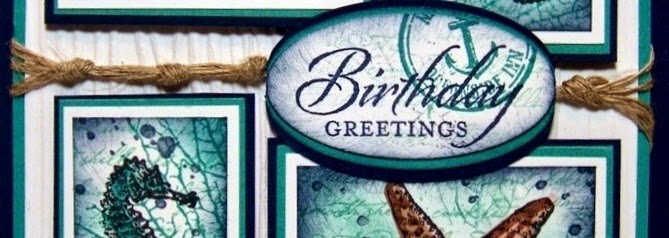
I have a few more cards to share from my weekend stamping and this one was created with one of my favorite stamp sets, By The Tide along with By The Seashore and our new Stampin’ Blendabilities™ :-)

To create this card:

Stamp the images from By The Tide and By The Seashore using Memento™ Tuxedo Black Ink onto Whisper White cardstock and also stamp each image onto scrap paper or a sticky note (to create a mask).

Color the images using the Coastal Cabana and Skin Tone Stampin’ Blendabilities™ Collections.  Add additional color using the Crumb Cake Stampin’ Write marker to the starfish and shell images. 

Trim around each image to create the panels and place the mask over each image and ink the script stamp from By the Tide with Coastal Cabana Classic Ink and repeatedly stamp onto the images. 

Ink the coral image from By The Tide using Bermuda Bay Classic Ink and stamp over the masked images. 

Add the distressing using the Gorgeous Grunge splatter stamp inked with Night of Navy Classic Ink and use a Sponge Dauber to apply Night of Navy Classic Ink. 

Mount each panel onto Whisper White cardstock, trim and mount again onto Bermuda Bay cardstock, trim and mount onto Night of Navy cardstock.

Use the Big Shot™ with the Woodgrain Textured Impressions™ Embossing Folder to emboss a piece of Whisper White cardstock, trim and mount onto a piece of Bermuda Bay cardstock.   

Stamp the sentiment from Wetlands using Night of Navy Classic Ink onto Whisper White cardstock, punch out using the Large Oval Punch, “huff” onto the Coral stamp image to re-moisten the ink and stamp over the sentiment and stamp the Nantucket image using Bermuda Bay Classic Ink.  Sponge Night of Navy Classic Ink over the edges and mount onto Large Ovals punched from Bermuda Bay and Night of Navy cardstock.

Add the image panels using Stampin’ Dimensionals® to the Woodgrain panel. 

Create the rope using Linen Thread and mount onto the panel along with the sentiment.

Adhere the entire panel to the Night of Navy card base to finish off the card.  

Stamp Sets: By The Tide, By The Seashore, Wetlands, Gorgeous Grunge

Ink: Bermuda Bay, Coastal Cabana, Night of Navy, Memento™ Tuxedo Black, Stampin’ Blendabilities™- Coastal Cabana and Skin Tone Collections, Crumb Cake Stampin’ Write marker
Paper/Cardstock:  Whisper White, Bermuda Bay, Night of Navy
Accessories: Big Shot™, Woodgrain Textured Impressions™ Embossing Folder, Sponge Dauber, Large Oval Punch, Linen Thread

Thanks again for stopping by!  Have a great Tuesday and I will be sharing the new SUO Challenge card shortly 

Saturday, August 31, 2013

Late Summer Sunset on the Shore- A Sketch and Color Challenge


Hi Stampers! 

I wanted to create a card using the CCMC266 Colors at Create with Connie and Mary along with the FabFri25Sketch Challenge and a final farewell to summer card for our Virtual Swap at The Card Gallery on Facebook. 

Again, I hope you will have the time to stop by and visit each site- so much inspiration!!

To create this card:
Use the 1” Circle Punch to punch out a circle from a sticky note or other piece of paper to use as a mask for the sun (also place a piece straight across to create the horizon) and place onto a piece of Whisper White cardstock.
Using a Sponge Dauber, apply Crushed Curry Classic Ink in the circle to create the sun, remove the mask and cover the recently sponged sun with the circle to protect the Crushed Curry and sponge a bit of Crushed Curry along with Tangerine Tango over the sky area.
Remove the masks and apply the same colors for the water area (remember horizontal motions across the paper).  Soften the ink using the AquaPainter™ with water being careful not to use too much water. 
Add the island/inlet areas using additional masks and Chocolate Chip Classic Ink (adding a few shadows in the water as well). 
Stamp the script image from Notable Notions using Tangerine Tango Classic Ink over the sky area and add a few birds with the Stampin’ Write Chocolate Chip marker.
Add the birds from Wetlands using Chocolate Chip Ink as well as the grasses along the side.  Darken the birds using the Stampin’ Write Chocolate Chip marker and add a few white highlights on the water and grasses with the Chalk Marker- trim and layer onto a piece of Chocolate Chip cardstock.
Using Chocolate Chip Classic Ink, stamp the Notable Notions script and the Wetlands shore birds onto a piece of Tangerine Tango cardstock.   Use the Big Shot™ with the Woodgrain Textured Impressions™ Embossing Folder to emboss the panel, trim and adhere to a piece of Whisper White and again onto the Chocolate Chip card base.
Adhere the sentiment (Teeny Tiny Wishes and the Word Window Punch) under the focal image and mount onto the card front using Stampin’ Dimensionals®. 
Add the starfish from By The Seashore using Stampin’ Dimensionals® to finish off the card – FYI- this is an image that I had previously printed using My Digital Studio and re-sized a bit smaller than the original stamp- used an AquaPainter™ with Crushed Curry and Tangerine Tango Classic Ink along with Chocolate Chip and Chalk Marker highlights. 

Stamp Sets: Wetlands, By The Seashore, Notable Notions, Teeny Tiny Wishes

Ink: Crushed Curry, Tangerine Tango, Chocolate Chip

Paper/Cardstock:  Whisper White, Tangerine Tango, Chocolate Chip

Accessories: Big Shot™, Woodgrain Textured Impressions™ Embossing Folder, Sponge Daubers, Punches- 1” Circle and Word Window


Thanks again for stopping!!  I hope you have a fabulous Labor Day weekend!!
Related Posts Plugin for WordPress, Blogger...