Showing posts with label Shabby Chic. Show all posts

Wednesday, November 28, 2018

The Card Concept #103 {Holiday Treats}


Hi Friends!

I hope all of you had a wonderful weekend and Thanksgiving!  We enjoyed visiting with our family and definitely ate too much :-)  The last two months have been celebrations galore- two weddings (twin nieces both married- one in October and the other in November), Thanksgiving, surprise birthday parties and more!!

Now it's time for The Card Concept #103 {Holiday Treats} Challenge and what a fun inspiration photo we have for you!  The various shades of red and green inspired me to create a Shabby Chic/Mixed Media card!  I needed a surprise birthday card for a family member who loves cardinals and thought that this color combination would be perfect!

I am also linking this card to the Simon Says Wednesday "Anything Goes" Challenge.

Just a reminder that the Card Concept is a bi-weekly challenge that has an inspiration photo along with a suggestion of design styles that you can choose from to create your card- Clean and Simple, Clean and Graphic, Clean and Layered, Shabby Chic, Freestyle Collage, Classy and Elegant and Mixed Media (or you can combine several styles for your own style).

If you have not had a chance to visit us at The Card Concept or the Word Art Wednesday  challenge site yet, I hope you will find time to do so- gorgeous inspiration from all!

To create this card:

1). De-static two pieces of white cardstock with an embossing powder tool, stamp the cardinal image from Cardinal (Our Daily Bread Designs) with archival black ink onto one piece and the verse sentiments from Birthday Doily (Our Daily Bread Designs) onto the other.  Apply clear embossing powder and heat set with the heat tool.  Once the embossing has cooled, fussy cut the cardinal image, die cut the sentiment with a stitched circle die and hand trim the birthday greeting into a banner.

2). Using ink from water-based markers, watercolor the cardinal image (I scribble some of the ink from the marker onto a silicone mat and use a water brush to watercolor).  Once you are satisfied with the watercolor, use the markers directly to add shadows and depth.

3). Trim a piece of olive designer paper to approx. 4” x 5 ¼”, use a distressing tool to distress the edges and mount onto a piece of espresso cardstock. 

4). Layer a strip of white crochet lace and espresso satin ribbon over the background panel and wrap the edges of the ribbon behind the card front.  Mount the card front onto a white card base.

5). Die cut a stitched square from white cardstock and mount onto a piece of espresso cardstock.  Trim the espresso layer close to the die cut edge and mount onto the card front with dimensional foam.

6). Mount the banner greeting and die cut circle sentiment onto espresso cardstock.  Layer both onto the card front using dimensional foam in the area that is not layered onto the die cut square.

7). Adhere the cardinal image with dimensional foam. Add a few pearls to the corner of the square as well as the sentiment.

8). To finish off the card, use an extra fine white paint pen to add a few white highlights to the pine cones as well as the cardinal’s eye.

 Stamp Sets: Cardinal, Birthday Doily (Our Daily Bread Designs)

Ink/Mediums: Versafine™ Onyx Black, Stampin’ Write Markers- Cherry Cobbler, Poppy Parade, Basic Black, Early Espresso, Mossy Meadow; Sharpie® Extra Fine White Paint Pen

Cardstock/Paper: Whisper White, Early Espresso (Stampin’ Up!); misc. olive designer paper (not sure of manufacturer)

Tools/Accessories:  Big Shot™, My Favorite Things Stitched Square STAX and Stitched Circle STAX Dies, Circle Dies (retired SU!), Embossing Powder Tool, Clear Embossing Powder, Heat Tool, Distressing Tool, 5/8” Early Espresso Satin Ribbon, White Crochet Lace Trim, Pearls

Thanks again for taking the time to stop by- I hope you will join us for our {HolidayTreats} Challenge at The Card Concept- we would love to see your card in our gallery!!

Wednesday, October 31, 2018

The Card Concept #101 {Rustic Fall}- Give Thanks


Hi Friends!


I absolutely love this wonderful inspiration photo that Lesley, the creator of The Card Concept Challenge,  chose with the vintage dark blue truck and gorgeous pumpkins- don't you?  

I was inspired by the color of the pumpkins as well as the other autumn colors to create a Shabby Chic/Mixed Media card using digital images from Power Poppy along with traditional watercolor and other techniques.

I am also participating with the Simon Says Work It Wednesday October "Give Thanks" Challenge along with the As You Like It “Favourite Halloween or Autumnal Colors” (I absolutely love all of the oranges, yellows and reds of autumn on the East Coast :-)) and the Word Art Wednesday #358-#359 “Anything Goes” Challenge.

***  Just a reminder that The Card Concept is a bi-weekly challenge that has an inspiration photo along with a suggestion of design styles that you can choose from to create your card- Clean and Simple, Clean and Graphic, Clean and Layered, Shabby Chic, Freestyle Collage, Classy and Elegant and Mixed Media (or you can combine several styles for your own style). ***

If you have not had a chance to visit us at The Card Concept or the other challenge sites yet, I hope you will find time to do so- fabulousl inspiration from all!

To create this card:

1). Using a photo editing software (I used the retired My Digital Studio™ from SU!), import the digital images from Painted Pumpkins and Bittersweet Wreath (both Power Poppy by Marcella), re-size as needed and print out onto white cardstock (this cardstock was from my stash and has a linen finish).

2). Using Tim Holtz Distress Inks along with various water-based markers,  watercolor the Painting Pumpkins digital image until you're satisfied with the results (I will list the items used below in the card recipe). Use a waterproof marker to draw a table edge, trim the image and use a distressing tool to distress the edges.  Apply Vintage Photo Distress Ink with a sponge dauber along the edges and distressing with the small splatter image (Timeless Textures-SU!).   Mount the finished image onto a piece of Not Quite Navy cardstock and distress the edges with a distressing tool.

3). Die cut the sentiment with a stitched rectangle die, mount onto Not Quite Navy cardstock (retired SU!), distress the edges of the Not Quite Navy layer with a distressing tool, sponge Vintage Photo Distress Ink around the edges and add a bit of splatter with the Timeless Textures stamp.

4). Distress the edges of a piece of patterned paper (I used a piece from my stash), apply Vintage Photo Distress Ink along the edges, mount the panel onto a piece of retired Not Quite Navy cardstock and distress the edges of the cardstock as well.

5). Die cut a piece of Not Quite Navy cardstock with one of the MFT Stitched Horizontal Strip Dies, split the die cut (the split will be covered with the sentiment panel) and mount the pieces onto the distressed panel.  Adhere the pieces of dark brown polished hemp twine (wrapping the ends behind the panel) and mount the entire panel onto a white card base.

6). Mount the main image onto the card front as well as the sentiment using dimensional foam.   Add the looped polished hemp twine bow with the pumpkin button (I used hot glue to adhere the bow).

7).  Use a clear glitter pen to add shimmer to the pumpkins to finish off the card.

 Stamp Sets: Painted Pumpkins, Bittersweet Wreath (Power Poppy), Timeless Textures (Stampin Up!)

Ink/Mediums: Printer Ink- Black, Stampin’ Write Markers- Cajun Craze, Pumpkin Pie, Smokey Slate; Arteza™ Real Brush Markers- A146 Olive Green, A167 Ocean Blue, A140- Cadium Orange, A112- Orange, A178- Ginger, A102- Chocolate; Tim Holtz® Distress Ink- Vintage Photo, Brushed Corduroy, Crazed Pumpkin; Spectrum Noir™ Glitter Pen, Sharpie®  Extra Fine Black Marker

Cardstock/Paper: Not Quite Navy (retired SU!), designer paper (Authentique- not sure of collection), misc. linen and HD white cardstock from my stash (for images and base)

Tools/Accessories:  My Digital Studio™ (retired SU!), Big Shot™, My Favorite Things™ (MFT) Dies-Stitched A2 Rectangle, Stitched Horizontal Strip; Distressing Tool, Polished Hemp Twine, retired Pumpkin Pie button (SU!), Printer

Thanks again for taking the time to stop by- I hope you will join us for our {RusticFall} Challenge at The Card Concept- we would love to see your card in our gallery!!

Wednesday, April 4, 2018

TCC90 The Lord Directs His Steps


Hi Friends!!

Woohoo! It’s time for the new #90 Sweet Treat Challenge at The Card Concept!   Look at those gorgeous cupcakes- the flowers look so real, don’t they? 


I was inspired by the bright spring colors of berry, yellow ad blue as well as the pretty flowers to create a Mixed Media card.  

Don't be frightened of Mixed Media- usually it is a card using two different inks  and/or mediums (in this case archival ink, distress inks and markers, white paint pen, glitter pen) plus other mediums (I used heat embossing and stenciling on this card). 

Since I add heat embossing to almost every one of my cards lately, they all qualify as Mixed Media :-)

Just a reminder that The Card Concept is a bi-weekly challenge that has an inspiration photo along with a number of design styles that you can choose from to create your card- Clean and Simple, Clean and Graphic, Clean and Layered, Shabby Chic, Freestyle Collage, Classy and Elegant and Mixed Media (or you can combine several styles for your own style).


If you have not had a chance to check out the rest of the Design Team cards at The Card Concept or visit the other challenge sites yet, I hope you will find time to do so- wonderful inspiration from all!

To create this card:

1). Ink the floral image from Rhododendron (Technique Tuesday) with archival black ink, stamp onto a piece of white cardstock, apply clear embossing powder and heat set with a heat tool.  Once the embossing has cooled, color the flowers with distress inks, markers and other water-based markers (colors noted in card recipe below).  Add a few highlights to the flower centers with an extra fine white paint marker. Fussy-cut and set aside.

2). Stamp the verse sentiment from Scripture Medley 3 (Verve Stamps) with archival black ink, stamp onto a piece of white cardstock, apply clear embossing powder and heat set with a heat tool.  Once the embossing has cooled, die cut with a stitched rectangle die, mount onto a piece of berry cardstock.

3). For the panels on the background, die cut various rectangles from yellow and white cardstock (dies are listed below), layer onto berry cardstock, add the hemp twine strands (wrapping the ends behind the panel) before mounting onto the white card base.

4). Add the sentiment panel and the fussy cut floral image with dimensional foam to the card front.

5).  Use a stencil with a stencil brush to add distress ink over all the panels.

6). Adhere the hemp twine bow with button.  Add pearls to the corner of the sentiment and upper right-hand corner of the card.

7). Use a clear glitter pen to add shimmer to the flowers to finish off the card.

Stamp Sets: Rhododendron (Technique Tuesday), Scripture Medley 3 (Verve Stamps)

Ink/Mediums: Versafine™ Onyx Black, Tim Holtz® Distress Markers- Picked Raspberry, Mowed Lawn; Tim Holtz® Picked Raspberry Distress Ink, Zig© Clean Real Color Markers- Light Pink, Green; SU! Markers- Blush Blossom, Berry Burst; Spectrum Noir® Clear Glitter Pen, Sharpie® Extra Fine White Paint Pen

Cardstock/Paper: Whisper White, Berry Burst; retired So Saffron and Soft Sky Designer Series Paper (all Stampin’ Up!)

Tools/Accessories:  Big Shot™, My Favorite Things™ Dies- A2 Stitched Rectangles STAX Set 1 & 2, Horizontal Stitched Strips STAX, Stitched Square STAX; Embossing Buddy®, Heat Tool, Clear Embossing Powder, Claritystamps™ Stencil Brush, Memory Box Heartwood Stencil, Polished Hemp Twine, retired SU! Button, Pearls

Thanks again for stopping by! I had fun designing this card and hope you will have a chance to come play along with us at The Card Concept!!

Wednesday, October 4, 2017

TCC79 He Has Made Everything Beautiful


Hi Friends!!

It’s time for the new The Card Concept #79 {Rustic Neutrals} Challenge ! I love this gorgeous photo that Lesley chose for the challenge, don’t you? So much to inspire you- from the texture, the white pumpkins, the white wash on the bricks, the gray metal wheel in the back as well as all of the other details and even a bit of greenery. 

I was inspired by the gray whitewash on the metallic wheel in the back as well as the variety of texture, the silver and beige along with the sage green for my Mixed Media Shabby Chic/Elegant card.

I am also linking this card to the Word Art Wednesday #302-#303 “Anything Goes”Challenge along with a few Splitcoaststampers' challenges (F4A397 "Your Happy Place", MIX243 "Mister, Mister" and a few others).  

My "happy place" is reading God's Word and spending time at Shenandoah National Park (Skyline Drive)! The beauty of God's creation is so inspiring and this time of year is one of my favorites with all of the changes in the leaves and beautiful colors.  

 If you have not had a chance to do so, I hope you will find the time to check out the rest of the wonderful Design Team cardsat The Card Concept as well as the entries at the Word Art Wednesday Challenge site- fabulous inspiration from all!

To create this card:

1). Ink the Tim Holtz® (TH) French Script Sizzix™ Embossing Folder with TH Pumice Stone Distress Ink, place a piece of Sahara Sand cardstock into the folder and emboss with the Big Shot™.  Trim the panel and distress the edges with a distressing tool.

2). Layer a piece of patterned sage green paper (this was from my stash and I cannot recall the manufacturer- sorry...) onto Basic Gray cardstock, distress the outside edge and layer onto the embossing panel created in step 1.

3). Add the gray crochet lace and gray satin ribbon (wrapping the ends of the ribbon behind the panel) and mount the panel onto a piece of Basic Gray cardstock.  Adhere the entire panel onto the white card base.

4). On a piece of Whisper White cardstock, stamp the sentiment from the Verve Stamps Scripture Medley 3 stamp set with Versafine™ Onyx Black ink, apply Clear Embossing Powder and heat set with the Heat Tool.  Once the embossing has cooled, die cut the sentiment with the My Favorite Things™ (MFT) Stitched Circle STAX Dies and mount onto a circle die cut from the same size die using Basic Gray cardstock.  FYI- I split the gray circle in half and adhere the sentiment so only a little bit of the gray is showing.

5). For the leaves:  Using a craft mat, tap a bit of Pumice Stone, Weathered Wood and Gathered Twigs Distress Ink, spritz lightly with water and press a piece of Whisper White cardstock into the ink.  Lift up the cardstock and continue to repeat the steps until you are satisfied with the color.  Dry the panel thoroughly with the Heat Tool and use an Embossing Buddy® to de-static the surface of the cardstock.  Ink the leaves from the retired Stampin’ Up! (SU!) set, With Gratitude using Versafine™ Onxy Black Ink, stamp onto the panel, apply clear embossing powder to a few of the leaves and heat with the heat tool.  Repeat the process, one leaf at a time and heat emboss several of the leaves with extra fine white embossing powder.  Once the embossing powder has cooled, if needed, use a sponge dauber with additional distress inks to intensify the color and fussy cut out each leaf. 

6). Mount the leaves to the card front with dimensional foam and add a few pearls to the sentiment circle.

7). Finish off the card by adding shimmer with a clear glitter pen to the leaves.

Stamp Sets:  Scripture Medley 3 (Verve Stamps), retired With Gratitude (Stampin’ Up!)

Ink/Mediums: Versafine™ Onyx Black Ink, TH Distress Inks- Pumice Stone, Weathered Wood, Gathered Twigs; Spectrum Noir™ Clear Glitter Pen

Cardstock/Paper: Whisper White, Extra Thick Whisper White, Basic Gray, Crumb Cake; misc. designer paper (sage green)

Accessories: Big Shot™, TH French Script Embossing Folder, MFT Stitched Circle STAX Dies, Sponge Dauber, Embossing Buddy®, Heat Tool, Clear and Extra Fine White Embossing Powder, Gray Crochet Lace, 1” Gray Satin Ribbon, Pearls, Distressing Tool

Thanks again for taking the time to stop by!  I hope I have inspired you today and that you will be able to join us for the #79“Rustic Neutrals” Challenge at The Card Concept! 

Wednesday, February 1, 2017

TCC66 His Love Endures Forever

Hi Friends!!


Our inspiration photo is so soft and lovely and I was inspired by the beautiful rose as well as the overall romantic feeling of love to create a shabby chic card.

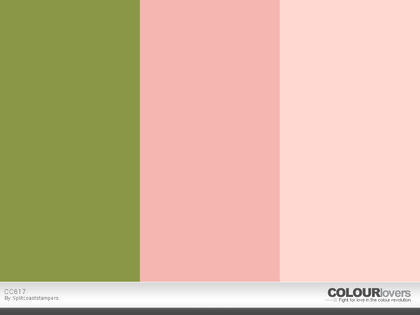
I have been hoarding this gorgeous Graphic 45 Botanical Tea designer paper and incorporated the Splitcoaststampers CC617 Color Challenge (with the dessert option of spring) into the design.


I hope you will find the time to check out the wonderful Design Team cards at The Card Concept as well as the other two challenge galleries- gorgeous inspiration from all!

To create this card:

1). Distress the edges of the Graphic 45 Botanical Tea designer paper, apply Vintage Photo Distress Ink over the edges, mount onto Soft Suede cardstock, trim and mount onto Blushing Bride cardstock.

2). Trim the Graphic45 Botanical Tea Cut-A-Way panel, distress with Antique Linen Distress Ink and stamp the platters with the Stampin’ Up! Timeless Textures small splatter stamp using Vintage Photo Distress Ink (stamping off prior to stamping on the panel).  Mount onto Soft Suede cardstock and mount onto the front of the card panel.

3). Add the crochet lace and olive satin ribbon, wrapping the ends of the ribbon behind the panel before mounting onto the white card base.

4). Ink the sentiment from Scripture Medley 3 (Verve Stamps) with Brushed Corduroy Distress Ink and stamp onto Very Vanilla cardstock.  Die cut and emboss the sentiment using the medium frame from Spellbinders™ Timeless Rectangles Dies, stamp the small splatter stamp from SU! Timeless Textures stamp (“huff” onto the stamp to re-moisten the ink). Mount onto the card front with dimensional foam.

4). Create the rolled roses using the MFT Royal Rose dies from Pink Pirouette and Blushing Bride cardstock. Use the MS Leaf Punch to add leaves from Old Olive cardstock – adhere the flowers to the card front (I used hot glue for this step) and add a few pearls in the corners to finish off the card.

Stamp Sets: Timeless Textures (Stampin’ Up!), Scripture Medley 3 (Verve Stamps)

Ink/Mediums: Distress Ink- Vintage Photo, Antique Linen, Brushed Corduroy

Paper: Very Vanilla, Blushing Bride, Old Olive, Pink Pirouette, Soft Suede, Extra Thick Whisper White; Graphic 45 Botanical Tea

Accessories: Big Shot™, MFT Royal Roses Dies, MS Leaf Punch, Distressing Tool, Crochet Lace and Satin Ribbon (from my stash)

I am so thankful that we can give thanks to the Lord for He is Good, His Love Endures Forever!!  I am resting in His Promises for sure!!

Thanks again for taking the time to stop by!  I hope all of you have a fabulous week and you will be able to join us for the #66 “Love & Romance” Challenge at The Card Concept!  Hugs and God Bless!


Wednesday, January 18, 2017

TCC65 Fresh and Bold- Vintage Ladies


Hi Friends!!

It’s time for TheCard Concept #65 “Fresh & Bold” Challenge!  I love this fun inspiration photo (I know I say this each time but really, this one is fun!) and was inspired by the oranges, pinks and the vintage ladies in the artwork on the wall to create my mixed media shabby chic card.

I pulled out a few stamps that I have not used in quite a while to give them some “love” and also incorporated the As You See It #141 Sketch Challenge and the Happy LittleStampers January 2017  Watercolour “Anything Goes” Challenge into the design (I did not use the opt. twist this time :-)).

To create this card:

1). Use an AquaPainter™ to apply Melon Mambo and Tangerine Tango Classic Ink to a piece of Whisper White cardstock, dry with a Heat Tool.

2). Ink the retired Stampin’ Up! French Script background stamp with Stampin’ Archival™ Basic Black ink and randomly press the stamp onto the background paper.

3). Trim the panel and distress the edges with a Distressing Tool, mount onto Basic Black cardstock and mount onto the Extra Thick Whisper White card base.

4). Cut the two banners- one from Melon Mambo cardstock and the other from Tangerine Tango cardstock.  Press both onto the inked French Script background stamp, distress the edges, mount onto Basic Black cardstock and distress again.  Layer the banners onto the card front.

5). Add the White Tea Lace Doily along with the circle die cut from Basic Black cardstock (cut with Spellbinders™ Stately Circles Dies).

6). Ink the vintage girl images from the Crafty Individuals CI-065 “Love Letter Ladies” stamp set with Stampin’ Archival™ Basic Black ink, heat set with the heat tool and add shadows with Derwent® Water Soluble Graphite Pencils (using a water brush to blend_).  Add a bit of color to the girl’s dress with Tangerine Tango Classic Ink and the rose with Melon Mambo Classic Ink.  Dry with a heat tool and apply Frost White Shimmer Paint (mixed with rubbing alcohol) over the panel using an AquaPainter™.  Trim the images and mount onto Basic Black cardstock, trimming close to the edge.  Adhere each of the stamped images to the card front with dimensional foam.

7). Die cut the flowers from Melon Mambo and Tangerine Tango cardstock using the MFT Royal Rose Dies, crimp the die cut pieces with a Crimper Tool, roll into the flower shape and adhere the center with hot glue.  Punch the leaves from Basic Gray cardstock using the MS Leaf Punch and add the leaves with the flowers to the card front (I used hot glue for strength).

8). Add a few Pearls to the corners to finish off the card.

I did not add a sentiment since I thought this card could be used either as a note card, birthday or thinking of you and I can leave it as is or add a sentiment later.

Stamp Sets: French Script (retired Stampin’ Up!), CI-065 Love Letter Ladies (Crafty Individuals)

Ink/Mediums: Stampin’ Archival™ Basic Black, Classic Ink- Melon Mambo, Tangerine Tango; Derwent® Water Soluble Graphite Pencils, Frost White Shimmer Paint

Paper: Whisper White, Extra Thick Whisper White, Basic Black, Basic Gray, Melon Mambo, Tangerine Tango

Accessories: Big Shot™, MFT Royal Roses Dies, MS Leaf Punch, Distressing Tool, White Tea Lace Doily, Pearls, Heat Tool, Crimper Tool, AquaPainter™

Thanks again for taking the time to stop by!  I hope all of you have a fabulous week and you will be able to join us for the #65 “Fresh & Bold” Challenge at The Card Concept!
Related Posts Plugin for WordPress, Blogger...