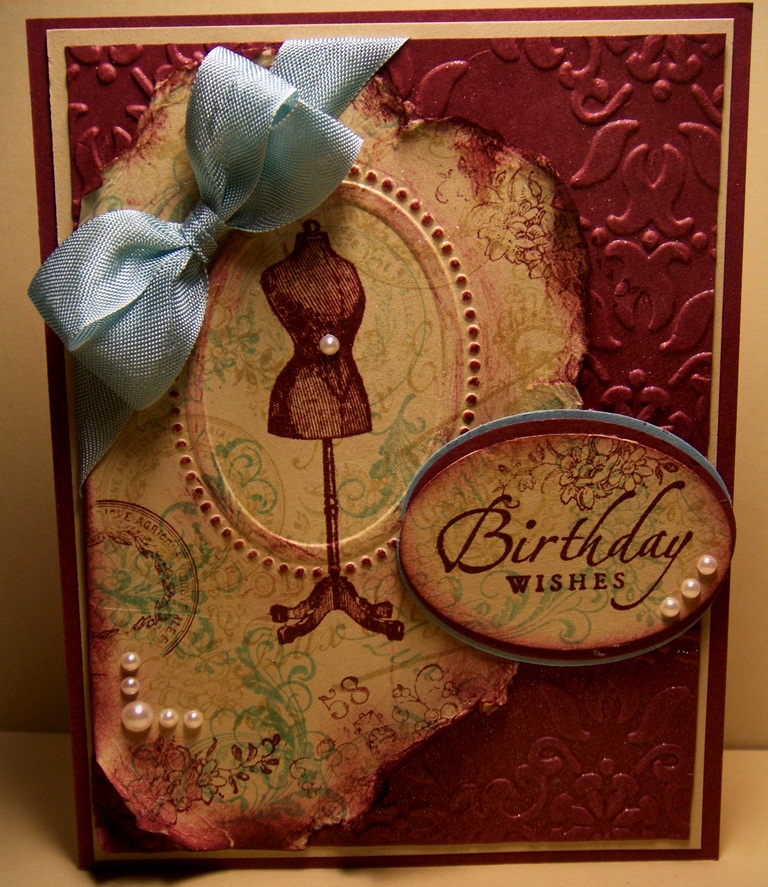
Thursday, January 19, 2012

Praying for You- A Color and Sketch


Hi Stampers!  

Another long week at work but I finally had a chance to relax and stamp!  I decided to use the PP78 colors from my friends at the Paper Players (check out their samples- they are fabulous!) along with the Splitcoast Stampers SC366 Sketch Challenge

To create this card:

Create your own Designer Series Paper using Stampin’ Write Markers in Blushing Bride, Calypso Coral and Pear Pizzazz to color the floral spray image from Fresh Vintage and stamp onto Whisper White cardstock. Repeat and continue to stamp to fill in the cardstock.

Ink the background stamp, En Francais with Pear Pizzazz Classic Ink and stamp onto a piece of Blushing Bride cardstock. 

Ink the sentiment from Blessings from Heaven with Calypso Coral Classic Ink and stamp onto Whisper White cardstock.  “Huff” on the floral spray stamp (inked with the markers in the step above) and stamp over the sentiment.  Punch out with the Decorative Label Punch and layer onto Calypso Coral. 

Close up of  stamped "DSP" 
To finish off the card, layer the Pear Pizzazz background (embossed with the Big Shot™ and the Finial Press Textured Impressions™ Embossing Folder), strips of Everyday Enchantment DSP, doily from the Flirtatious DSP, Pear Pizzazz Seam Binding, rolled flowers from Calypso Coral cardstock and Pearls.

Stamp Sets:  Fresh Vintage, Blessings from Heaven

 Ink: Calypso Coral, Stampin’ Write Markers- Blushing Bride, Calypso Coral, Pear Pizzazz

Cardstock:  Whisper White, Blushing Bride, Calypso Coral, Pear Pizzazz, Everyday Enchantment and Flirtatious DSP

Accessories:  Big Shot™, Finial Press Textured Impressions™ Embossing Folder, Decorative Label and 1 3/8” Circle Punch, Pear Pizzazz Seam Binding, Pearls

Thanks for stopping by!  I hope all of you are having a great time this week and have some time to relax and create as well! 

Sunday, January 15, 2012

Thank You- Two Cards, One Color Challenge and More!


Hi Stampers!! 

This week’s ColourQCQC19 Challenge colors are bright, bold and fun, so much so that I decided to create two different cards utilizing the CQC119 colors along with a few other challenges!  I hope that you will take the time to visit their blogs and leave some comment “love” for their Design Teams- they work so hard at keeping us inspired and motivated each week!

In addition to the color challenge, the first card uses the sketch from this week’s StampingQueens SQSC21 Challenge along with the Friday Mash Up FM41 Challenge (Thank You card with DSP).


To create this card: ­­

Use the Big Shot™ with the Petals-A-Plenty Textured Impressions™Embossing Folder and emboss a piece of Whisper White, Melon Mambo, Pretty in Pink and Pumpkin Pie DSP.

Also with the Big Shot™, cut a doily from the Paper Doily Sizzlit Die from Whisper White cardstock and hand trim the doily in half (this one was the second half from a previous project).

Punch a few flowers from the Melon Mambo, Whisper White and Pretty in Pink embossed cardstock using the Boho Blossom Punch and one flower from Melon Mambo with the Blossom Punch. 

Use the Flirtatious DSP and create the tag and lower layer of the background.  Assemble the card layers- add the 5/8” Basic Gray Satin Ribbon bow, sentiment tags and Rhinestones to finish off the card.

Stamp Sets:  Tiny Tags
Ink: Melon Mambo, Pumpkin Pie
Paper: Whisper White, Basic Gray, Pretty in Pink, Melon Mambo, Pumpkin Pie DSP, Flirtatious DSP

Accessories:  Big Shot™, Petals-A-Plenty Textured Impressions™ Embossing Folder, Paper Doily Sizzlit Die,  Punches- Boho Blossom, Blossom, Jewelry Tag, 5/8” Basic Gray Satin Ribbon, Rhinestones, White Bakers Twine, Corduray Pumpkin Pie Button Brad (retired)  


 The second card also qualifies for the Friday Mash Up FM41 Thank You with DSP Challenge along with the Stamping 411 SSC238 Sketch Challenge and the Hand Stamped Sentiments  HSS100RP Pleats and Ruffles Theme Challenge (hopefully crimped paper qualifies as a “ruffle”).

To create this card:

Use Stampin’ Write Markers in Pretty in Pink, Melon Mambo, Pumpkin Pie and Basic Gray to color the floral spray image from Fresh Vintage and stamp the image onto Whisper White cardstock.  Punch out with the 2 ½” Circle Punch and mount onto a paper doily from the Flirtatious DSP pack. 

Punch the border of Whisper White and Pumpkin Pie DSP with the Eyelet Border Punch and crimp both pieces with the Crimper Tool.

Assemble the layers- add the ribbon, sentiment, bow and pearl to finish off the card.

Stamp Sets:  Fresh Vintage, Short and Sweet

Ink: Stampin’ Write Markers in Melon Mambo, Pumpkin Pie, Basic Gray and Pretty in Pink

Paper: Whisper White, Basic Gray, Pretty in Pink, Pumpkin Pie DSP, Flirtatious DSP

Accessories:  Punches- 1 ¾” Circle, 2 ½” Circle and Eyelet Border, Crimper Tool, 5/8” Basic Gray Satin Ribbon, Pearl

These colors did seem a bit daunting to me at first but I had fun creating the cards.  In my opinion, the second card is more my “style” but the first card will be perfect for a friend of mine who loves pink and flowers :-)

Thanks again for stopping by and I hope you enjoyed these cards.  If you have the time, please leave me a comment to let me know which one you like the best!

Have a wonderful week and take the time to relax and possibly create a project!  Most of all, have a great time and God Bless!

Monday, January 9, 2012

Fresh Vintage- Two Challenges in One!


Hi Stampers! 

I have been admiring the inspiration photo at this week’s Hand Stamped Sentiments HSSICC99Inspiration Challenge and decided to combine this challenge with the SSC237 sketchat Stamping 411.  Both Design Teams have done a fabulous job providing us with so much inspiration!   

This card utilizes Dry Embossing, Heat Embossing, Distressing, Background Stamp and an Embossing Folder.

To create this card:

Ink the floral stamp from Fresh Vintage with Bashful Blue and stamp onto Bashful Blue cardstock for the pennant strip and focal panel. Stamp the pennant piece with the background stamp, En Francais with Night of Navy and distress the edges with the Distressing Tool and mount onto Night of Navy cardstock. 

Use Versamark™ ink and stamp the floral spray image and the postage stamp onto Bashful Blue cardstock and apply Navy Stampin’ Emboss® Powder (retired).  Heat emboss with the Heat Tool, distress the edges of the focal image with the Distressing Tool, lightly sponge Night of Navy around the edges and mount onto Night of Navy cardstock.  Punch the postage stamp out with the 1” Square Punch and punch out a piece of Night of Navy cardstock with the Postage Stamp Punch. 

Brayer Night of Navy on the smooth interior side of the Finial Press Textured Impressions™ Folder, use the Big Shot™ to emboss a piece of Bashful Blue cardstock (distress the edges with the Distressing Tool and sponge Night of Navy lightly over the edges and panel).

Mount the cardstock panels, add the sentiment, pearls and 5/8” Night of Navy Grosgrain Ribbon (retired) to finish off the card.

Stamp Sets:  Fresh Vintage, Short and Sweet

 Ink: Versamark™, Bashful Blue, Night of Navy

Paper: Bashful Blue, Night of Navy

 Accessories:  Big Shot™, Finial Press Textured Impressions™ Embossing Folder, Sponge Dauber, Heat Tool, Stampin’ Emboss® Navy Embossing Powder(retired), 5/8” Night of Navy Grosgrain Ribbon(retired), Pearls, Distressing Tool, Punches- Large Oval, Postage Stamp, 1” Square and Medium Oval (retired)

Thanks again for visiting and I hope you have a blessed week!

Sunday, January 8, 2012

Thank You- Two Challenges in One!


Hi Again Stampers!! 

While I had the CQC118 ColourQ colors out from my last post, I decided to create another card using the FM16 Sketch from Freshly Made Sketches.  

This is a fairly quick and easy card with very little stamping and embossing...Not sure if I am happy with the Calypso Coral side panels- may remove those before mailing :-)


To create this card:

Stamp the floral image from Fresh Vintage using Pool Pary Classic Ink onto Whisper White cardstock and emboss with the Big Shot™ and the Rectangular Designer Label Textured Impressions™ Embossing Folder.  Cut out around the edges of the folder and adhere to a piece of Pool Party cardstock.  Carefully cut out around the edges of the embossing folder again, creating another layered frame.

Attach the 3/8” Pool Party Seam Binding Ribbon bow and mount onto another panel of Whisper White and Cherry Cobbler.

Create three rolled flowers with the 1 3/8” Circle Punch and Pearls.  Stamp the sentiment with Pool Party and Calypso Coral and punch out with the Jewelry Tag Punch.

Revised Card without Calypso Coral sides 
Mount all onto layers of Everyday Enchantment DSP and Cherry Cobbler, adding the embossed panels of Calypso Coral and more Seam Binding.


Stamp Sets:  Fresh Vintage, Tiny Tags

Ink: Cherry Cobbler, Pool Party,Calypso Coral

Paper: Whisper White, Calyspo Coral, Cherry Cobbler, Pool Party, Everyday Enchantment DSP

Accessories:  Big Shot™, Designer Label (Rectangular) and Vintage Wallpaper Textured Impressions™ Embossing Folder, Punches- 1 3/8” Circle, Jewelry Tag, 3/8” Pool Party Seam Binding, Pearls  

If you have the time, let me know which one you prefer- with or without the Calypso Coral on the sides.  


Thanks again for stopping by- and don't forget to have fun stamping! 

Saturday, January 7, 2012

Thanks for the Support!


Hi Stampers!! 

I wanted to play with some of the new products that I received for Christmas and the colors from this week’s CQC118 ColourQ were a perfect!  If you have not taken the time to visit their site this week, the Design Team samples and all of the other entries are terrific source of inspiration!  

When I first saw this new set, Rue Des Fleurs, I laughed at the sentiment and knew that would be perfect with this bust image.  I send this "virtual" card out to all of you for your support and am so thankful to have you and other friends in my life :-)

To create this card:

With the Big Shot™ and the Finial Press Textured Impressions™ Embossing Folder, emboss the two panels of Designer Series Paper (DSP) and lightly sand with the Sanding Block to expose the white core.  Mount onto a piece of Cherry Cobbler cardstock.

Use the Big Shot™ with the Paper Doily Sizzlits Die to cut a doily from Whisper White cardstock. Hand cut the doily in half and adhere to the bottom half of the card. 

Stamp the image using Basic Black Classic ink onto Whisper White cardstock and color with Stampin’ Write markers in Pool Party, Calypso Coral, Pear Pizzazz and Cherry Cobbler.  Use the 2 ½” Circle Punch to punch out the image and mount onto two Cherry Cobbler circles punched with the same punch (offset the circles a bit to form a layer).

With the Bird Builder Punch, punch out three leaves from Pear Pizzazz cardstock.  Use the Boho Blossom Punch to punch out four flowers (the largest one was used) from Calypso Coral.  To break down the fibers of the cardstock on the flower, use the  Crimper Tool to crimp the flowers several times.  Carefully separate the layers of cardstock, use the 1/16” Handheld Punch to punch a hole in the center and insert a mini brad.  Scrunch the layers to create the flower and adhere the card with Mini Glue Dots. 

Add the 5/8” Satin Ribbon bow and sentiment to finish off the card.

Stamp Sets:  Rue Des Fleurs

Ink: Cherry Cobbler, Basic Black, Stampin’ Write Markers- Pool Party, Pear Pizzazz, Cherry Cobbler, Calypso Coral

Paper: Whisper White, Cherry Cobbler, Everyday Enchantment DSP

Accessories:  Big Shot™, Finial Press Textured Impressions™ Embossing Folder, Paper Doily Sizzlits Die, Punches- 2 ½” Circle, Large Oval, Bird Builder, Boho Blossoms, 5/8” Satin Ribbon (from my stash)

Thanks again for all of your support- your visits and comments are so encouraging to me!  I know that we have not met in person but I read each and every comment and feel that all of you are my friends!  Thanks again for blessing my life and I hope all of you have a wonderful week! 

Tuesday, January 3, 2012

2011- A Year in Review


Happy New Year Stampers!   

I was in a bit of a reflective state today and since it is a New Year thought I would join my fellow stamping bloggers in displaying a personal favorite from each month (a Year in Review).  If you would like further details on each, click on the link below each photo and it will take you to the direct post:

                                           
January 2011- This card is quite distressed and I love the sentiment "Everyday holds the possibility of a miracle" by Elizabeth David


February 2011- This is a hybrid card that I made for my wonderful husband last year :-)


March  2011- I love nature and Nature Walk is one of my favorite sets :-)


April 2011-  A quick sponge technique combined with embossing- Clean and Simple! 


May 2011A tribute to our Armed Forces and a reminder to pray for them each day


June 2011-  Two more CAS cards with the same color combination (and the dream of traveling :-))


July 2011 Several types of embossing techniques were used for this one along a new set from the 2011 catalog :-)


 August 2011 Created for a friend that was moving on to a different job (this one uses a simple masking and sponging technique)


 September 2011-   Another one of the new stamps sets that I "had" to have (love this bee!)  This card incorporates a punched layer central panel and sentiment that were fun to make...

 October 2011-   This color combination seemed like an "unlikely trio" but after playing with the colors, I found the combination a great one (and will use it again) 


 November 2011-   This card was created for a "girly-girl" challenge and I had so much fun "dressing it up"! 


 December 2011-   This card was one of a kind that I made for my father and step-mother (they live in another state and I do not get to see them for Christmas).  I do miss seeing them and hope they enjoyed this card as much as I did creating it for them! :-)


Thanks again for stopping by!  I hope each of you have a great week stamping and creating- God Bless!! 

Monday, January 2, 2012

CCC12- Twenty Six Christmas Cards- Yea!!


Hi Stampers!   

As I mentioned in an earlier post, I decided to start early this year creating my Christmas cards for 2012.  First, I signed up for the 2012 CCC12 Splitcoast Christmas Card Challenge again this year and have committed to making at least 20 cards per month!  I know it sounds ambitious, but for some reason, I was unable to follow thru with mailing my cards this year and barely had enough for hand distribution (last year I had created 110 cards). 

I did not want to fall short again this year, therefore the minimum of 20 per month should be enough for our church family and relatives.  I am going to make sure that I follow through on the multiples as well and try to create more CAS cards with fewer layers and embellishments (except for the hand delivery cards).  Thankfully, I have this blog and my friends that visit me to help keep me accountable :-)

This card was fairly quick and easy (once I decided on the background color- almost went with Crushed Curry since I had it out from the previous project- still need to use up the huge stockpile from the Clearance Rack :-))  I even  ended up making 26 total - not an easy task with my Angel "girl" helping me- isn't she cute? :-))

This card incorporates My Digital Studio for the main image  (what a time saver!) along with traditional stamping for the sentiment only.   I had to resize the main image a few times before deciding that eight images per 8.5 x 11" piece of Whisper White would be the best size (therefore there are two sizes of cards). 

Print the MDS image onto Whisper White cardstock using Black printer ink and layer the image onto Basic Black cardstock.  

Use the Decorative Label Punch to punch out labels from Whisper White and line up the sentiment on the upper and lower half of the label (cut the punched image in half so you will have the sentiment label for two separate cards).

Adhere the sentiment behind the main image and onto the Perfect Plum embossed panel (emboss using the Big Shot™ with the Snow Burst Textured Impressions™ Embossing Folder).  

Add the 5/8” Basic Black Satin Ribbon bow and a Rhinestone to the star to finish off the card!

Stamp Sets:  Come to Bethlehem (My Digital Studio and Clear Mount)
Ink: Printer Ink- Black and Basic Black
Cardstock:  Whisper White, Perfect Plum
Accessories:  Big Shot™, Snow BurstTextured Impressions™ Embossing Folder, 5/8” Basic Black Satin Ribbon, Rhinestone

Thanks again for visiting!  I hope you enjoy New Year’s Day and have a great week (possibly you are starting on your Christmas cards for 2012 as well?) If so, I would love to hear about them and possibly see a sample..if you leave a comment with your link, I will visit you as well .:-)

Sunday, January 1, 2012

You Are Absolutely Fabulous!


Happy New Year!! 

I wanted to create another card with the new set, Fresh Vintage along with a new embossing folder and decided to use this week’s CQC117 ColourQ Challenge colors- black and white with a pop of color along with the SUO35 Feel A Little Punchy Challenge.  If you have not had the chance to check out their site, the Design Team samples and all of the other entries are absolutely fabulous!

I chose a yellow pop of color (Crushed Curry- I know not everyone's favorite but I have quite a bit in stock) for this quick, easy and fun Clean and Simple (CAS) card :-)!!

To create this card:

With the Big Shot™ and the Fun Flowers Bigz L Die cut the large flower from Crushed Curry.  Emboss the flower with the Perfect Dots Textured Impressions™ Embossing Folder  and emboss a piece of Whisper White with the heart strip from the Adorning Accents Textured Impressions™ Embossing Folder set.

De-static a piece of Whisper White with the Embossing Buddy®, stamp the round image from Vintage Stamp with Versamark® ink, apply Stampin’ Emboss® Black Embossing Powder and heat with the Heat Tool.  Once cooled, punch out with the 1 ¼” Circle Punch. 

Repeatedly stamp the floral scroll image using Crushed Curry ink on the smooth edges of the embossed Whisper White background and attach two strips of 5/8” Basic Black Satin Ribbon. 

Stamp the sentiment using Basic Black Classic Ink onto Whisper White and use the Decorative Label punch to punch out the sentiment along with the Basic Black layer.

Layer the pieces and add the pearl to the center of the flower to finish off the card.

Stamp Sets:  Fresh Vintage,  Absolutely Fabulous (retired)

Ink: Versamark™, Basic Black, Crushed Curry (retired)

Cardstock: Whisper White, Basic Black, Crushed Curry (retired)

Accessories:  Big Shot™, Adorning Accents (heart strip) and Perfect Dots Textured Impressions™ Embossing Folders, Punches- Decorative Label, 1 ¼” Circle, Pearls, 5/8” Basic Black Satin Ribbon

I hope all of you have a wonderful (safe) weekend celebrating with family and friends!  God Bless you in 2012- you are all absolutely fabulous! 
Related Posts Plugin for WordPress, Blogger...