Saturday, February 10, 2018

Spring Blossoms Birthday


Hi Friends!

Today I am sharing another quick mixed media card designed using the February release stamp set, Spring Blossoms along with the previously released tamp set, Typewriter Text Background from Sweet ‘n Sassy Stamps. 

The Spring Blossoms Clear Stamp Set has so many great sentiments as well as the beautiful tulip and daffodil images and is part of the Sweet ‘n Sassy Stamps February release.

Also, don’t forget the February stamp of the month is Hoppy Easter- it is so cute!! For every $60 purchase (not including discounts or shipping), you can receive this stamp set free until the end of February.  Plus, Sweet ‘n Sassy Stamps has free shipping and handling on your $75 order (in the US) so this is a great deal!!

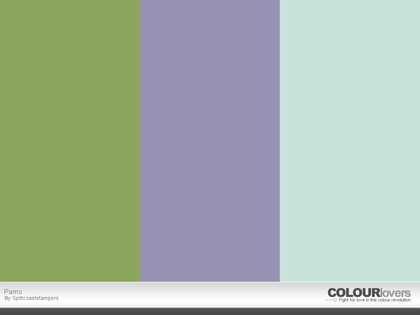
 I enjoy playing along with weekly challenges so I incorporated the Just Add Ink #395 Inspiration Challenge (inspired by the colors with the white and black shadows), the Tic-Tac-Toe #034 Challenge (center row across- Die-Cut, Emboss, Floral), the International Art & Soul #026 “Texture” Challenge and the Word Art Wednesday #320-#321 “Anything Goes” Challenge.

 If you have not had a chance to visit the above challenge sites or the SNSS Blog/FB Page yet, I encourage you to do so- wonderful inspiration from all!

To create this card:

1). De-static a piece of white cardstock with an embossing powder tool, stamp the tulip image from Spring Blossoms with archival black ink, apply clear embossing powder and heat set with the heat tool.

2). Once the embossing has cooled, color the image with water-based markers (see colors below in the card recipe) and fussy-cut the image.

3). Die cut and emboss a piece of black cardstock with an elegant rectangle die, de-static the center of the rectangle with an embossing powder tool, stamp the Typewriter Text Background with embossing ink, apply white embossing powder and heat set with the heat tool.

4). Die cut a piece of white cardstock and polka dot designer paper with a stitched rectangle die, mount the white die cut onto a piece of black cardstock, trim and mount onto a piece of melon cardstock. Add the embossed elegant rectangle panel onto the card front.

5). De-static a piece of white cardstock with an embossing powder tool, stamp the sentiment from Spring Blossoms with archival black ink, apply clear embossing powder and heat set with the heat tool.  Once the embossing has cooled, die cut with a stitched rectangle die and adhere to the card front with dimensional foam.

6). Add the triple ribbon checked bow (wrap the ends behind the card front).  Add the fussy-cut tulip with dimensional foam and mount the entire card front onto the white card front.

7). Use a clear glitter pen to add shimmer to the flower petal and add a few pearls to finish off the card.


Ink/Mediums: Versafine™ Onyx Black, Versamark™; Stampin’ Write Markers- Blushing Bride, Powder Pink, Melon Mambo, Pear Pizzazz, Old Olive;  Spectrum Noir™ Clear Glitter Pen

Paper/Cardstock: Whisper White, Basic Black, retired designer series paper

Acessories/Tools: Big Shot™, MFT Dies- A2 Stitched  Rectangle STAX Dies Set 1, Horizontal Stitched Strip; Spellbinders™ Timeless Rectangles Dies, Embossing Buddy®,  White and Clear Embossing Powder, Heat Tool, Pearls, 3/8” Black and White Checked Ribbon


Thanks again for taking the time to stop by- hugs and I hope you have a blessed week, sweet friends!

Wednesday, February 7, 2018

TCC86 What A Savior


Hi Friends!!


I was inspired by the vintage style of the setting, the lace, roses and colors to create a Shabby Chic Mixed Media card with the new February release stamp set, What A Savior from Sweet ‘n Sassy Stamps.  

This stamp set has several hymns as well as wonderful sentiments for Easter and year round- love the artwork created by NinaB Designs for Sweet ‘n Sassy Stamps!

Our theme is "Old Fashioned Love" and when I think of love, I think of the sacrifice that Jesus made for all of us on the cross.  There is no greater love - what a Wonderful Savior is Jesus Our Lord!!


If you have not had a chance to do so, I hope you will find the time to check out the rest of the wonderful Design Team cards at The Card Concept as well as the entries at the other challenge sites- fabulous inspiration from all!

To create this card:

1). Prepare two pieces of white cardstock with an embossing powder tool, stamp the hymn image and three of the rose images from What A Savior with Versafine™ Onyx Black ink, apply clear embossing powder and heat set with a heat tool.  Once the embossing has cooled, die cut the hymn image with a stitched circle die and watercolor the rose images with distress inks as well as water-based markers (see all of the colors used in the card recipe below). 


2). Fussy cut the roses (cutting the foliage away from some of the petals and attaching in different areas on the flower to frame the hymn).

3).  Tap worn lipstick distress ink onto a craft mat, spritz with water and add to the hymn image as well as a piece of designer paper.  Also add vintage photo to the designer paper and antique linen to the hymn (to “age” the paper).

4). Distress the edges of the designer paper and mount onto a piece of suede cardstock.  Add the ivory crochet lace and rose satin ribbon (wrapping the ends behind the panel) before mounting the entire panel onto the white card base.

5). Die cut an ornate circle die from suede cardstock, sponge vintage photo distress ink around the edges, mount the hymn image onto the circle and adhere to the card front with dimensional foam.

6). Add the fussy-cut flowers using dimensional foam and a few sequins.

7). Use a clear glitter pen to add shimmer to the roses and pearls in the upper right and lower left hand corner to finish off the card.


Inks/Mediums:  Versafine™ Onyx Black; Tim Holtz® Distress Inks- Worn Lipstick, Vintage Photo, Antique Linen; Stampin’ Write Markers-Blushing Bride, Flirty Flamingo, Melon Mambo, Powder Pink, Pear Pizzazz, Wild Wasabi; Spectrum Noir™ Clear Glitter Pen

Cardstock/Paper: Whisper White, Soft Suede, retired Newsprint Designer Series Paper (all Stampin’ Up!)

Accessories: Big Shot™, Dies- MFT Stitched Circle STAX, Spellbinders™ Stately Circles Dies; Embossing Buddy®, Clear Embossing Powder, Heat Tool, Sponge Dauber, Distressing Tool, 1” Rose Satin Ribbon, Ivory Crochet Lace, Pearls, Sequins- Craft Medley

 Thanks again for stopping by- I hope I have inspired you today and that you will be able to join us for the The Card Concept #86 {Old Fashioned Love} Challenge at The Card Concept! 

SC683 God Is My Salvation


Hi Friends!

It’s time for the weekly sketch at Splitcoaststampers! Cathy is our #SC683 sketch designer this week and she has designed a wonderful sketch that can be interpreted in so many ways!

I decided to create a Clean and Layered Mixed Media card using Floral Greetings and Our Refuge at Sweet ‘n Sassy Stamps. I love the beautiful floral designs in the Floral Greetings stamp set (designed by Graciellie Designs) and the fonts on the verses in Our Refuge are gorgeous!


I love using stitched dies on my cards to add "faux" stitching but occasionally actually stitch on my cards as well (with a dedicated sewing machine).  What is your favorite way?

If you have not had a chance to visit the Splitcoaststampers’ Sketch gallery or other challenge sites yet, I hope you will do so- fabulous inspiration from all!

To create this card:

1). De-static two pieces of white cardstock with an embossing powder tool. On one panel, stamp the floral spray image twice from Floral Greetings with Versafine™ Onyx Black Ink and stamp the verse from Our Refuge onto the other.

2). Once the embossing has cooled, die cut the verse with a stitched banner die.  Die cut another banner with the same die using black cardstock, split the black banner in half and layer behind the verse.


3). Using water-based markers, watercolor the floral images and fussy cut (cutting away some of the foliage).

4). Using a stencil brush and tumbled glass distress ink, apply ink with the Heartwood stencil.  Trim the panel, mount onto a piece of black cardstock and adhere the entire panel onto the white card base.

5). Mount the layered verse onto the card front and the flowers with dimensional foam.

6). Use a clear glitter pen to add shimmer to the flower petals and use an extra white paint pen to add highlights to the flower centers.

7). Add pearls to finish off the card. 


Ink/Mediums: Versafine™ Onyx Black; Stampin’ Write Markers- Wisteria Wonder, Wild Wasabi; Tim Holtz® Tumbled Glass Distress Ink, Spectrum Noir™ Glitter Pen, Sharpie® Extra Fine White Paint Pen

Paper: Whisper White, Basic Black

Accessories/Tools: Big Shot™, MFT Jumbo Stitched Fishtail Banner STAX Dies, Embossing Buddy®, Clear Embossing Powder, Heat Tool, Memory Box Heartwood Stencil, AquaPainter™, Pearls

Thanks again for taking the time to visit! If you have a chance, we would love for you to join us at Splitcoaststampers for this week’s sketch challenge!  Hugs and I hope all of you have a great week, sweet friends!

Tuesday, February 6, 2018

Nothing Is Impossible


Hi Friends!

Today I am sharing a quick Clean and Simple (CAS) mixed media card designed using the February release stamp set,  Spring Blossoms along with the previously released stamp set, Be Encouraged from Sweet ‘n Sassy Stamps. 

The  Spring Blossoms Clear Stamp Set has so many great sentiments as well as the beautiful tulip and daffodil images and is part of the Sweet ‘n Sassy Stamps February release.

Also, don’t forget the February stamp of the month is Hoppy Easter- it is so cute!! For every $60 purchase (not including discounts or shipping), you can receive this stamp set free until the end of February.  Plus, Sweet ‘n Sassy Stamps has free shipping and handling on your $75 order (in the US) so this is a great deal!!


 If you have not had a chance to visit the above challenge sites or the SNSS Blog/FB Page yet, I encourage you to do so- wonderful inspiration from all!

To create this card:

1). De-static a piece of white cardstock with an embossing powder tool, stamp the daffodil image from  Spring Blossoms with embossing ink, apply white embossing powder and heat set with the heat tool.

2). Once the embossing has cooled, color the image with alcohol markers, water-based markers and watercolor pencils (I went a little crazy and kept adding color- see all of the colors and items used in the card recipe below:-)).  Use a stencil with ink from the water-based markers and watercolor pencil to add subtle stenciling to the background.

3). To partial cut the image with a stitched rectangle die, trim around the left hand side of the flower, lift up the petals and place the stitched die over the panel and die cut. 

4). De-static the panel again with the embossing powder tool, stamp the sentiment from Be Encouraged with archival black ink, apply clear embossing powder and heat set with the heat tool.

5). Mount the die cut panel on an angle onto the card front using dimensional foam.  Mount the entire card front onto the white card base.

6). Use a clear glitter pen to add shimmer to the flower petals and background (it is so hard to photograph the shimmer but it is there :-)).  Add a few sequins to finish off the card.


Ink/Mediums: Versafine™ Onyx Black, Versamark™; Stampin’ Write Markers- Bermuda Bay, Crushed Curry, Daffodil Delight, Peekaboo Peach; Derwent® Watercolor  #33 Light Blue Pencil; Spectrum Noir™ Alcohol Markers- GY1, GY2, BO2, VB2, Spectrum Noir™ Clear Glitter Pen
 
Paper/ Cardstock: Whisper White, Bermuda Bay

Acessories/ Tools: Big Shot™, MFT A2 Stitched  Rectangle STAX Dies Set 2, Embossing Buddy®,  White and Clear Embossing Powder, Heat Tool, Memory Box Chevron Stencil, Sequins- Craft Medley


Thanks again for taking the time to stop by- hugs and I hope you have a blessed week, sweet friends!

Thursday, February 1, 2018

What A Savior


Hi Friends!

Today I am sharing a quick card designed using the February release stamp set, What A Savior from Sweet ‘n Sassy Stamps. 

 
WhatA Savior along with several other stamp sets are part of the Sweet ‘n Sassy Stamps February release and the February stamp of the month is Hoppy Easter- how cute!! 

For every $60 purchase (not including discounts or shipping), you can receive the Hoppy Easter stamp set free until the end of February.  Plus, Sweet ‘n Sassy Stamps has free shipping and handling on your $75 order (in the US) so what a great deal!!
 
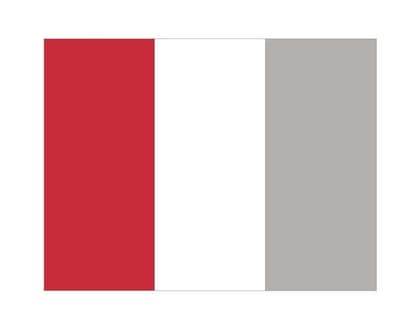
I love playing along with weekly challenges and incorporated the Splitcoaststampers CC671 Color Challenge along with the Fab Friday #129 Sketch Challenge and the Simon Says Wednesday “Anything  Goes” Challenge into the design.

If you have not had a chance to visit the above challenge sites or the SNSS Blog/FB Page yet, I encourage you to do so- wonderful inspiration from all!

To create this card:

1). De-static a piece of white cardstock with an embossing powder tool, stamp the image from What A Savior with embossing ink, apply silver embossing powder and heat set with the heat tool. Once the embossing has cooled, die cut with a stitched circle die. 
 2). Using a red water-based marker, scribble the ink onto a craft mat and watercolor the “heart”  with a water  brush.  Once dry, apply shimmer with a clear glitter pen to the watercolored area and mount the die cut image onto a red cardstock die cut.

3). Trim a piece of red patterned paper along with the silver chevron paper for the background.  Add a strip of red cardstock to the red patterned paper, mount the silver chevron paper onto the red card front and add the layered red panel.

4). Wrap two pieces of woven satin ribbon for the vertical element of the sketch, placing the ribbon ends behind the card front and adhere the entire panel onto a white card base.  

5). Add the triple red ribbon bow to finish off the card.


Ink/Mediums: Versamark™ Onyx Black; Stampin’ Write Real Red Marker; Spectrum Noir™ Clear Glitter Pen

Paper/Cardstock: Whisper White, Real Red, retired designer papers (Stampin’ Up!)

Acessories/Tools: Big Shot™, MFT Stitched  Circle STAX Dies, Circle Framelits™, Embossing Buddy®, Silver Embossing Powder, Heat Tool, 3/8” Real Red Woven Satin Ribbon


Thanks again for taking the time to stop by- hugs and I hope you have a blessed week, sweet friends!
Related Posts Plugin for WordPress, Blogger...