Showing posts with label #handmade. Show all posts

Saturday, December 28, 2024

Stamp Simply 2024 Fav Eight


Hi Friends!

I hope all of you are having a blessed Christmas week so far! 

This week the Stamp Simply Design Team are sharing our Fav 8 from 2024. If you have not had a chance to stop by the Stamp Simply blog  to see the rest of the Design Team’s Fav8 choices, I hope you will find time to do so- truly works of art from all of the team!

I always have a tough time choosing cards for this post.  I truly love using Scripture on my cards and Stamp Simply has so many beautiful fonts with their Scripture stamps!  

FYI- The links for the original blog posts are under each photo (if you would like to check out how they were created and what products were used :-)).

Proclaim Liberty Eagle 


For God So Loved


Nothing Shall Be Impossible


By His Wounds


Sunflower Seasons 


Boho Pumpkins


Boho Leaves- Grateful 


A Child Is Born


Also, this will be my last official Stamp Simply Design Team blog post.  

I have been so blessed to be a designer for Stamp Simply Design Team since the fall of 2020 and am stepping down from the Design Team due to personal reasons.   

Many of you who follow my blog know that my husband went to be with the Lord in 2022.  He was a true warrior, fighting major health issues including five different cancers over a period of twenty years.  The last cancer was a quick growing glioblastoma and this time, they could only remove about half of the tumor and there were no post surgery treatment options.  

Thankfully, the Lord took him home within six weeks after the initial  surgery/biopsy.  My hubby would not want to live long without having the ability to talk, walk, read, eat, or do anything that he loved to do. 

We had just celebrated our 39th Anniversary and we were so blessed! Best friends and partners in everything in life.  I miss him every day, but know that one day, I will be with him for all eternity along with our Lord and Savior, Jesus Christ! 

We did not have children, and I have been trying to keep up everything around the house on my own.  My wonderful husband was gifted in so many ways and was a great handyman as well. He and I had so much fun as we would do our house projects as a team!  

When he was diagnosed with the gliobastoma, we were in the middle of a major cosmetic remodeling project and I am now so far behind! I am going to try to focus on getting the house done this year as well as downsize a bit and, hopefully, have more time for my creative outlets in the future. 

I will continue to create cards and will share them (when I can) on my blog.  I am so thankful for the generosity of Sharon at Stamp Simply, she is such a wonderful person, and I absolutely love her stamps! Trust me, Stamp Simply stamps will be part of my stamping inventory forever :-)  

I hope you will stop by Stamp Simply and check out the specials!

Thanks again for visiting my blog and I hope all of you have a fabulous New Year!


Wednesday, December 13, 2023

TCC#202 King of Kings


Hi Friends!

Welcome to our new #202 {Christmas Cheer} Challenge at the The Card Concept!


Check out this gorgeous inspiration photo!
  I love the décor, the red and white as well as the beautiful pillows.  I was inspired by the colors and theme for my Classy and Elegant/Clean and Layered card/

We are looking forward to seeing what inspires your card! Will it be the overall theme, the colors, items in the photo/textures or something else?

If you have not already visited us at The Card Concept, I hope you will find the time to do so.  Gorgeous inspiration from the rest of my DT sisters! 

This was a quick and fun card to create:

On a 4 ¼” x 5 ½” piece of white cardstock, de-static the panel and ink up the script block image from Jesus (Stamp Simply) with Candied Apple Distress Oxide Ink, apply clear embossing powder and heat set with a heat tool.


Score below and above the stamped and embossed image (it is hard to see this in the photo).  I actually scored the panel and scored too vigorously, lol, so I had to score another panel, trim the embossed image and adhere it to the second panel, oops!!


Trim the entire background panel to approx. 4” x 5 ¼”, mount onto a 4 ¼” x 5 ½” piece of red cardstock.

Add a strip of red seam binding ribbon, wrapping the ends behind the panel and adhere to a white card base.

On another piece of white cardstock, ink the poinsettia image from the Floral Clusters- Winter Poinsettia stamp set with Versafine Onyx Black ink, apply clear embossing powder and heat set with a heat tool.


Watercolor the poinsettia with distress inks and die cut with the coordinating die.  FYI- I also die cut another poinsettia out of plain white cardstock to layer behind the stamped image (this gives the image more stability for mounting onto the card front).

Mount the die cut poinsettia with dimensional foam to finish off the card.

Stamp Sets:  Floral Cluster- Winter Poinsettia, Jesus (Stamp Simply)

Inks/Mediums: Versafine Onyx Black,  Candied Apple Distress Oxide Ink, Distress Inks- Candied Apple, Ripe Persimmon, Mowed Lawn, Evergreen Bough

Cardstock/Paper: Whisper White, Real Red


Accessories/Tools: Gemini, Jr., Stamp Simply Dies- Floral Clusters and Sprigs, Embossing Powder Tool, Clear Embossing Powder, Heat Tool, Red Seam Binding, Scoring Tool, Waterbrush


Thanks again for taking the time to visit! I hope you are inspired to create a card and join us for our #202 {Christmas Cheer} Challenge at The Card Concept!  

Maybe if you have the time, you could create a few cards.  The deadline to play along is Monday, January 8th at noon EDT.


Saturday, December 9, 2023

Quick Christmas Cards


Hi Friends!

This week we are continuing to share Christmas cards on the Stamp Simply blog. 


I decided to create another set of easy Christmas cards using the Studio Light Sending Joy 6x6Paper Pad.  I love this paper for quick Christmas cards- just a reminder, this paper pad has been discontinued so once it is sold out at Stamp Simply, it will not be available again. 


If you love this paper as much as I do, buy it now before it is too late!  You can create at least 60 quick cards (if not more) from this one paper pad!

Once I trimmed each piece of the designer paper to approx. 3 ¾” x 5” and distressed the edges, I used an embossing powder tool to de-static the paper before heat embossing the sentiments with Versafine Onyx Black ink and clear embossing powder.


I paired the Rose-Breasted Grosbeak image with an embossed sentiment from the Merry Christmas stamp set, distressed the edges, mounted the panel onto black cardstock before adhering to a white card base.  

So quick and easy, plus flat for mailing!


For the pine tree snow scene card, I heat embossed the sentiment from Christmas Peace, added the
May Arts ⅝” Sage Twill Ribbon and 1.75” White Venise Gabriella Lace  (wrapping the ends of the ribbon behind the panel) before mounting onto black cardstock and adhering to a white card base.

Again, this card was easy with just a bit of elegance added with the ribbon/lace and still fairly flat for mailing :-)

If you have not had a chance to check out my Sister DT cards yet, I hope you will do so- wonderful inspiration from all!

Stamp Sets: Christmas Peace, Merry Christmas (Stamp Simply)

Inks/Mediums: Versafine Onyx Black

Cardstock/Paper: White, Black, Studio Light Sending Joy 6x6 Paper Pad

Accessories/Tools: Distressing Tool, Embossing Powder Tool, Gold Embossing Powder, Heat Tool, May Arts ⅝” Twill- 30 yd spool- Sage, Venise Lace- Gabriella- 1.75” White

I enjoy playing along with online challenges and will be linking the Rose- Breasted Grosbeak card to the Sparkles Christmas #155 December Animals or Birds Challenge.

If you have a chance, stop by and check out the current specials at Stamp Simply!


Thanks again for visiting and I hope you have a fabulous weekend! 

Saturday, February 19, 2022

Hope and a Future


 Hi Friends!

Today I am sharing a graduation card using the new Craft Consortium Patina 6x6 Paper Pad along with stamps, dies and twine from Stamp Simply.

The Craft Consortium Patina 6x6 paper pad has such deep, rich colors, texture and patterns- wonderful for masculine and feminine cards!


Also, Jeremiah 29:11 is one of my favorite verses and I love the font in the Scripture for Graduation and Beyond stamp set, don’t you ? It pairs perfectly with the Graduation Sentiments and also comes as a bundle. 

I am linking this card to the Watercooler Wednesday #335 “Anything Goes “Celebrating the End” (FYI- this is their final challenge).

If you have not already had a chance to do so, I hope you visit the Stamp Simply blog to see all of the inspiration from the rest of the SS Design Team as well as the final Watercooler Wednesday Challenge- beautiful galleries from all!

To create this card:

Using ground espresso distress ink, repeatedly stamp the subway style background stamp from the Graduation Sentiments (part of the Graduation Bundle) onto a panel from the Craft Consortium Patina designer paper.


Distress the edges, mount onto a piece of rust cardstock and mount onto a white card base.

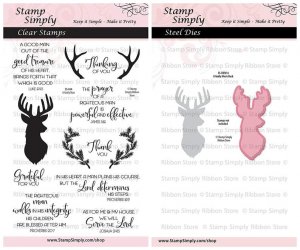
De-static a piece of white cardstock with an embossing powder tool, ink the A Godly Man buck image and the verse sentiment with archival black ink, apply clear embossing powder and heat set with a heat tool.


Die cut the verse sentiment using the outer die from the
medium pierced rectangle die, mount onto a piece of rust cardstock and trim close to the edge.

Add the knotted kraft baker’s twine  to three of the corners, add to the card front using dimensional foam or chipboard.

Die cut the buck image with the Buck Die, die cut two additional bucks from white cardstock to layer behind the stamped die cut buck.


Mount the buck image with dimensional foam (or chipboard) and add a few black rhinestones to finish off the card.


Stamp Sets: Scripture for Graduation and Beyond, Graduation Sentiments (both included in the Graduation Bundle), A Godly Man (part of A Godly Man Bundle)- all from Stamp Simply

Ink/Mediums: Versafine Onyx Black, Tim Holtz Ground Espresso Distress

Cardstock/Paper: White, Rust; Craft Consortium Patina 6x6 Paper

 Accessories/Tools:  Gemini. Jr., Stamp Simply Dies- Buck Die single or part of A Godly Man Bundle, Spellbinders Celebrations - Pierced Rectangle Dies , May Arts Baker’s Twine- 110 Yard Spool- Kraft, Kaisercraft Self-Adhesive Round Rhinestones- Black, Embossing Powder Tool, Clear Embossing Powder, Heat Tool

Thanks again for stopping by- I hope you will check out the February sale at Stamp Simply!


Saturday, February 12, 2022

Welcome Little One


Hi Friends!

Today I am sharing a baby card designed with the new Echo Park It’s A Girl 6x6 Paper Pad along with the Welcome Baby Bundle, dies, lace and other supplies all from Stamp Simply.


The new It’s A Girl paper is so cute! I love all of the sweet animal images and centered one of the little deer images on the bib die :-)

It has been a personal goal of mine to design a card for each of the 892+ sketches at Splitcoaststampers and I was able to use the SC750 sketch for the layout on this card- woohoo!

I am also linking this card to the Watercooler Wednesday WWC334 Helen’s All About Occasions Challenge (I definitely need a few more baby cards in my stash) and the Word Art Wednesday #529-#530 “Anything Goes” Challenge.


If you have not already had a chance to do so, I hope you visit the Stamp Simply blog to see all of the inspiration from the rest of the SS Design Team as well as the above challenge sites- beautiful galleries from all! 

To create this card:

Die cut the onesie die from Welcome Baby Bundle out of the light green patterned paper from It’s A Girl paper pad.  

Die cut the bib from the animal patterned paper, centering the bib over the little deer.

Layer the two die cuts together and mount onto chipboard (or dimensional foam).

Trim a piece of the animal patterned paper to approx. 3 ¾” x 5 ⅛”, mount onto a piece of green cardstock.

Layer a strip of the designer paper onto a piece of green cardstock, adhere to the far right hand side of the front panel.


Die cut a piece of coral  designer paper with a large circle die, mount onto a die cut circle from green cardstock.

Trim a far right hand side of the layered circle and mount onto the card front.

De-static a piece of white cardstock with an embossing powder tool, stamp the sentiment “Welcome Little One” onto the prepared panel with archival black ink, apply clear embossing powder and heat set with a heat tool.

Die cut the sentiments with the Fishtail Sentiment Banners dies, mount onto green cardstock (also die cut from green cardstock).


Layer the die cut sentiments onto the card front, trimming off the far right edge.

Add the ¼” white lace and mount the die cut layered onesie.

Adhere a few pearls to the upper left hand area of the circle die cut and mount the card front to the white card base to finish off the card.

I think the colors on this card are neutral enough that it could be for a girl or boy, don’t you?


Stamp Sets:  Welcome Baby Bundle (Stamp Simply)

Ink/Mediums: Versafine Onyx Black

Cardstock/Paper:  White, Mellow Moss (Stampin’ Up!), Echo Park It’s A Girl 6x6 Paper Pad

Accessories/Tools: Gemini, Jr., Welcome Baby Bundle, Stamp Simply Steel Dies- Fishtail Sentiment Banners, Sizzix Circle Dies, Embossing Powder Tool, Clear Embossing Powder, Heat Tool, ¼” White Crochet Lace, Kaisercraft Self-Adhesive Round Pearls- Pearl 

Thanks again for taking the time to visit and don’t forget the fabulous February sale at Stamp Simply- use code LOVE15.


Saturday, January 1, 2022

Year in Review 2021- Fav 6 with Stamp Simply


Happy New Year!

I hope all of you are enjoying the first day of 2022!   This past week the Design Team from Stamp Simply has been sharing their favorite six cards from 2021 and today, it is my turn.

If you have not checked out the rest of the Design Team choices, I hope you will find time to do so- gorgeous inspiration from all!

I always have a difficult time choosing favorites, do you? Especially from my own cards since I am my own worst critic, lol! 

Here are the six cards from this past year that have special meaning to me.

A Godly Man- His Children Are Blessed After Him


Stamp Sets:   A Godly Man Bundle 

Ink/Mediums: Versafine Onyx Black

Cardstock/Paper: Little Lumber Jack 6x6 Paper Pad by Echo Park

Dies/Embossing Folders, Etc: Stamp Simply Steel Dies- A Godly Man Buck,

Sizzix 3D Texture Fades A6 Embossing Folder- Lumber , May Arts Bakers Twine- Kraft- 100 yd Spool


One Nation Under God


Ink/Mediums:  Versafine Onyx Black, Zig Wink of Stella Brush- Clear Glitter Marker

Cardstock/Paper:  Craft Consortium Wood Textures 6x6 Paper Pad

Dies,  Sizzix Thinlits Dies by Tim Holtz- Crochet, Stamp Simply Steel Dies- Floral Cluster & Sprigs Dies ,  May Arts Burlap String- 400 yard spool- Natural, Kaisercraft Self-Adhesive Round Pearls- Pearl 

Pastor Appreciation


Stamp Sets: Pastor & Ministry Appreciation Scripture Sentiments, Give Thanks, Harvest 

Ink/Mediums:  Versafine Onyx Black, Zig Wink of Stella Clear Glitter Marker

Paper: Craft Consortium Wood Textures 6x6 Paper Pad

Dies, Etc: Harvest, Give Thanks; Sizzix Thinlit Dies by Tim Holtz- Tag Collection, Divine Twine Baker’s Twine- Black


Upon Every Remembrance of You


Stamp Sets:  Give Thanks 

Ink: Versamark Watermark Pad

Paper: Craft Consortium Ink Drops 6x6- Vivid, Luxury Pearlescent Metallic Cardstock #105- Gold 15 ct

Dies: Sizzix Thinlit Dies by Tim Holtz Skeleton Leaves

Thanks again for taking the time to visit!  I hope all of you have a wonderful New Year and stop by again soon!


Related Posts Plugin for WordPress, Blogger...