Showing posts with label Eau de Parfum. Show all posts

Thursday, June 8, 2017

Eau De Parfum

Hi Friends!

I had a chance to spend some time stamping last night and wanted to create another card using the Artistic Outpost Eau de Parfum background stamp along with the new distress oxide inks (I finally was able to order mine and received them this past week).
 
 
If you have not had a chance to check out the Artistic Outpost blog or the other challenge sites yet, I encourage you to do so!  

Inspiration is posted each week on the AO Blog/ AO Facebook Page and the challenge galleries have fabulous inspiration as well!

To create this card:

1). Tap the Distress Oxide ink pads (Worn Lipstick, Peeled Paint and Wilted Violet) onto a craft mat, spritz with water and lay a piece of watercolor paper into the ink.  Lift up and dry with the heat tool, spritzing additional water as you dry.  Keep repeating until you are satisfied with the results.

2). De-static the panel with an embossing powder tool, stamp the Eau de Parfum background stamp with Versamark™ ink, apply black embossing powder and heat set with the heat tool. Trim the panel and mount onto a piece of black cardstock.  Add additional color to the flowers and leaves with distress markers- picked raspberries, mowed lawn and use a wisteria wonder marker to color the perfume bottle. Add a few highlights with an extra fine white paint pen.

3).  On a piece of white cardstock,  splash a bit of worn lipstick and peeled paint distress oxide ink, ink the large splatter stamp from Grunge Elements using black soot distress ink, trim and mount onto a piece of black cardstock before mounting onto the white card base.  Use a stencil brush with a dot stencil to lightly stencil worn lipstick oxide ink to the opposite corners.  

4). Create the banner using a piece of green polka dot pattern paper from the Birthday Brights 6x6 Paper Pad, mount onto black cardstock.  Use a paint brush to apply peeled paint oxide ink and picket fence distress stain before mounting onto the card front.

5). Add the focal image panel onto the card front with dimensional foam.

6). Die cut and emboss a piece of black cardstock with the ODBD Custom Small Bow Dies, add a green button to the center and mount onto the card front to finish off the card.


Thanks again for taking the time to stop by and visit- hugs and I hope you have a great  week, sweet friends!

Friday, April 28, 2017

Floral Eau de Parfum


Hi Friends!

I had a chance to create another Mixed Media card using the Artistic Outpost Eau de Parfum background stamp from the February release along with ODBD Custom Dies and Paper (all available from Our Daily Bread Designs). 
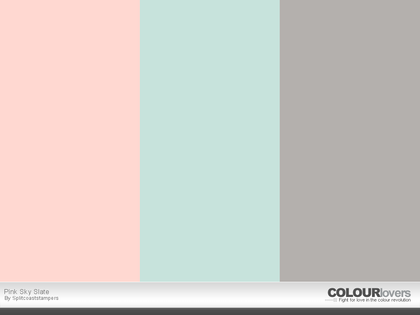
I like to participate with online challenges and incorporated the Splitcoaststampers CC632 Color Challenge, the Mojo Monday #494 Sketch Challenge and the Word Art Wednesday #280-#281 “Anything Goes” Challenge into the design.

If you have not had a chance to check out the Artistic Outpost blog or the other challenge sites yet, I encourage you to do so!  Inspiration is posted throughout the week on the AO Blog and the challenge galleries have wonderful samples as well!

To create this card:

1). Ink the Eau de Parfum background stamp with copic friendly black ink, stamp onto a piece of white cardstock.  Color the image with alcohol and water-based markers as well as a water soluble graphite pencil for shadows.

2). Die cut and emboss two pieces of black cardstock- one with the ODBD Pierced Squares Dies and another with the ODBD Pierced Rectangles Dies.

3). Trim a piece of ODBD Chalkboard Collection 6x6 Paper to fit the rectangle die cut and trim the stamped Eau de Parfum image to fit the square die cut.

4). Trim a piece of white cardstock for the card front, mount onto a piece of black cardstock and lightly stencil gray ink onto the edges.

5). Layer the rectangle die cut with pink grosgrain ribbon, wrapping the ends behind the card front and mount onto the white card base.

6). Mount the focal image with dimensional foam.

7). Die cut the ODBD Rose Die from light blue cardstock, separate the fibers and petals, assemble the rose and add the die cut/embossed ODBD Rose Leaves (created from green cardstock). 

8). Mount the flower to the card front, apply a clear shimmer pen to all of the petals and add pearls to the corners to finish off the card. 

Thanks again for taking the time to stop by and visit- hugs and I hope you have a great weekend!

Saturday, April 8, 2017

Spotlighting with Eau de Parfum


Hi Friends!  

I wanted to share with you here another quick Mixed Media card using the Eau de Parfum background stamp from  Artistic Outpost along with ODBD Custom Dies (all available from Our Daily Bread Designs) that I am sharing today on the AO blog as well :-)

I just love the vintage feel of the images in the Eau de Parfum background- the gorgeous flowers, the perfume bottle as well as the accents of Paris- don’t you?

I decided to showcase the spotlighting technique for this card and incorporated the Splitcoaststampers CC629 Color Challenge along with the Addicted to Stamps and More #236 “Anything Goes” Challenge. 

If you have not had a chance to visit the challenge sites or The Artistic Outpost Blog / AO FB page yet, I encourage you to do so- wonderful inspiration from all!

To create this card:

1). Stamp the Eau de Parfum background image using archival black ink onto white cardstock.

2). Die cut and emboss the circle from the stamped image using the Pierced Circles Dies before adding color to the die cut with a water brush along with water-based markers and a water soluble graphite pencil (for shadows).  Once the coloring has dried (I use a heat tool to speed up the process), add details on the flowers with an extra fine white paint pen and shimmer to the perfume bottle with a clear glitter pen.

3). Add a few shadows with the water soluble graphite pencil using the water brush to the remainder of the background before fussy cutting around the deckled edge of the image and adding white highlights to the flower centers with an extra fine white paint pen.

4). Die cut and emboss a piece of white cardstock using the Pierced Rectangles Dies, mount onto a piece of black cardstock, trim close to the edge and adhere the layered panel  onto the white card front.  Add the fussy-cut background to the card front.

5). Die cut and emboss a piece of sugarplum cardstock with the Pierced Rectangles Dies, lightly stamp the Eau de Parfum background on the edges (lining up with the initial stamped background)  using a watermark ink and mount onto the card front.

6). Line up and adhere the spotlighted die cut circle with dimensional foam to finish off the card.

Thanks again for taking the time to visit- hugs and I hope you have a wonderful week, my friends!

Saturday, March 11, 2017

Eau de Parfum with a Touch 'O Green and Gold


Hi Friends!   I am sharing this card on the Artistic Outpost blog today and wanted to share the step by step instructions here with you as well. 

This card was designed using the Artistic Outpost Eau de Parfum background stamp from along with the ODBD Pierced Rectangles Dies (all items available at Our Daily Bread Designs).

I decided in honor of the upcoming St. Patrick’s Day holiday to incorporate a bit of green and gold using the Splitcoaststampers’ CC625 "The Wearing O' The Green" Color Challenge along with the Word Art Wednesday #272-#273 “Anything Goes” Challenge as well as the Alphabet "Z for Zero Embellishments" Challenge.

If you have not had a chance to visit The Artistic Outpost Blog or the other challenge sites yet, I encourage you to do so- gorgeous inspiration from my sisters on the Artistic Outpost DesignTeam  as well as the Splitcoaststampers and Word Art Wednesday galleries!

To create this card:

1). Trim a piece of black cardstock and mount onto the white card base.

2). Die cut and emboss a piece of emerald cardstock with the ODBD Pierced Rectangles Dies and set aside.

3). Ink the AO Eau de Parfum background stamp  with archival black ink, heat set with the heat tool before using watercolor pencils and water based markers to watercolor the images.  Add white highlights to the flower centers with an extra fine white paint pen and use gold distress stain along with a gold metallic marker to color the flower bowl.

4). Add shimmer to the blossoms using a water brush with frost white shimmer paint and use a clear glitter pen to add shimmer to the perfume bottle.  Fussy-cut the image, mount onto a piece of black cardstock before adhering to the card front.


Quick and easy!  This was a fun card to design and I hope I have inspired you to create something this week!  

Thanks again for taking the time to visit, hugs, sweet friends!


Friday, March 3, 2017

Eau de Parfum


Hi Friends!   I will be sharing this card on the Artistic Outpost blog tomorrow and wanted to share the step by step instructions here with you as well :-)

This card was designed using the new Eau de Parfum background stamp from the AO February 2017 Release along with the ODBD Pierced Rectangles Dies and ODBD Beautiful Borders Dies (all items available at Our Daily Bread Designs).

To create this card:

1). Trim a piece of dark eggplant cardstock and mount onto a piece of soft plum cardstock. Trim again and mount onto the white card base.  Distress and “antique” the edges with a sponge and vintage photo distress ink.

2). Die cut and emboss a piece of soft plum cardstock with the ODBD Pierced Rectangles Dies (split the die in two).  Die cut and emboss a piece of vanilla cardstock with the ODBD Beautiful Borders Dies. Layer the border die with the split rectangle die to create the horizontal element on the card and cover the seam with dark purple satin ribbon (wrapping the ribbon ends behind the card front).

3). Ink the AO Eau de Parfum background stamp  with embossing ink, stamp onto a piece of vanilla cardstock and heat emboss with espresso embossing powder.

4). Once the embossing powder has cooled, use a water brush with water based markers and watercolor pencils to color the image.  Add distressing with vintage photo distress ink to the paper to additionally “antique” the image.  Fussy-cut the image, mount onto a piece of vanilla cardstock and use a distressing tool to distress the edges.

5). To finish off the card, use a white paint pen to add highlights to the flower centers, a clear shimmer pen to add shimmer to the flowers and a few pearls to the corners.


Thanks again for taking the time to stop by!  I hope you have a wonderful weekend, my friends!

Wednesday, February 15, 2017

Welcome to the Artistic Outpost February Release!


Hi Friends! 

Today we are celebrating the February 2017 Release at the Artistic Outpost!


This new release comprises of three gorgeous background stamps, Eau de Parfum, Eiffel Collage and Roses in Paris and I absolutely love all three of these beautiful images! 

We are having a blog hop in celebration and I hope that you will find the time to hop along with us (see more details below) ....


My first Mixed Media card features the AO Eiffel Collage and the ODBD Pierced Rectangles Dies.  


The background was heat embossed with clear embossing on black cardstock as well as black embossing on white cardstock before piecing the two together and coloring with water based markers.

My second Mixed Media card features the AO Eau de Parfum stamp along with ODBD Pierced Rectangles Dies and ODBD Beautiful Borders Dies. 


Again, this image was heat embossed with brown embossing powder and watercolors were used for the coloring.  

I think that these gorgeous Parisian inspired images can be used for so many occasions, don't you?

We want you to be able to find the time to hop along with us so I will share more details on how I created each of these cards in a future post :-)  Please stop by and visit my AO Sister DT Blogs and leave a comment for a chance to win a prize! 

         Avril * Terry * Julie (you are here)


Prize Information:
Just for commenting on the Design Team Blog Posts, you have a chance to win a $15 Gift Certificate to the ODBD Website.  You have until February 17th, 2017 at 10:00 PM CDT to leave comments on the participating designer’s blogs for a chance to win! One random winner will be selected from the comments left on the designers blogs, the winner will be announced on the AO Blog on February 18, 2017, be sure to check back there to see if you have won! 

Thanks again for taking the time to visit- hugs and I hope you have a wonderful week!
Related Posts Plugin for WordPress, Blogger...