Showing posts with label #bible. Show all posts

Wednesday, June 12, 2024

TCC208 Hello Summer- Be Still and Know


Hi Friends!

I had so much fun in creating my previous card, I decided to create a second card for our #208 {Hello Summer} Challenge at the The Card Concept!

Just a reminder, this will be our last challenge before our summer break and we are looking forward to seeing what inspires your card from our inspiration photo!

Will it be the overall theme, the colors, textures, stripes, pillows, patterns or something else?

I was inspired by the theme, colors and textures and decided to pull out the Stamp Simply set, Words of Encouragement for the verse sentiment and paired it with two retired Stampin’ Up! sets, Nature’s Wonder and the Wonderfully Worn background stamp for my fairly clean and layered Mixed Media card.

As I mentioned previously, it has been a goal of mine to try to ink up some of my many retired stamp sets and I have always loved this sand dollar image and the background stamp was used as a grunge element.

I also enjoy participating with online challenges and will be playing along with one of my favorite challenges, the Word Art Wednesday #651-#652 “Anything Goes” Challenge.  

I hope you will take a moment to visit our challenge blog and see how the rest of the Design Team were inspired- they are so creative!!


To create this card:

On a piece of white cardstock, de-static with an embossing powder tool, ink the retired Nature’s Wonder image with Versafine Black Onyx ink, stamp onto the prepared panel, apply clear embossing powder and heat set with a heat tool.

Once the embossing has cooled, watercolor with distress oxide inks and trimming the image close to the edge.

Mount the image onto black cardstock, trim and mount onto white cardstock, trim once more and mount onto black cardstock.

Press Broken China and Peacock Feathers Distress Oxide ink onto a silicone mat.  Lightly spritz with water, press a piece of white cardstock into the ink to create the background.

Use a heat tool to dry the panel. 

Ink the Wonderfully Worn background with Versafine Black Onyx Ink, carefully press the panel along the background stamp in various places to create the distressing on the panel.


Once the ink has dried, de-static the lower right hand area, ink the sentiment with Versafine Black Onyx and stamp onto the prepared panel.  Apply clear embossing powder and heat set with a heat tool.

Trim the panel to approx. 4” x 5 ¼”, mount onto black cardstock. 

Add the ¼” black grosgrain ribbon onto the panel and wrap the ends behind the panel.

Mount the entire background panel onto aqua cardstock before adhering to a white card base.

Add the layered sand dollar image onto the card front with dimensional foam.

Add Frost White Shimmer Paint with a water brush to add shimmer to the sand dollar image along with a few black rhinestones to finish off the card.


Stamp Sets: Words of Encouragement (Stamp Simply), retired Nature’s Wonder, Wonderfully Worn background (Stampin’ Up!)

Inks/Mediums: Versafine Onyx Black,  Tim Holtz™ Distress Oxide Ink- Broken China, Peacock Feathers, Hickory Smoke; Frost White Shimmer Paint

Cardstock/Paper: White, Black, Bermuda Bay

Accessories/Tools: Embossing Powder Tool, Clear Embossing Powder, Heat Tool, AquaPainter™, ¼” Black Grosgrain Ribbon, Black Rhinestones

Thanks again for taking the time to stop by! I hope you are inspired to create a card and join us for our #208 {Hello Summer} Challenge at The Card Concept!  The deadline to play along is Monday, July 8th  at noon EST. 

     Also, I hope you have a chance to check out the specials at Stamp Simply!


Saturday, February 18, 2023

He Has Risen


Hi Friends!

This week the Design Team at Stamp Simply are sharing Easter, Spring and floral cards.

With Easter fast approaching, I decided to use the new Craft Consortium InkDrops- Sunset 6x6 paper for the background and paired it with two different stamp sets, dies and other accessories all from Stamp Simply!

I hope you have time to check out the rest of the inspiration from the Design Team- gorgeous projects by all!


This card was created by heat embossing the daffodil image from
He Lives with white embossing powder onto the orange patterned ink drops paper.  I love the patterns on the ink drop papers- wonderful for backgrounds as well as stand-alone cards.


The
cross was die cut and embossed from white cardstock before being layered onto two additional crosses die cut from black cardstock.

The rolled flower was created by hand- I cut a rough circle from a scrap piece of the background paper, spiral cut from the outside in and crimped with a crimper tool. Once crimped, I rolled the flower from the outside in, and adhered with adhesive. 

The flower was layered with die cut leaves from the Two Sprigs Die set.

The orange jewels on a string are part of the new May Arts Vintage Sampler- On Fire with Orange and Yellow. They fit perfect in the cross (I added a bit of adhesive behind the cross to hold the jewel strand in place).

The sentiment from He Has Risen was heat embossed with black ink and clear embossing powder and the card was finished off with a few pearls.

Stamp Sets: He Has Risen, He Lives (Stamp Simply supplies)

Inks/Mediums: Versamark, Versafine Onyx Black

Cardstock/Paper: Black, Craft Consortium Ink Drops- Sunset 6x6

Accessories/Tools: Gemini, Jr., Stamp Simply Steel Dies- Crosses, Two Sprigs; .75” Lucia Lace- White, Embossing Powder Tool, Clear and White Embossing Powder, Heat Tool, Kaisercraft Round Self-Adhesive Pearls- Pearl, May Arts Vintage Sampler- On Fire with Orange and Yellow

As many of you who follow my blog know, I enjoy participating with online challenges and will be linking to the  Word Art Wednesday #583-#584 “Anything Goes” Challenge.

Also, don’t forget to check out the wonderful array of Easter/Spring sets at Stamp Simply! 


Saturday, December 3, 2022

Beginning of Knowledge


Hi Friends!

Today I am sharing a quick card using stamps, dies and other supplies all from Stamp Simply!

This year (since my husband passed away in April) I have been busy with yard work, especially this fall with all of the leaves.  We have six majestic oaks that tend to drop their leaves late in the year, so needless to say, I have not had as much time to spend time stamping as I would like.

Since I have more limited time creating, I am trying to create more clean and layered cards using items that I have on my desk, etc.

I had the white tag already die cut and decided to pull out the A Man of Knowledge set and paired it with the Have A Cup On Us Bundle to create a card for one of the ladies in our Bible Study.  

I love A Man of Knowledge stamp set, it is so versatile for feminine and masculine cards!

This was an easy card to create:


Emboss a piece of white cardstock using the Sizzix 3D Texture Fades Intertwine Embossing Folder (this was the first time that I had a chance to use this folder- I love the texture and it even leaves a few openings just like it would if you were to weave the pieces).

Trim the embossed panel and mount onto a piece of black cardstock.

Wrap a piece of Rachel 1.5” White Lace, wrap the ends behind the panel.

Mount the panel onto a white card base.

Ink the stack of books from A Man of Knowledge stamp set with Versafine Onyx Black ink, apply clear embossing powder and heat set with a heat tool.


Once the embossing has cooled, color the books with water-based makers and fussy cut the books (cutting a few apart).

De-static the upper portion of the tag, stamp the sentiment from A Man of Knowledge with Versafine Black Onyx ink, apply clear embossing powder and heat set with a heat tool.

Adhere the stacked books onto the tag (I still have a set of three books from the original image left over for another project). 

Add the peach seam binding tied with natural twine and adhere the tag to the card front with dimensional foam.

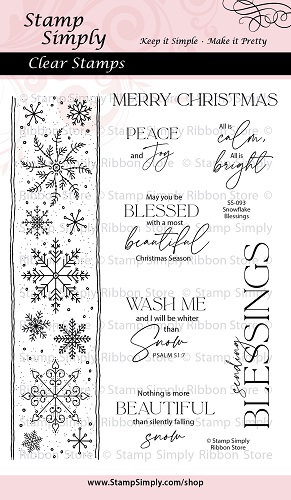
The cup image was on my desk as well from a previous day of stamping (I heat embossed the image from Have A Cup on Us and die cut with the coordinating die).  I used a masking technique to stamp/heat emboss the snowflake strip from  Snowflake Blessings Strip stamp set onto the die cut coffee cup image.

Use a light blue water-based marker to color the snowflake on the coffee cup, adhere to the card front and add a pearl to the center of the snowflake to finish off the card.

I enjoy participating with online challenges and will be linking this card to the
Double D “Hot Beverage” Challenge along with the Simon Says Wednesday “Anything Goes” Challenge.

Stamp Sets: A Man of Knowledge , Have A Cup On Us Bundle, Snowflake Blessings Border Strip (Stamp Simply)

Ink/Mediums: Versafine Onyx Black, Water-based Markers

Cardstock/Paper: White, Black


Accessories/Tools: Gemini, Jr. , Stamp Simply Dies- Have A Cup On Us Bundle, Sizzix Thinlit Dies by Tim Holtz- Tag Collection, Sizzix 3D Texture Fades A6 Embossing Folder- Intertwine, Rachel 1.5” Lace – 3 yds White, Seam Binding Sampler- Spring- 30 yds, Kaisercraft Self-Adhesive Pearls- Pearl


Also, check out the current December special from Stamp Simply! 


Thanks again for taking the time to visit- I hope all of you have a great week!
 

Saturday, February 20, 2021

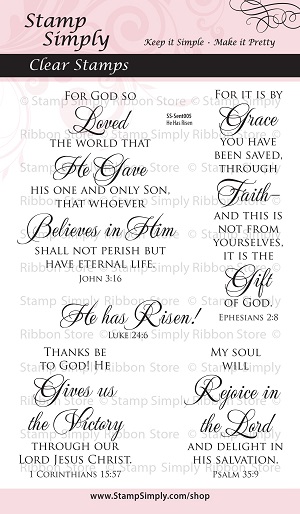
Victory Through Our Lord Jesus Christ


Hi Friends!

With Easter fast approaching, I am sharing another Easter card designed using stamps, dies and paper from The Stamp Simply Ribbon Store.

There are so many stamp sets for Easter at The Stamp Simply Ribbon Store in addition to the New Release scheduled for reveal this coming week!

This is card features a “faux” alcohol ink background using a piece of designer paper from the Consortium Vivid Ink Drops 6x6 paper pad.

This paper pad has so many beautiful backgrounds- as I mentioned in a previous post, I do enjoy working with alcohol inks, but it can be messy, the Vivid Ink Drops paper pad takes all the work out of creating those fun backgrounds!

I enjoy participating in online challenges and am linking this card to #IB162“Inspired By Quote” Challenge.  I love using Scripture on my cards and this is one of my favorite verses.  

In addition to the Inspired By Challenge, I am also playing along with the Word Art Wednesday #479-#480 “Anything Goes” Challenge, the Stamping Sensations “Color My World” Challenge, the Double Trouble #77 “Layer It On” Challenge and partnering with the Crafter's Cafe #260 "Lace/Pearls" Challenge. 

If you have not had time to check out the Stamp Simply blog or the other challenge sites yet, I hope you will do so- gorgeous inspiration from all!


To create this card:

Cut a piece of black cardstock to 4 ¼” x 5 ½”, adhere a piece of 4” x 5 ¼” white cardstock to the panel.


De-static the lower edge of a 3 ¾” x 5” piece of the Vivid Inks designer paper with an embossing powder tool, stamp the 1 Corinthians 15:57 verse sentiment from He Is Risen with Versafine Onyx Black ink, apply clear embossing powder and heat set with a heat tool.

Once the embossing has cooled, adhere to the background panel and mount onto a white card base.


Create the paper lace from white cardstock using the Tim Holtz Crochet Die adhere to the background panel.

Add a strip of 5/8” Black Twill Ribbon, wrapping the ends behind the panel. 

Adhere to the background panel to a white card base.

For the floral image, use an embossing powder tool to de-static a piece of white cardstock, stamp the floral image from Floral Clusters- Summer Roses with Versafine Onyx Black ink, apply clear embossing powder and heat set with a heat tool.

Once the embossing has cooled, watercolor the image using water-based makers and die cut with the coordinating Floral Clusters Single Die.  Die cut two more of the florals from white cardstock, adhere behind the colored floral image.

Mount onto the card front using dimensional foam or chipboard.

Use a clear glitter pen to add shimmer to the flower petals, a white paint pen to add highlights to the flower center and a few pearls to the floral centers.

Finish off the card with black rhinestones in the upper left-hand corner.  


Stamp Sets:  He Is Risen,  Floral Clusters- Summer Roses  (Stamp Simply)

Ink/Mediums: Versafine Onyx Black, Water-based Markers- Purple, Pinks, Reds, Light and Dark Green; Zig Wink of Stella- Clear Glitter Marker, Extra Fine White Paint Pen

Cardstock/Paper: White, Black; Craft Consortium Ink Drops- Vivid 6x6 Paper Pad

Accessories/Tools: Gemini, Jr., Stamp Simply Dies- Floral Cluster & Sprigs Dies (part of the Floral Cluster Bundle), Sizzix Thinlit Dies by Tim Holtz- Crochet, Embossing Powder Tool, Clear Embossing Powder, Heat Tool, 5/8” Black Twill, Pearls, Black Rhinestones

Thanks again for taking the time to stop by- I hope all of you have a safe and warm weekend/week!

Thursday, August 6, 2020

Love One Another


Hi Friends!

This card was designed using two retired stamp sets, Wonderful Moments (Stampin’ Up!) and Scripture Medley 5 (Verve Stamps) for my niece (her colors are red, white and blue).  


If you have not had a chance to check out the above challenge sites yet, I encourage you to do so- fabulous inspiration from all!

To create this card:

De-static a piece of vellum with an embossing powder tool, ink the Wonderful Moments stamp image with Versamark™ ink, stamp onto the prepared vellum, apply gold embossing powder and heat set with a heat tool.

Once the embossing has cooled, trim the panel and mount onto a piece of white cardstock.

Repeat the above steps with the sentiment onto white cardstock, die cut with a stitched oval die, mount onto a oval die cut from navy cardstock.

Die cut a stitched rectangle from navy cardstock a bit larger than the bride image, mount the bride image onto the navy rectangle and add the strip of red satin ribbon. 
Mount the bride panel onto a white square card base (my card is 5 ½” square).  Add the oval sentiment with chipboard (or dimensional foam).

Create the rolled flowers from white and navy cardstock.  Add the green leaves along with the rolled flowers to the card front.

Finish off the card using a glitter pen to add shimmer to the flower petals, a few pearls and a red satin bow.

Stamp Sets: Wonderful Moments (retired Stampin’ Up!), Scripture Medley 5 (retired Verve Stamps)

Ink/Mediums: Versamark™ , Spectrum Noir™ Clear Glitter Pen

Paper/Cardstock: Whisper White, Night of Navy, Garden Green, Vellum

Accessories/Tools: Gemini, Jr™, My Favorite Things Dies- Stitched Rectangle STAX A2 Set 1,  Stitched Oval STAX, Mini Royal Rose; Martha Stewart™ Leaf Punch,  ⅝” Red Satin Ribbon

Thanks again for taking the time to stop by- I hope all of you have a great week!

Saturday, May 9, 2020

Lilac- I Will Never Leave You


Hi Friends!

I am sharing another card today that uses one of my neglected stamp sets- Lilac from Technique Tuesday along with a verse sentiment from Fear Not (Stamp Simply).

I have owned the Lilac set for at least a year or more and this is the first time that I have had a chance to ink it up.  My mother loved lilacs and when I saw this image, I knew I would have to add it to my stamp “collection”. 

I am still working through the Splitcoaststampers’ Sketch Challenges and used the SC183 Sketch for the layout on this card.  I decided to create a portrait version and my layer for #4 is a bit smaller so you can see more of the lilac image :-)  Plus I added a ribbon/bow at the bottom to balance out the card.

I am also participating with the Double “D” 05/06 “Lavender-Lilac-Purple” InspirationChallenge (I was inspired by all of the beautiful flowers and especially the lilacs) and the Word Art Wednesday #438-#439 “Anything Goes” Challenge.

The lilac image was heat embossed with clear embossing powder and colored with water-based markers. Distress Oxide ink was used for the background and the panel was die cut with a stitched rectangle die.

The sentiment was heat embossed with white embossing powder onto black cardstock and die cut with a stitched rectangle die.

The background panel of white cardstock was embossed with a script embossing folder and all of the layers were mounted onto black cardstock.

A bow of black seam binding was added before mounting the main focal image panel was adhered to the card front with dimensional foam.

A clear glitter pen was used to add shimmer to the petals and an extra fine white paint pen to add a few highlights to finish off the card.

Stamp Sets: Lilac (Technique Tuesday), Fear Not (Stamp Simply)

Ink/Mediums: Versafine™ Onyx Black, Stampin’ Write Markers- Gorgeous Grape, Highland Heather, Old Olive; Tim Holtz™ Tumbled Glass Distress Oxide;  Spectrum Noir™ Clear Glitter Pen, Extra Fine White Paint Pen

Cardstock/Paper:  Whisper White, Basic Black, retired This and That Epic Day Designer Series Paper

Accessories: Gemini, Jr™, My Favorite Things Stitched Rectangle A2 STAX Set 1 Dies, Darice™ Script Embossing Folder, Embossing Buddy®, Clear and White Embossing Powder, Heat Tool, AquaPainter™, ½” Black Seam Binding

Thanks so much for taking the time to visit- I hope you will stop by again soon!  Hugs, sweet friends!
Related Posts Plugin for WordPress, Blogger...