Showing posts with label Easter Morn. Show all posts

Thursday, April 25, 2019

He Is Risen #3


Hi Friends!

This is another Easter card that I designed using the cross image from the retired Easter Morn stamp set (Stampin’ Up!). 

 I chose this image since it reflects the true meaning of Easter.   "Believe on the Lord, Jesus Christ, and you will be saved" Acts 16:31a.  I am so thankful that I accepted Christ as my Savior in 1996 and know that I will spend eternity with Him in Heaven.  Alleluia- What a Savior!!

I have created several different card designs with the same main cross image.  I will be posting them throughout the week and if you are interested, here are the other posts so far-  

I decided to create a Clean and Simple (CAS) mixed media card for the Less Is More #393 "Subtle Colours" Challenge.


If you have not had a chance to visit the above challenge galleries yet, I encourage you to do so- fabulous inspiration from all!

To create this card:

1). De-static a piece of white cardstock with an embossing tool, stamp the cross image with Versafine™ Onyx Black ink, apply clear embossing powder and heat set with a heat tool.

2). Once the embossing has cooled, color the cross image using water-based markers.  Fussy-cut the image and set aside.  (FYI- I stamped nine images on a piece of 8 ½” x 11” white cardstock, stamped and embossed the images before using the Brother Scan-n-Cut to cut out the images.)

3). Fold a piece of 4 ¼” x 11” piece of white cardstock in half for the card base.  Use a score board to score lines on the front of the card panel at 1 ¼”, 1 ⅜”, 3 ⅛ “ and 3 ¼”.  It is a bit difficult to see the score lines in the photo but they are there :-)
  
4). Mount the cross image using dimensional foam.

5).  To finish off the card- use a clear glitter pen to add shimmer to the petals, cross and dove.  Add white highlights to the flower centers with a white paint pen.
Stamp Sets: Easter Morn (retired Stampin’ Up!)

Ink: Versafine™ Onyx Black, Stampin’ Write Markers- Daffodil Delight, Crushed Curry, Rich Razzleberry, Coastal Cabana, Gable Green; Spectrum Noir™ Clear Glitter Pen, Sharpie™ Extra Fine White Paint Pen

Paper: Whisper White

Accessories: Embossing Buddy®, Clear Embossing Powder, Heat Tool , Scoring Tool, Scoring Board, AquaPainter™

Thanks again for taking the time to stop by!!   Hugs and I hope you can visit again soon!

Wednesday, April 24, 2019

He Is Risen #2


Hi Friends!

This is another Easter card that I designed using the cross image from Easter Morn (retired Stampin’ Up!) – if you are interested, another design using the same image was posted here and here. 


If you have not had a chance to visit the above challenge galleries yet, I encourage you to do so- fabulous inspiration from all!

To create this card:

1). De-static a piece of white cardstock with an embossing tool, stamp the cross image with Versafine™ Onyx Black ink, apply clear embossing powder and heat set with a heat tool.

2). Once the embossing has cooled, color the cross image using water-based markers.  Fussy-cut the image and set aside.  (FYI- I stamped nine images on a piece of 8 ½” x 11” white cardstock, stamped and embossed the images before using the Brother Scan-n-Cut to cut out all of the images.)

3). Fold a piece of 4 ¼” x 11” piece of white cardstock in half for the card base.  Emboss the front panel with an embossing folder.

4). Emboss another panel of white cardstock using a lace embossing folder, cut the strips for the vertical layers of the sketch and mount onto white cardstock.  Use the remaining part of the embossed panel for the horizontal layer (also mounting it onto white cardstock). 

5).  Adhere the horizontal layer to the card front and add the vertical strips (using dimensional foam). 

6). Die cut a circle and a doily from white cardstock, layer and mount onto the front of the card base.

7). Mount the cross image using dimensional foam.

8).  Use a clear glitter pen to add shimmer to the petals, cross and dove.  Add white highlights to the flower centers with a white paint pen.

Stamp Sets: Easter Morn (retired Stampin’ Up!)

Ink: Versafine™ Onyx Black, Stampin’ Write Markers- Daffodil Delight, Crushed Curry, Melon Mambo, Rich Razzleberry, Coastal Cabana, Gable Green; Spectrum Noir™ Clear Glitter Pen, Sharpie™ Extra Fine White Paint Pen

Paper: Whisper White

Accessories: Embossing Buddy®, Clear Embossing Powder, Heat Tool , Big Shot™, Harlequin and Lace Dynamic Embossing Folders, Circle Dies (retired SU!), Doily Die (Divinity Designs, LLC)

Thanks again for taking the time to visit- hugs and I hope you have a wonderful week!

Tuesday, April 23, 2019

He Is Risen


Hi Friends!

I hope all of you had a fabulous Easter Weekend and Resurrection Sunday!!  

I am still working on my goal of using stamps and products that I have already in my “collection” and created several Easter cards using the cross image from Easter Morn (a retired Stampin’ Up! stamp set).

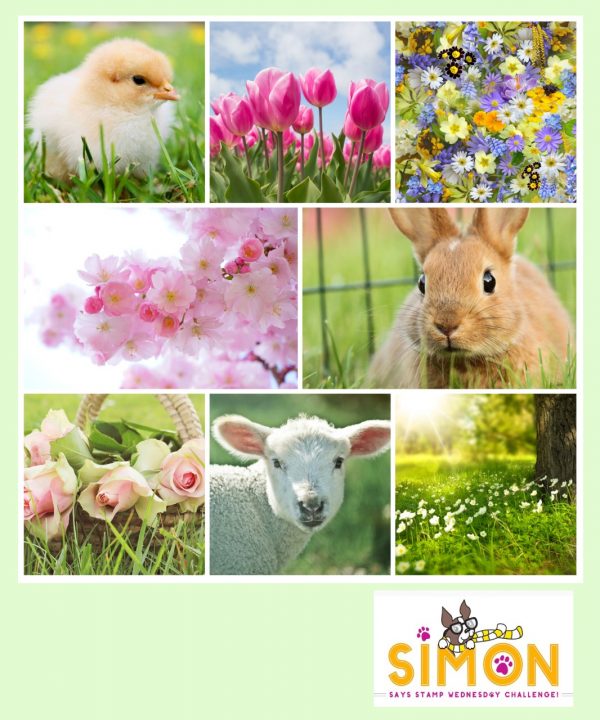
This card I paired with a sentiment from the retired Stampin’ Up! set, Crazy About You and am participating with a few online challenges- the sketch from CASE This Sketch #318 (Retro #218) Challenge along with the Simon Says Wednesday 04/17 Spring Mood Board Challenge (I was inspired by the multi colored flowers) and the Try It On Tuesday “Springtime” Challenge.

If you have not had a chance to visit the above challenge galleries yet, I encourage you to do so- gorgeous inspiration from all!

To create this card:

1). De-static a piece of white cardstock with an embossing tool, stamp the cross image with Versafine™ Onyx Black ink, apply clear embossing powder and heat set with a heat tool.

2). Once the embossing has cooled, color the cross image using water-based markers.  Fussy-cut the image and set aside.  (FYI- I stamped nine images on a piece of 8 ½” x 11” white cardstock, stamped and embossed all of the images and used the Brother Scan-n-Cut to cut out all of the images.)

3). Fold a piece of 4 ¼” x 11” piece of white cardstock in half for the card base.  Use a score board to score lines on the front panel – score at 1 ¼”, 1 ⅜”, 3”, 3 ⅛”. 

4). Mount the cross image using dimensional foam.

5).  De-static a piece of black cardstock with an embossing powder tool, stamp the “Happy Easter” from Crazy About You with Versamark™ ink, apply white embossing powder and heat set with a heat tool.  Create the banner ends and mount onto the card front with dimensional foam.

6).  Use a clear glitter pen to add shimmer to the petals, cross and dove.  Add white highlights to the flower centers with a white paint pen.

Stamp Sets: Easter Morn, Crazy About You (both retired Stampin’ Up!)

Ink: Versafine™ Onyx Black, Versamark™, Stampin’ Write Markers- Daffodil Delight, Crushed Curry, Melon Mambo, Rich Razzleberry, Coastal Cabana, Gable Green; Spectrum Noir™ Clear Glitter Pen, Sharpie™ Extra Fine White Paint Pen
Paper: Whisper White, Basic Black

Accessories: Score Board, Scoring Tool, Embossing Buddy®, Clear and White Embossing Powder, Heat Tool 

Thanks again for stopping by!!   I am planning on sharing a few more of the cards designed with the same cross image throughout the week- hopefully you will have a chance to visit again soon!

Sunday, April 1, 2012

He Is Risen! Two Challenges and Triple Embossing?


Hi Stampers!! 

Boy, do the weeks fly by!  Here it is, another week and time for a card for the CQC130 ColourQ Challenge  and the HSSIC111 Easter Theme Challenge at Hand Stamped Sentiments!  

I chose to create a quick, CAS card using one of my favorite retired Easter sets, Easter Morn.  A bit of heat embossing, marker coloring, die cutting, dry embossing and you are finished!

To create this card:

Heat emboss the image with Stampin’ Emboss® Gold Embossing Powder (used Versamark® ink on Whisper White- this is the first embossing layer).  Color the image using Stampin’ Write markers in Daffodil Delight, Certainly Celery, Tempting Turquoise and Melon Mambo.  

Emboss a piece of Whisper White with the Square Lattice Textured Impressions™ Embossing Folder (I used a piece of Whisper White cardstock that had been previously embossed) and emboss it again the second time with the Framed Tulips Textured Impressions™ Embossing Folder  (this is the third embossing layer :-)). 

Frame the image with the Framelits™ Lables Collection and cut two other frames the same size from Melon Mambo (to layer behind the image).

Layer the entire card panel and add the Turquoise Satin Ribbon Bow (from my stash-it is definitely Turquoise IRL- photo appears a bit darker).  This ribbon was one of many that I found at a local outlet store- very pretty and since I love Satin Ribbon, of course, I had to have it:-))

Stamp Sets:  Easter Morn

Ink: Versamark™, Stampin’ Write Markers- Certainly Celery, Daffodil Delight, Melon Mambo, Tempting Turquoise

Paper: Whisper White, Certainly Celery, Daffodil Delight, Melon Mambo, Tempting Turquoise

Accessories:  Big Shot™, Square Lattice and Framed Tulips Textured Impressions™ Embossing Folders, Framelits™ Label Collection Dies, Heat Tool,  Stampin’ Emboss® Gold Embossing PowderTurquoise Satin Ribbon (from my stash)

Thanks again for stopping by- I hope all of you have a wonderful week! Easter is coming- I am so thankful that my Savior Is Risen, He Is Risen indeed! 
Related Posts Plugin for WordPress, Blogger...