Showing posts with label MFT Blueprints 13. Show all posts

Thursday, April 21, 2016

CAS Butterflies- A Sketch, Theme and Color Challenge


Hi Friends!

I had a chance to create a few quick cards this evening/morning and for this card, I decided to use Sandy's PP291 CAS Butterflies Challenge at The Paper Players along with the CYCI#116 Sketch Challenge at Can You Case It? and the Splitcoaststampers’ CC566 Color Challenge for inspiration.

I hope you will take the time to visit the above challenge sites- so much inspiration!

To create this card:

I used the Smakin' Acetate Technique to create the background panel- cut up one side of a clear envelope (or transparency sheet), open like a book and gently press the Melon Mambo Classic Ink Pad directly onto the acetate (not the whole pad only partial areas).

Add the Pretty In Pink "ink" with the Stampin’ Write Marker (I was too lazy to go into my “stock” craft room to get the ink pad :-))

Press the envelope sides back together, press down to smoosh the ink around a bit, re-open the envelope and lay a piece of Whisper White cardstock down onto the ink on one side of the envelope.

Press another piece of Whisper White cardstock into the ink on the other side of the envelope and set aside for a future project (love that this technique gives you two backgrounds).

Once the ink has dried, ink the sentiment from the Our Daily Bread Designs (ODBD) Scripture Collection 9 using Stāz-On® Jet Black Ink and stamp onto the panel.

Add a few splatters using the small splatter stamp from Timeless Textures with Melon Mambo Classic Ink and Stāz-On® Jet Black Ink.

Use the Big Shot™ with the My Favorite Things® Blueprints 13 Stitched Rectangle Die to cut out the panel and mount onto the Whisper White card base with dimensional foam.

De-static a piece of Whisper White cardstock with the Embossing Buddy® and stamp the butterflies from Papillon Potpourri with Versamark™ Ink. 

Apply Stampin’ Emboss® Black Embossing Powder and heat set with the Heat Tool.

Color the butterflies with the Stampin’ Write Pumpkin Pie Marker and use the Melon Mambo Stampin’ Write Marker to add shadows to the center of the wings.

Punch out the butterflies with the Elegant Butterfly Punch and adhere to the card front.

To finish off the card add antennas to the butterflies with an XS Faber-Castell® Black Pitt Pen Marker.

Stamp Sets: Papillon Potpourri, Timeless Textures (both Stampin’ Up!), Scripture Collection 9 (ODBD)

Ink: Versamark™, Stāz-On® Jet Black, Melon Mambo; Stampin’ Write Markers- Melon Mambo, Pumpkin Pie, retired Pretty In Pink; Faber-Castell® XS Black Pitt Pen Marker

Paper: Whisper White

Accessories: Big Shot™, MFT Blueprints 13 Die™, Elegant Butterfly Punch; Clear Envelope


Thanks again for taking the time to stop by- you are all such an encouragement to me!  Hugs and have a great week!!

Friday, October 16, 2015

HYCCT1514 Mosaic Quilt Thank You

Hi Friends!!

This card was created for the Splitcoaststampers Hope You Can Cling To  HYCCT1514 Kerry’s “Mosaic Memories” Challenge.

The challenge was to find an image of a mosaic tile for inspiration and I used this gorgeous neutral tile from this site as inspiration.

I also incorporated the Alphabet Challenge “R is for Ribbon” along with the Splitcoaststampers’ F4A258 “Teeny Tiny Art” Challenge (the quilt pattern is approx. 2/12” square).

Again, I hope you will have a chance to visit the above galleries and possibly take some time to create a card and join in on the fun!!

To create this card:

Cut three separate dies from Early Espresso, Sahara Sand and Tip Top Taupe cardstock using the Big Shot™ with the Wplus9 Designs, LLC™ Quilt Cuts 2 Die.

Adhere your quilt pattern pieces onto another square of coordinating cardstock (cut with the My Favorite Things™ (MFT) Stitched Square Die- I used Tip Top Taupe) and mount this onto a piece of Early Espresso cardstock and trim close to the edges.

Create the background banners with pieces of Sahara Sand and Early Espresso cardstock using the Big Shot™ and the MFT Jumbo Stitched Fishtail Banner Dies,  layer the smaller Early Espresso Banner behind the Sahara Sand and adhere the quilt square onto the banners on an angle.

Add the 5/8” Early Espresso Satin Ribbon triple bow and wrap the ends of the ribbon behind the banner panel.

Cut two small flag banners from the MFT Blueprints 13 Die using Sahara Sand and Early Espresso cardstock.

Stamp the sentiment from the Wplus9 Pretty Patches: Apple using Early Espresso Classic Ink onto the die cut piece of Sahara Sand, cut the Earle Espresso banner in half and adhere behind the stamped Sahara Sand banner.

Cut a piece of Tip Top Taupe cardstock with the stitched frame from the  MFT Blueprints 13 Die and mount onto a piece of Early Espresso cardstock, trim and mount onto the Tip Top Taupe card base.

Add the quilt banner layer onto the card front and mount the sentiment onto the quilt layer using Stampin’ Dimensionals®.

Add the Pearls to finish off the card.

Stamp Sets:  Pretty Patches: Apple (Wplus9 Design Studio, LLC)

Ink: Early Espresso

Paper: Early Espresso, Sahara Sand, Tip Top Taupe

Accessories: Big Shot™, MFT Blueprints 13 Dies and Jumbo Stitched Fishtail Banner Dies, Wplus9 Quilt Cuts 2 Die, 5/8” Early Espresso Satin Ribbon, Pearls


Thanks again for stopping by- I hope you have a fabulous weekend, my friends!

Tuesday, October 6, 2015

HYCCT1505 Three Decoys- Thinking of You

Hi Again Friends!


Again, I hope you have a chance to check out the challenge sites- wonderful inspiration from all!

To create this card:

Stamp the Impression Obsession® Three Decoys image and the retired hostess Stampin’ Up! sentiment from Kind & Caring Thoughts onto Very Vanilla cardstock using Stāz-On® Jet Black Ink. 

Use the Big Shot™ with the My Favorite Things™ (MFT) Blueprints 13 Die to cut out the image and mount onto Basic Black cardstock.

Adhere the entire panel to the Whisper White card base.

Use the retired Photo Corner Punch to punch out the corners from Basic Black cardstock, punch holes with the 1/16” Handheld Punch and insert the Antique Brass Brads.

To finish off the card, add the photo corners using Stampin’ Dimensionals®.

Stamp Sets: Kind and Caring Thoughts (SU! hostess set), Three Decoys (I/O)

Ink: Stāz-On® Jet Black

Paper: Very Vanilla, Basic Black

Accessories: Big Shot™, MFT Blueprints 13 Die, retired Photo Corner Punch


Thanks again for stopping by- have a terrific evening!!

Friday, September 18, 2015

MFT Nuts About You- A Fun Card for Several Challenges


Hi Friends! 

I recently purchased a few sets from My Favorite Things™ (MFT) and had not had a chance to play around with them until today :-)

I decided to play around with a MFT stencil along with the acorns from the MFT Cute Critters set to create a "Just for Fun" card - this set is so cute and MFT even has a coordinating die set to match :-)!    


Again, if you have not already had a chance to visit the above sites, I encourage you to do so- great samples from the Design Teams as well as their galleries!

Stamp Sets:  Cute Critters (MFT)

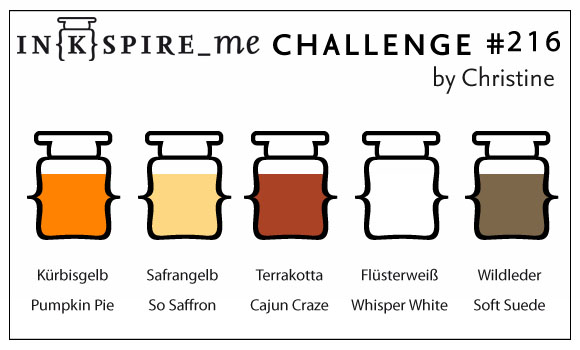
Ink: Memento™ Tuxedo Black, Cajun Craze, Pumpkin Pie, So Saffron, Soft Suede; Stampin’ Write Markers- Cajun Craze, Sahara Sand, Soft Suede, Zig® Clean Color Markers- 060, 022

Paper:  Whisper White, Cajun Craze, So Saffron, Soft Suede

Accessories:  Big Shot™, MFT Dies- Cute Critters, Stitched Horizontal Strips, Blueprints 13, Blueprints 18; MFT Stencil- On The Diagonal, Sponge Daubers, Natural Linen Thread; Crystal Effects™


OK- Version #2...For some reason, I was not thrilled with the first card so I added a bit more Pumpkin Pie on the vertical "tage" element and in doing so, accidentally sponged a bit on the white die area around the acorns  (so I removed them and "fussy-cut" the images ) :-)

Version #2- I was not happy with the 1st one so added a bit more color :-)
My normal style is a more shabby, chic/ vintage and I do struggle with the CAS or cleaner styles- but keep trying!!

So which one do you prefer?  

Version #1 or Version #2?

The shabby chic designer in me likes Version #2 better (and that is a good thing since I cannot remove the sponging now- lol!)....


Thanks again for dropping by! I hope you have a fantastic Friday, hugs to you, my friends!
Related Posts Plugin for WordPress, Blogger...