Showing posts with label TH Crochet Die. Show all posts

Saturday, April 29, 2023

TCC194 Create in Me


Hi Friends!

Welcome to our #194 {Spring Bouquet} Challenge at The Card Concept! The Card Concept is a bi-weekly photo inspiration challenge.  We would love for you to create a card based on our inspiration photo and join us!

Isn’t this a beautiful spring table setting? I was inspired by the soft pinks, blues, textures of the flowers/nests and silver accents for my Shabby and Vintage Mixed Media card.

Those of you who follow my blog know that I enjoy participating with other online challenges.  I know how much work goes into maintaining a challenge blog and want to give them support as well as enjoy seeing all of their Design Team creations and galleries :-)  

I will be linking this card to the As You Like It “Favorite Flower (and Why) Challenge (I like tulips, they are a sign of spring and one of my Mother’s favorites as well) along with the Tic Tac Toe #226 Featured Designer Elizabeth’s Challenge (left column down- Flowers, Embossing, Encouragement) and the Word Art Wednesday #593-#594 “Anything Goes” Challenge.

If you have not already visited us at The Card Concept, I hope you will find the time to do so.  Gorgeous inspiration from the rest of the DT as well as the other challenge sites.

This card was fun and fairly easy to make.

Trim a piece of the pale pink designer paper from the Echo Park My Favorite Spring 6x6 Paper Pad to approx. 4” x 5 ¼”.  Emboss with the Darice Vine Pattern Embossing Folder. 

Apply Frost White Shimmer Paint over the entire surface (I used an AquaPainter) and distress the edges with scissors and/or a distressing tool.


Tear a piece of the blue gingham patterned paper (from the My Favorite Spring Pad).  


De-static the lower right hand area, stamp the sentiment from Words of Encouragement with Versafine Onyx Black ink, apply clear embossing powder and heat set with a heat tool.


Distress the edges and add to the embossed pink background panel.  Mount the layered background panel onto a piece of white cardstock (trimming close to the edge).

Adhere a piece of white Venise Lucia .75” lace and blue seam binding (wrapping the ends of the seam binding behind the panel).

Mount onto a 4 ¼” x 5 ½” piece of the baby blue designer paper and adhere to a white card base.

De-static a piece of white cardstock with an embossing powder tool, ink the tulip image from Get Well Tulip Bundle with Versafine Onyx Black ink, apply clear embossing powder and heat set with a heat tool.

Color the tulip with water-based markers and die cut with the coordinating die (also cutting two additional tulips from white cardstock to layer behind the stamped image).

Add a looped piece of silver metallic string to the card front and mount the tulip with dimensional foam.

Die cut a piece of lace from white cardstock using the Tim Holtz Crochet Die and add a piece to the upper left hand corner.

Finish off the card with a few pearls in the upper right hand corner.

A spring time card for Mother’s Day, encouragement or “just because”.

Stamp Sets:  Get Well Tulip Bundle, Words of Encouragement (Stamp Simply)

Inks/Mediums: Versafine Onyx Black; Stampin’ Write Markers- Powder Oink, Melon Mambo, Rose Red, Granny Apple Green, Lemonlime Twist

Cardstock/Paper: White, Echo Park My Favorite Spring 6x6


Accessories/Tools: Gemini, Jr., Stamp Simply Dies- Get Well Tulip Bundle, Sizzix Thinlits by Tim Holtz- Crochet, Embossing Powder Tool, Clear Embossing Powder, Distressing Tool, Venise Lucia .75” Lace- White, Seam Binding Bundle- Blue Purples, May Arts Metallic String- Silver, Kaisercraft Self-Adhesive Round Pearls- Pearls

 Thanks again for taking the time to visit! I hope you are inspired to create a card and join us for our #194 {Spring Bouquet} Challenge at The Card Concept!

Saturday, January 29, 2022

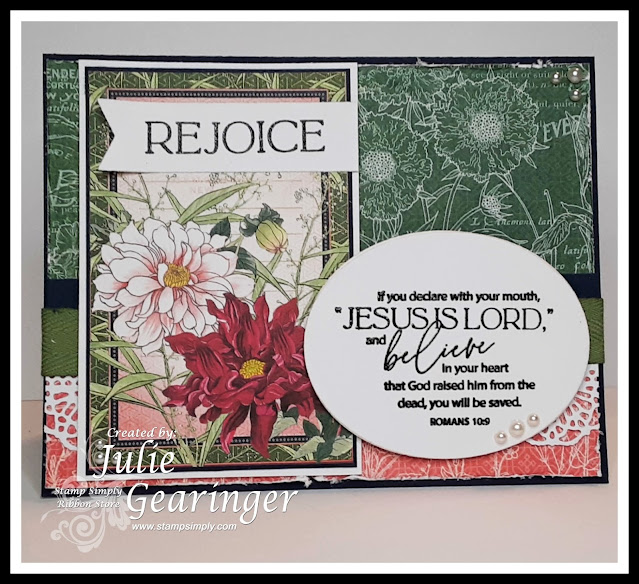
Rejoice!


Hi Friends!

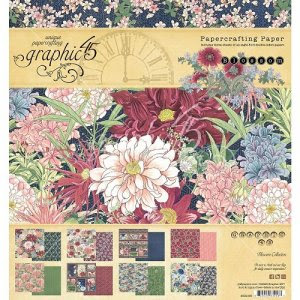
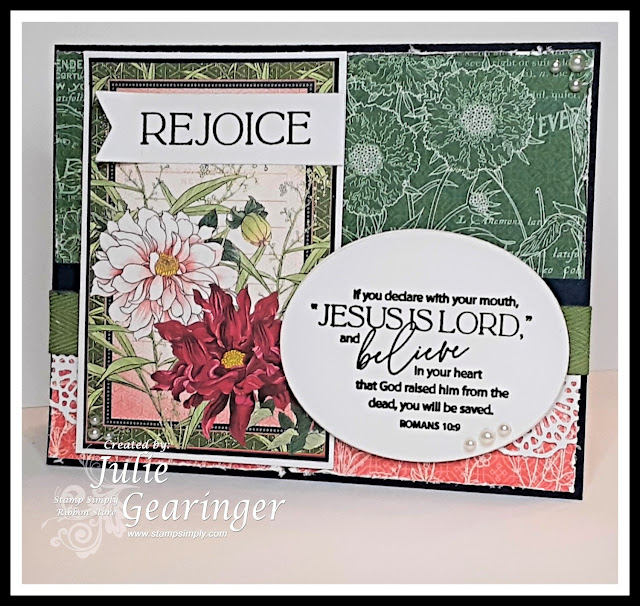
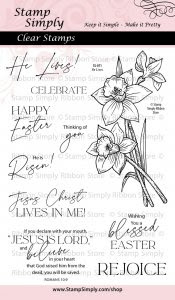
Today I am sharing an Easter card designed with the Stamp Simply He Lives, Graphic 45 Blossom designer paper along with other dies and supplies- all from Stamp Simply!

I absolutely love Graphic 45 paper and the Blossom 8x8 paper is gorgeous! So many pretty florals- so easy to make pretty cards!


I paired it with the Stamp Simply He Lives stamp set- the scripture verse sentiments are perfect for Easter as well as year round.

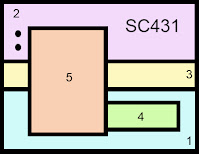
I have a personal goal of designing a card using one of the Splitcoaststamper sketches and I decided to use a modified version of the SC431 sketch for the layout on this card (I made layer #4 an oval and did not add the little brads on the left of layer #5). 

I am also linking this card to the Word Art Wednesday #527-#528 "Anything Goes" Challenge. 

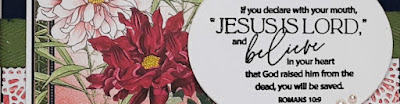
The main floral image is one of the cut-a-parts from the Graphic 45 Blossom 8x8 paper pad and it was layered onto dark blue cardstock before layering again onto white cardstock.


The sentiments “REJOICE” along with the Romans 10:9 verse (both from the He Lives stamp set) were stamped onto white cardstock with archival black ink and heat embossed with clear embossing powder.  

The "REJOICE" was die cut with the Fishtail Sentiment Banners die set and the Romans 10:9 verse was die cut with the Hemstitch Oval die set (using just the medium oval die without the hemstitch inner die).

To construct the card, trim two pieces of the Blossom 8x8 paper, distress the edges and adhere to a dark navy card front.

Die cut a piece of white cardstock with the Tim Holtz Crochet Die, adhere to the lower part of the background panel.

Add a piece of navy ribbon to the card front, then add a strip of sage twill ribbon- wrap the ends behind the panel.


Mount the rectangle focal image to the card front with dimensional foam, adhere the banner sentiment, mount the verse sentiment with dimensional foam before mounting the card front onto a white card base.

Finish off the card with a few pearls to the upper right hand corner of the card, lower left of the focal image and lower right of the sentiment.

                        Stamp Sets: He Lives (Stamp Simply)

Ink/Mediums: Versafine Onyx Black

Cardstock/Paper: Dark Navy, White; Graphic 45 Blossom 8x8 Paper

Accessories/Tools: Gemini, Jr., Stamp Simply Steel Dies- Fishtail Sentiment Banners, Spellbinders Amazing Paper Grace - Hemstitch Oval, Sizzix Thinlits Dies by Tim Holtz- Crochet, May Arts 5/8” Twill Ribbon- Sage, Kaisercraft Self-Adhesive Round Pearls- Pearl, Distressing Tool, Embossing Powder Tool, Clear Embossing Powder, Heat Tool

Thanks again for stopping by!  Easter is fast approaching- I hope I have inspired you to create a few cards to mail to loved ones!

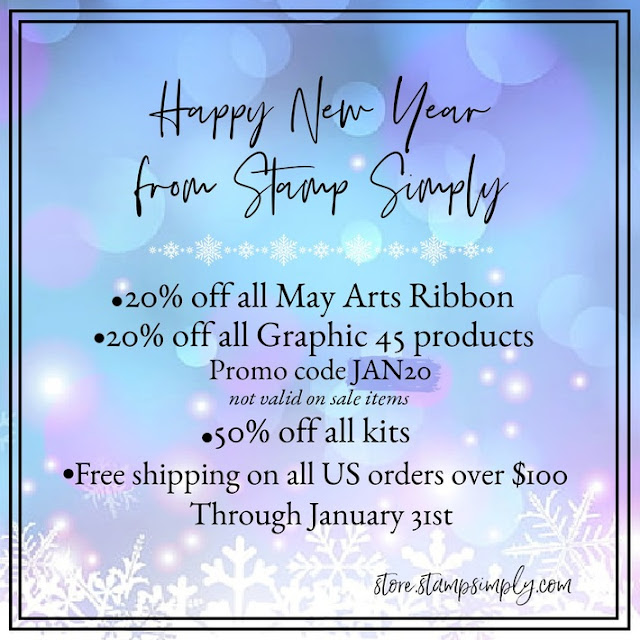
Don’t forget to check out the January sale at Stamp Simply- use code JAN20 for 20% off May Arts Ribbon and Graphic 45 Paper.  


Sunday, January 17, 2021

Hello Sweet Friend


 Hi Friends!

Today I am sharing a fun card designed with the new Cupid & Co 6x6 Paper Pad by Echo Park along with stamps and dies from The Stamp Simply Ribbon Store!

This is such a cute paper pad- perfect for Valentines Day or other occasions- wedding, anniversary, etc. 

As many of you know that follow my blog, I have a personal goal to create a card for each of the over 800 Splitcoaststampers Sketch Challenges and used Sketch #828 for the layout on this card.

I am also participating with the Tic-Tac-Toe #096 Challenge (left column down Heart-Red-Ribbon) along with the Simon Says Wednesday “Layer It Up” Challenge.  

If you have not had time to check out the Stamp Simply blog or the other challenge sites yet, I hope you will do so- wonderful inspiration from all!

To create this card:

Cut a piece of black cardstock to 4 ¼” x 5 ½”, adhere the vertical floral and striped Cupid & Co paper to the panel.

Add a strip of red satin ribbon to cover the edges, wrap the ends of the ribbon behind the panel.

Mount the entire panel onto a white card base.

Using the Tim Holtz Tag Collection Dies, die cut a tag from black cardstock.  Add a piece of the Cupid & Co paper to the tag.  Adhere a piece of white paper lace (die cut with the Tim Holtz Crochet Die) to the bottom of the tag and add a strip of red satin ribbon (again, wrapping the ends behind the tag).

Add the looped satin ribbon to the top of the tag and adhere to the card front using dimensional foam (or chipboard).

For the heart, use the tiny strips of paper that you normally trim off the top of each page in the Echo Park Cupid & Co 6x6 pad. 

Adhere the trimmed pieces and adhere them to a piece of white cardstock.  Die cut the “quilt” panel with the Farmhouse Pierced Nested Heart Dies.

Die cut another heart (the same size) from black cardstock, cut in half and mount behind the “quilted” heart.

Use an embossing powder tool to de-static a piece of white cardstock, stamp the sentiment from Typewritten Just Checking In using Versafine Onyx Black ink, apply clear embossing powder and heat set with a heat tool.

Once the embossing powder has cooled, die cut with the Fishtail Sentiments Banner Dies, mount onto the quilt heart, and adhere the entire heart to the card front using dimensional foam to finish off the card.


Stamp Sets: Typewritten Just Checking In  (Stamp Simply)

Ink/Mediums: Versafine Onyx Black

Cardstock/Paper: White, Black; Cupid & Co 6x6 Paper Pad by Echo Park

Accessories/Tools: Gemini, Jr., Stamp Simply Dies- Fishtail Sentiments Banner, Farmhouse Pierced Nested Hearts, Sizzix Thinlit Dies by Tim Holtz- Crochet, Sizzix Framelit Dies by Tim Holtz- Tag Collection, Embossing Powder Tool, Clear Embossing Powder, Heat Tool, 1” Red Satin Ribbon

Thanks again for visiting- I hope all of you are staying safe and having a great weekend!


Related Posts Plugin for WordPress, Blogger...