Showing posts with label Valentine. Show all posts

Thursday, February 10, 2022

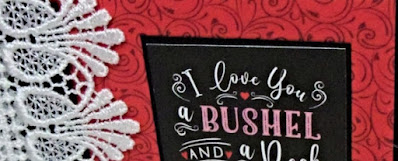
I Love You A Bushel and a Peck


Hi Friends!

Today I am sharing a mini folio album/journal designed using stamps, lace and other supplies from Stamp Simply!

I wanted to create a small journal/album that could be used as a prayer journal and decided to use up the rest of the Cupid & Co 6x6 paper that I had on hand from last year.


I found a wonderful tutorial online for the mini folio album construction and modified the instructions to create a 4x4 album- see the YouTube video at Polly’s Paper Studio: Accordion Fold Pocket Folio Crash Your Stash January Polly’s Paper Studio Tutorial   https://www.youtube.com/watch?v=pAA7MEBeJAM

I followed the basic instructions that Polly had in the video but modified the instructions to create a 4x4 finished album with inserts, pockets and flaps. 

Front Cover and Page 1 with Insert, verse sentiment layers/journaling cards


Page 2 Insert, Journaling Cards 


Page 4 and 5/Back Cover


I used lightweight chipboard for the front and back cover and the black twill ribbon was added to the front and back before layering with the designer paper.

Once the album was completed with the designer paper, white Raschel Lace was layered over the edge of the spine (adhering to the front and back covers only) and added the Valentina Venise Lace over the edges of the Raschel Lace to finish off the spine. 

    Isn’t this lace gorgeous!  Raschel is on the left, Venise Valentina on the right 


The
black twill ribbon was added to the chipboard front and back before layering with the designer paper.

The inserts have white cardstock layered onto the back so you could journal or add a photo.

The smaller rectangles for each page were designed to layer over each of the fold out flaps (or you could use to journal on the back and add photos, etc. to the fold outs).

The envelope punch board was used to create the tabs on each of the page inserts and a corner rounder for the journal cards that tuck behind each pocket.


As many of you who follow my blog know, I enjoy participating in online challenges and will be linking this card to the Festive Friday #FF0102 “St Valentine’s Day” Challenge (Red, Pink, Ribbon, Romantic Sentiment), the Simon Says Monday “Love is in the Air” Challenge and the Word Art Wednesday #529-#530 “Anything Goes” Challenge.

If you have not had a chance to visit the challenge sites yet or the Stamp Simply Blog, I hope you find time to do so- gorgeous inspiration from all!


Stamp Sets:  Words of Encouragement,   Fear Not, Get Well Tulip   and    Farmhouse Scriptural Quotes (Stamp Simply)    

Ink/Mediums: Versafine Onyx Black

Cardstock/Paper:  Black, White; Cupid & Co 6x6 Paper Pad (Echo Park)  

Accessories/Tools: Corner Rounder, 1 ½” Raschel Lace-3 yards White, 1.75” Venise Lace Valentina- 1 yard WhiteMay Arts 5/8” Twill Ribbon- Black- 10 yard bundle, Envelope Punch Board, Scoring Tool 

This was a fun project that I hope has inspired you to be creative this week!

Thanks again for taking the time to visit and don’t forget the fabulous February sale at Stamp Simply- use code LOVE15.   


Sunday, January 17, 2021

Hello Sweet Friend


 Hi Friends!

Today I am sharing a fun card designed with the new Cupid & Co 6x6 Paper Pad by Echo Park along with stamps and dies from The Stamp Simply Ribbon Store!

This is such a cute paper pad- perfect for Valentines Day or other occasions- wedding, anniversary, etc. 

As many of you know that follow my blog, I have a personal goal to create a card for each of the over 800 Splitcoaststampers Sketch Challenges and used Sketch #828 for the layout on this card.

I am also participating with the Tic-Tac-Toe #096 Challenge (left column down Heart-Red-Ribbon) along with the Simon Says Wednesday “Layer It Up” Challenge.  

If you have not had time to check out the Stamp Simply blog or the other challenge sites yet, I hope you will do so- wonderful inspiration from all!

To create this card:

Cut a piece of black cardstock to 4 ¼” x 5 ½”, adhere the vertical floral and striped Cupid & Co paper to the panel.

Add a strip of red satin ribbon to cover the edges, wrap the ends of the ribbon behind the panel.

Mount the entire panel onto a white card base.

Using the Tim Holtz Tag Collection Dies, die cut a tag from black cardstock.  Add a piece of the Cupid & Co paper to the tag.  Adhere a piece of white paper lace (die cut with the Tim Holtz Crochet Die) to the bottom of the tag and add a strip of red satin ribbon (again, wrapping the ends behind the tag).

Add the looped satin ribbon to the top of the tag and adhere to the card front using dimensional foam (or chipboard).

For the heart, use the tiny strips of paper that you normally trim off the top of each page in the Echo Park Cupid & Co 6x6 pad

Adhere the trimmed pieces and adhere them to a piece of white cardstock.  Die cut the “quilt” panel with the Farmhouse Pierced Nested Heart Dies.

Die cut another heart (the same size) from black cardstock, cut in half and mount behind the “quilted” heart.

Use an embossing powder tool to de-static a piece of white cardstock, stamp the sentiment from Typewritten Just Checking In using Versafine Onyx Black ink, apply clear embossing powder and heat set with a heat tool.

Once the embossing powder has cooled, die cut with the Fishtail Sentiments Banner Dies, mount onto the quilt heart, and adhere the entire heart to the card front using dimensional foam to finish off the card.


Stamp Sets: Typewritten Just Checking In  (Stamp Simply)

Ink/Mediums: Versafine Onyx Black

Cardstock/Paper: White, Black; Cupid & Co 6x6 Paper Pad by Echo Park

Accessories/Tools: Gemini, Jr., Stamp Simply Dies- Fishtail Sentiments Banner, Farmhouse Pierced Nested Hearts, Sizzix Thinlit Dies by Tim Holtz- Crochet, Sizzix Framelit Dies by Tim Holtz- Tag Collection, Embossing Powder Tool, Clear Embossing Powder, Heat Tool, 1” Red Satin Ribbon

Thanks again for visiting- I hope all of you are staying safe and having a great weekend!


Saturday, January 9, 2021

Farmhouse Valentine Folio Easel Card


 Hi Friends!

 We are focusing on Valentine cards this week on the Stamp Simply blog and today I am sharing a special “Valentine” that is an Anniversary card for my husband:-). 

My hubby and I are celebrating our 38th Anniversary today and I thought I would create a mini folio easel card.

There are several hinged layers on the front of the card that can be used for journaling, photos or "love notes".  


I incorporated the Splitcoaststampers SC417 Sketch into the layout (another one of my goals is to try to create a card for each of the over 800 Splitcoaststamper Sketch Challenges).  

I will also be participating with The Spot #144 “Showcase Your Best Work” along with the Try It On Tuesday “Uplifting or Positive Quote” Challenge and the Word Art Wednesday #473-#474 “Anything Goes”Challenge.

As I create and design, I think about and pray for the recipient so this card is very special to me- it is a labor of love, so it is my best work :-)  

Not sure if the sentiment would be considered a "quote" for the Try It On Tuesday Challenge, but my hubby and I often say this to one another, even after all of this time! It is also uplifting to me to think back on the 38 years we have been together and all of the fabulous memories.  It sure has flown by fast and does not feel like it has been over half of our lives together, that's for sure:-) 


To create this card:

This card is a basic easel card- see a tutorial here at Splitcoaststampers for the design for the easel (I used the 4 ¼” x 11” version at the bottom of the tutorial).  The sentiment is on a belly band and when you remove it, you can access the flaps on the front of the card.  

This is a view with the belly band removed

 I created the front flaps using black cardstock (adding 1/2" for the hinges to the length). 

I used a corner rounder for the corners and the flaps are covered with the Graphic 45 Farmhouse 8x8  paper along with plain vanilla cardstock. 

For the interior, I also used the Graphic 45 Farmhouse paper and used  Pearlescent Metallic Gold Cardstock was used for the die cut circle for the sentiment on the front. 

I love the soft metallic look to this metallic pearlescent cardstock plus it is 105# cardstock (very heavy) and has the metallic on both sides!  FYI- This is the first time I have used this cardstock and I am in love!

The heat embossed sentiment “You + Me = Forever” is from the Farmhouse Simple Sentiments- I absolutely love the fonts used on the entire farmhouse series at Stamp Simply!

The card was finished off using black rhinestones and ½” black seam binding.

Isn't the Graphic 45 Farmhouse paper gorgeous?  

I love all the cut-a-parts, borders, and patterns- we collect antique honey dishes and I know that the background is considered chicken wire, but it looks a bit like a honeycomb, right?


Stamps: Farmhouse Simple Sentiments (Stamp Simply)

Ink/Mediums: Versafine Onyx Black

Cardstock/Paper: Vanilla, Black, Graphic 45 Farmhouse 8x8 Paper Pad, Luxury Pearlescent Metallic 105# Cardstock- Gold

Accessories/Tools: Gemini, Jr., Spellbinders Standard Circle Dies- Large & Small, Embossing Powder Tool, Clear Embossing Powder, Heat Tool, 1/2” Black Seam Binding, Black Rhinestones, Distressing Tool

If you have not had a chance to check out the Stamp Simply blog (Sharon posted a few other views of the front flaps) or the other challenge sites, yet, I hope you will do so- fabulous inspiration from all!

Thanks again for taking the time to visit! I hope all of you have a wonderful weekend/week and have a chance to be creative!

Monday, May 11, 2020

Kitty Love You


Hi Friends!

Today I am sharing a card that I designed using the Simon Says Furry Kisses stamp set along with a sentiment from the retired Stampin’ Up! set, Short and Sweet.

I love this sweet kitty image from Simon Says Stamp and thought that this card could be used as a Valentine or a general "love you"/"thinking of you" card.  

I am working my way through the over 800 sketch challenges at Splitcoaststampers and this card uses the SC443 Sketch for the layout. This sketch was from 2013 and again, I am so thankful that they do not expire :-)

I am also linking this card to the Simon Says Wednesday “Dies and/or Punches” Challenge (I used the SSS   Open Heart Dies and a retired banner die for this card) and the 2 Crafty Critter Crazies May “AnythingGoes” Challenge.

This was a quick and easy card- heat emboss the kitty images using clear embossing powder and watercolor with water-based markers. Fussy-cut the image and mount onto a die-cut rectangle. Mount the panel onto espresso cardstock, trim close to the edge.

Stamp the sentiment and heat emboss in the corner of the panel. 

Emboss a piece of white cardstock with a pawprint embossing folder, trim and mount onto espresso cardstock.

Create a few banners from designer paper, mount onto espresso cardstock, add to the background panel and mount onto a white card base.

Adhere the main kitty panel with dimensional foam (or, I prefer, chipboard).

Die cut and adhere a few layered hearts to the kitty panel.  Use a clear glitter pen to add shimmer to the kitty images (of course, this would be optional) :-)

Add a few rhinestones to finish off the card.

Stamp Sets: Furry Kisses (Simon Says Stamp), Short ‘n Sweet (retired Stampin’ Up!)

Ink/Mediums: Versafine™ Onyx Black, Stampin’ Write Markers-Soft Suede, Early Espresso; Clear Glitter Pen

Cardstock/Paper:  Whisper White, Basic Black, Cherry Cobbler, Early Espresso, retired Pretty in Pink; retired Stampin’ Up! Sending Love Designer Series Paper

Accessories: Gemini, Jr™,  Dies- My Favorite Things Stitched Rectangle A2 STAX Set 1, Simon Says Stamp Open Heart; Darice™ Pawprints Embossing Folder, Embossing Buddy®, Clear Embossing Powder, Heat Tool, AquaPainter™, Rhinestones

Thanks again for taking the time to visit my blog- I hope all of you are staying healthy and safe- hugs, sweet friends!

Wednesday, February 5, 2020

TCC128 LOVE


Hi Friends!


What a fun inspiration photo! I love all of the colors as well as the theme of Valentine’s Day!  Originally I was going to create a Clean and Graphic card, but since I wanted to use this vintage LOVE stamp, I decided to design a Shabby and Vintage/Mixed Media card.

In addition to the retired Love Is A Great Thing (Stampin’ Up!) (and in my effort to continue to ink up stamps I already own) I also used images from several other Stampin’ Up! retired sets, Botanicals, Timeless Textures and Tiny Tags. 


The splattered background of this card was created using an acetate envelope technique (I used clear packaging from a stamp set).  Slice open one end of the envelope, open and tap a bit of Real Red Classic Ink onto one side of the envelope, lightly spritz with water, close the envelope and “smoosh” the ink together through the acetate.  Open the envelope, lightly press the white cardstock into the ink and continue with the process until you are happy with the results.

Use Frost White paint diluted with water to add a bit of sheen and tone down the panel.  Ink the script image from Botanicals with black ink and randomly stamp over the background.

Add a bit of platinum embellishment mousse in certain areas and stamp the small splatter stamp from Texture Tiles with silver metallic ink.

Die cut a stitched rectangle from the center of the background panel (for the center focal image panel) and set aside.

Cut the remaining background panel to approx.. 4” x 5 ¼”, adhere to a piece of white cardstock, trim again, mount onto black cardstock, trim and mount onto a white card base.

Ink the Love Is A Great Thing image with Versafine™ Onyx Black Ink, stamp onto white cardstock, apply Clear Embossing Powder and heat set with a heat tool.  

Color the image with water-based markers, watercolor pencils, silver metallic marker and frost white shimmer paint.  Add white highlights with an extra fine white paint pen.

Mount the focal image onto black cardstock, trim close to the edge and add a strip of lace.

Stamp the sentiments from Tiny Tags with black ink, punch out with the Jewelry Tag Punch, add a hole for hanging and thread through the silver cord.  Wrap around the central panel and add the silver cord bow. 

Mount the entire center panel onto the card front, die cut a few flourishes from white cardstock and add to the corners.  Use a clear glitter pen to add shimmer to the die cuts as well as the letters and finish off the card with a few rhinestones.

Stamp Sets:  Love Is A Great Thing, Botanicals, Timeless Textures, Tiny Tags (all retired Stampin’ Up!)

Ink/Mediums: Versafine™ Onyx Black,  Real Red Classic Ink, Encore™ Silver Ultimate Metallic Ink, Stampin’ Up! Watercolor Pencils- Real Red, Old Olive, Arteza ™ Trimarkers- Poppy Red, Watermelon, Bright Pink; Silver Metallic Marker, Nuvo™ Pure Platinum Embellishment Mousse, Frost White Shimmer Paint, Wink of Stella™ Clear Glitter Pen, White Paint Pen

Cardstock/Paper: Whisper White, Basic Black

Tools/Accessories: Gemini, Jr™, MFT Stitched Rectangle STAX A2 Set 1 Dies, Flourish Corner Dies, Embossing Buddy®, Clear Embossing Powder, Heat Tool, 3/8” White Crochet Lace, Silver Cord, Jewelry Tag Punch, Rhinestones, Acetate Envelope

Thanks again for taking the time to visit!  I hope I have inspired you to create your own card based on our {Be Mine, Valentine} photo and link up to our gallery at The Card Concept- we would love to see what inspired you! The challenge is open until Monday, February 17th  at noon EST.

Wednesday, February 6, 2019

TCC108 Follow My Heart


Hi Friends!

It's time for The Card Concept #108 {Love Is In The Air} Challenge!  Valentines Day is around the corner- have you made a card for your Valentine yet?

If not, we hope you will join us at The Card Concept! I was inspired by the red, black and white to design a Shabby Chic card – not sure if I will give this one to my hubby since it is a bit feminine, but it would be perfect for a friend of mine.


Just a reminder that The Card Concept is a bi-weekly challenge that has an inspiration photo along with a suggestion of design styles that you can choose from to create your card- Clean and Simple, Clean and Graphic, Clean and Layered, Shabby Chic, Freestyle Collage, Classy and Elegant and Mixed Media (or you can combine several styles for your own style).

If you have not had a chance to visit us at The Card Concept or the other challenge sites yet, I hope you will find time to do so- fabulous inspiration from all!

To create this card:

1). De-static a piece of white cardstock with an embossing powder tool.   Using Versafine™ Onyx Black Ink, stamp the Eiffel Tower and banner image from the retired Follow My Heart stamp set (Stampin’ Up!) onto the prepared panel, apply clear embossing powder and heat set with a heat tool.  Once the embossing has cooled, fussy-cut the Eiffel Tower and use the retired Banner Punch to punch out the banner.

2). Trim a piece of striped Poppy Parade designer paper to approx.. 4” x 5 ¼”, mount onto a piece of Basic Black cardstock.  Trim and mount onto the Extra Thick Whisper White card base.

3). Create the remaining layers for the sketch from designer paper along with Whisper White cardstock, Wrap pieces of black hemp twine around the white banner layer, mount per the sketch onto the card front (using dimensional foam behind the main square panel and under the ends of the vertical black/white panel.

4). Use the retired Sweetheart Punch to punch out one heart from Whisper White cardstock and two hearts from Basic Black cardstock, Layer the two black hearts behind the white heart and mount onto the card front.  Add the fussy-cut Eiffel Tower image with dimensional foam (I first mounted the Eiffel Tower image onto Basic Black cardstock to give it a bit more stability). 

5). Add the looped black hemp bow and use a small punched out heart for the center of the bow,  To finish off the card, apply shimmer to the small heart in the center of the bow using a clear glitter pen and add the White Tea Lace Doily pieces to the corners.
'
Stamp Sets: Follow My Heart (retired Stampin’ Up! hostess set)

Ink/Mediums: Versafine™ Onyx Black, Spectrum Noir™ Clear  Glitter Pen

Cardstock/Paper: Whisper White, Basic Black, Poppy Parade; retired Night and Day DSP, retired Poppy Parade DSP (all Stampin’ Up!)

Tools/Accessories:  Embossing Buddy®, Clear Embossing Powder, Heat Tool, Black Hemp Twine, SU! Punches- Banner, retired Sweetheart and Triple Heart, White Tea Lace Doily 

Thank you for taking the time to visit! I hope I have inspired you to create your own card based on our {Loveis in the Air} photo and linkup to our gallery at The Card Concept- we would love to see your interpretation!!

Related Posts Plugin for WordPress, Blogger...