Saturday, February 26, 2022

Jesus is Lord


Hi Friends!


Today I am sharing an Easter card designed with the new
Echo Park My Favorite Easter 6x6 Paper Pad along with the He Lives Bundle, dies, ribbon and other supplies all from Stamp Simply.

I love all of the pastels and sweet designs in the Echo Park My Favorite Easter 6x6 Paper Pad- perfect for spring and Easter plus the He Lives Bundle is perfect for Easter as well as all year round!


I also wanted to play along with the Watercooler Wednesday WWC335  “Anything Goes" Celebrating the End Challenge (this is their final challenge) along with the Tic-Tac-Toe #150 Featured Designer Vicky Challenge (middle column down, Designer Paper- Spring Flowers- Ribbon/Twine) and the Double Trouble #104 “Hoodie-Hoo! Hoodie-Hoo !” Challenge (spring theme).


If you have not already had a chance to do so, I hope you visit the Stamp Simply blog to see all of the inspiration from the rest of the SS Design Team as well as the above challenge sites- gorgeous galleries from all!

To create this card:

De-static a piece of white cardstock with an embossing powder tool, stamp the daffodil image from the He Lives Bundle with archival black ink onto white cardstock, apply clear embossing powder and heat set with a heat tool.


Once the embossing has cooled, watercolor the image with water-based markers and die cut with the coordinating die (also die cut another daffodil from plain white cardstock to adhere behind the colored image).

Die cut a piece of white cardstock with a pierced rectangle die, de-static with an embossing powder tool, stamp the sentiment from He Lives with archival black ink and apply clear embossing powder.

Layer the sentiment panel onto a piece of light pink cardstock, trim close to the edge.


Trim a piece of the pastel plaid designer paper from My Favorite Easter to approx. 4 ⅛” x 5 ⅜” and mount onto a 4 ¼” x 5 ½” piece of light pink cardstock.

Adhere the sentiment panel directly to the card front panel.

Add a strip of the fuchsia silk ribbon, wrap the ends behind the panel and mount onto a white card base.

Adhere the daffodil die cut with dimensional foam and add the fuchsia bow.

Finish off the card with a few self-adhesive pearls

Stamp Sets: He Lives Bundle (Stamp Simply)

Ink/Mediums: Versafine Onyx Black

Cardstock/Paper:  White, Pink Pirouette (Stampin’ Up!), Echo Park My Favorite Easter 6x6 Paper Pad

Accessories/Tools: Gemini, Jr., He Lives Bundle, Spellbinders Celebrations- Pierced Rectangle Dies, May Arts ¼” Silk- 54 yard spool- Fuchsia, Kaisercraft Self-Adhesive Round Pearls- Pearl, Embossing Powder Tool, Clear Embossing Powder, Heat Tool

Thanks again for taking the time to stop by and it is not too late to save with the fabulous February sale at Stamp Simply- use code LOVE15. 


Saturday, February 19, 2022

Hope and a Future


 Hi Friends!

Today I am sharing a graduation card using the new Craft Consortium Patina 6x6 Paper Pad along with stamps, dies and twine from Stamp Simply.

The Craft Consortium Patina 6x6 paper pad has such deep, rich colors, texture and patterns- wonderful for masculine and feminine cards!


Also, Jeremiah 29:11 is one of my favorite verses and I love the font in the Scripture for Graduation and Beyond stamp set, don’t you ? It pairs perfectly with the Graduation Sentiments and also comes as a bundle

I am linking this card to the Watercooler Wednesday #335 “Anything Goes “Celebrating the End” (FYI- this is their final challenge).

If you have not already had a chance to do so, I hope you visit the Stamp Simply blog to see all of the inspiration from the rest of the SS Design Team as well as the final Watercooler Wednesday Challenge- beautiful galleries from all!

To create this card:

Using ground espresso distress ink, repeatedly stamp the subway style background stamp from the Graduation Sentiments (part of the Graduation Bundle) onto a panel from the Craft Consortium Patina designer paper.


Distress the edges, mount onto a piece of rust cardstock and mount onto a white card base.

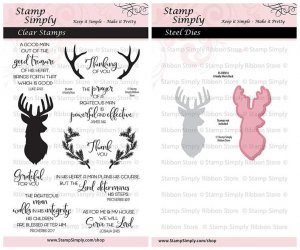
De-static a piece of white cardstock with an embossing powder tool, ink the A Godly Man buck image and the verse sentiment with archival black ink, apply clear embossing powder and heat set with a heat tool.


Die cut the verse sentiment using the outer die from the
medium pierced rectangle die, mount onto a piece of rust cardstock and trim close to the edge.

Add the knotted kraft baker’s twine  to three of the corners, add to the card front using dimensional foam or chipboard.

Die cut the buck image with the Buck Die, die cut two additional bucks from white cardstock to layer behind the stamped die cut buck.


Mount the buck image with dimensional foam (or chipboard) and add a few black rhinestones to finish off the card.


Stamp Sets: Scripture for Graduation and Beyond, Graduation Sentiments (both included in the Graduation Bundle), A Godly Man (part of A Godly Man Bundle)- all from Stamp Simply

Ink/Mediums: Versafine Onyx Black, Tim Holtz Ground Espresso Distress

Cardstock/Paper: White, Rust; Craft Consortium Patina 6x6 Paper

 Accessories/Tools:  Gemini. Jr., Stamp Simply Dies- Buck Die single or part of A Godly Man Bundle, Spellbinders Celebrations - Pierced Rectangle Dies , May Arts Baker’s Twine- 110 Yard Spool- Kraft, Kaisercraft Self-Adhesive Round Rhinestones- Black, Embossing Powder Tool, Clear Embossing Powder, Heat Tool

Thanks again for stopping by- I hope you will check out the February sale at Stamp Simply!


Wednesday, February 16, 2022

The Card Concept #169 Cozy Cabin Challenge


Hi Friends!

It’s time for the #169 {Cozy Cabin} Challenge at The Card Concept!

I just love this inspiration photo!  The colors, the sweet little black dog on the pillow, the black dog figurines, the patterns and textures as well as the cozy theme inspired me to create a set of four Clean and Graphic/ Clean and Layered cards.

I decided to use the Stack -n- Cut Quilt technique (from Splitcoaststampers) for the background design.  I love the SNCQ technique and how you can create quick cards from single sheets of cardstock or designer paper. I also incorporated another favorite technique of mine, embossing- I use heat embossing on almost every card, lol!  

I enjoy playing along with online challenges and am playing along with the  “As You See It Challenge #268 “Techniques, Techniques” Challenge- Fav Technique of Mine is ……” Fav technique would be Heat Embossing and the Stack -n- Cut Quilt :-) 

I also incorporated the Tic-Tac-Toe #148 Challenge into the design- diagonal White- Free- Sentiment, across Sentiment-Embellishment (Ribbon)- Die Cut and down White, Stitching (Faux) and Die Cut.

If you have not had a chance to visit us at The Card Concept (or the other challenge sites) yet, I hope you will take the time to do so! Wonderful inspiration from the rest of the Design Team at The Card Concept as well as the As You See It and Tic-Tac-Toe Challenge galleries!


Here is the entire set together:-) 


To create this set of cards:

Layer four pieces of cardstock together- I used solid colors versus patterned paper- White, Bashful Blue, Real Red and Midnight Muse. Since the cardstock is thicker, I did have a few rough edges but I trimmed slivers off the rough edges after the initial cutting.

On four pieces of scrap white cardstock (I have a very thin white cardstock in my stash), layer each piece of the stacked quilt pieces in a different position on each background. 

Adhere the pieces to the scrap background, and once finished, emboss with an embossing folder.

Trim the panels, mount onto white cardstock, trim again and mount onto black cardstock, trim once more and mount onto red cardstock.

Wrap a piece of 1” black satin ribbon over the background and wrap the ends behind the panel. Adhere the background panels onto a white card base.


De-static white cardstock with an embossing powder tool, stamp the sentiments from Scripture Medley 5 (retired Verve Stamps) with Versafine™ Onyx Black ink, apply clear embossing powder and heat set with a heat tool.

Once the embossing has cooled, die cut the verse sentiments with a stitched rectangle die, mount onto black cardstock and trim close to the edge.

Adhere to the card front with dimensional foam (or chipboard).

Die cut the various dog silhouette dies from black cardstock (I cut two of each).  Layer the die cuts together to create a thicker die cut.

To finish off the cards, mount a dog die cut to the card fronts with dimensional foam or chipboard.

Stamp Sets:  Scripture Medley 5 (retired Verve Stamps)

Ink/Mediums: Versafine™ Onyx Black

Cardstock/Paper:  White, Black; Real Red, retired Bashful Blue, retired Midnight Muse (all Stampin’ Up!)

Accessories/Tools:  Big Shot™, retired Lacy Brocade Embossing Folder (Stampin’ Up!), Embossing Powder Tool, Clear Embossing Powder, Heat Tool, Dog Dies (not sure of the manufacturer), 1” Black Satin Ribbon (from my stash)

Thanks again for taking the time to visit- I hope you have a chance to check out the rest of The Card Concept Design Team cards and, if you have time, create a card based on our inspiration photo and join us!

Saturday, February 12, 2022

Welcome Little One


Hi Friends!

Today I am sharing a baby card designed with the new Echo Park It’s A Girl 6x6 Paper Pad along with the Welcome Baby Bundle, dies, lace and other supplies all from Stamp Simply.


The new It’s A Girl paper is so cute! I love all of the sweet animal images and centered one of the little deer images on the bib die :-)

It has been a personal goal of mine to design a card for each of the 892+ sketches at Splitcoaststampers and I was able to use the SC750 sketch for the layout on this card- woohoo!

I am also linking this card to the Watercooler Wednesday WWC334 Helen’s All About Occasions Challenge (I definitely need a few more baby cards in my stash) and the Word Art Wednesday #529-#530 “Anything Goes” Challenge.


If you have not already had a chance to do so, I hope you visit the Stamp Simply blog to see all of the inspiration from the rest of the SS Design Team as well as the above challenge sites- beautiful galleries from all! 

To create this card:

Die cut the onesie die from Welcome Baby Bundle out of the light green patterned paper from It’s A Girl paper pad.  

Die cut the bib from the animal patterned paper, centering the bib over the little deer.

Layer the two die cuts together and mount onto chipboard (or dimensional foam).

Trim a piece of the animal patterned paper to approx. 3 ¾” x 5 ⅛”, mount onto a piece of green cardstock.

Layer a strip of the designer paper onto a piece of green cardstock, adhere to the far right hand side of the front panel.


Die cut a piece of coral  designer paper with a large circle die, mount onto a die cut circle from green cardstock.

Trim a far right hand side of the layered circle and mount onto the card front.

De-static a piece of white cardstock with an embossing powder tool, stamp the sentiment “Welcome Little One” onto the prepared panel with archival black ink, apply clear embossing powder and heat set with a heat tool.

Die cut the sentiments with the Fishtail Sentiment Banners dies, mount onto green cardstock (also die cut from green cardstock).


Layer the die cut sentiments onto the card front, trimming off the far right edge.

Add the ¼” white lace and mount the die cut layered onesie.

Adhere a few pearls to the upper left hand area of the circle die cut and mount the card front to the white card base to finish off the card.

I think the colors on this card are neutral enough that it could be for a girl or boy, don’t you?


Stamp Sets:  Welcome Baby Bundle (Stamp Simply)

Ink/Mediums: Versafine Onyx Black

Cardstock/Paper:  White, Mellow Moss (Stampin’ Up!), Echo Park It’s A Girl 6x6 Paper Pad

Accessories/Tools: Gemini, Jr., Welcome Baby Bundle, Stamp Simply Steel Dies- Fishtail Sentiment Banners, Sizzix Circle Dies, Embossing Powder Tool, Clear Embossing Powder, Heat Tool, ¼” White Crochet LaceKaisercraft Self-Adhesive Round Pearls- Pearl 

Thanks again for taking the time to visit and don’t forget the fabulous February sale at Stamp Simply- use code LOVE15.


Thursday, February 10, 2022

I Love You A Bushel and a Peck


Hi Friends!

Today I am sharing a mini folio album/journal designed using stamps, lace and other supplies from Stamp Simply!

I wanted to create a small journal/album that could be used as a prayer journal and decided to use up the rest of the Cupid & Co 6x6 paper that I had on hand from last year.


I found a wonderful tutorial online for the mini folio album construction and modified the instructions to create a 4x4 album- see the YouTube video at Polly’s Paper Studio: Accordion Fold Pocket Folio Crash Your Stash January Polly’s Paper Studio Tutorial   https://www.youtube.com/watch?v=pAA7MEBeJAM

I followed the basic instructions that Polly had in the video but modified the instructions to create a 4x4 finished album with inserts, pockets and flaps. 

Front Cover and Page 1 with Insert, verse sentiment layers/journaling cards


Page 2 Insert, Journaling Cards 


Page 4 and 5/Back Cover


I used lightweight chipboard for the front and back cover and the black twill ribbon was added to the front and back before layering with the designer paper.

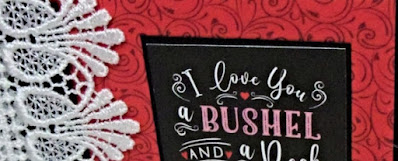
Once the album was completed with the designer paper, white Raschel Lace was layered over the edge of the spine (adhering to the front and back covers only) and added the Valentina Venise Lace over the edges of the Raschel Lace to finish off the spine. 

    Isn’t this lace gorgeous!  Raschel is on the left, Venise Valentina on the right 


The
black twill ribbon was added to the chipboard front and back before layering with the designer paper.

The inserts have white cardstock layered onto the back so you could journal or add a photo.

The smaller rectangles for each page were designed to layer over each of the fold out flaps (or you could use to journal on the back and add photos, etc. to the fold outs).

The envelope punch board was used to create the tabs on each of the page inserts and a corner rounder for the journal cards that tuck behind each pocket.


As many of you who follow my blog know, I enjoy participating in online challenges and will be linking this card to the Festive Friday #FF0102 “St Valentine’s Day” Challenge (Red, Pink, Ribbon, Romantic Sentiment), the Simon Says Monday “Love is in the Air” Challenge and the Word Art Wednesday #529-#530 “Anything Goes” Challenge.

If you have not had a chance to visit the challenge sites yet or the Stamp Simply Blog, I hope you find time to do so- gorgeous inspiration from all!


Stamp Sets:  Words of Encouragement,   Fear Not, Get Well Tulip   and    Farmhouse Scriptural Quotes (Stamp Simply)    

Ink/Mediums: Versafine Onyx Black

Cardstock/Paper:  Black, White; Cupid & Co 6x6 Paper Pad (Echo Park)  

Accessories/Tools: Corner Rounder, 1 ½” Raschel Lace-3 yards White, 1.75” Venise Lace Valentina- 1 yard WhiteMay Arts 5/8” Twill Ribbon- Black- 10 yard bundle, Envelope Punch Board, Scoring Tool 

This was a fun project that I hope has inspired you to be creative this week!

Thanks again for taking the time to visit and don’t forget the fabulous February sale at Stamp Simply- use code LOVE15.   


Related Posts Plugin for WordPress, Blogger...