Wednesday, August 10, 2016

Live, Laugh, Play

Hi Friends! 

I hope you are having a fabulous week so far!  Today I am sharing a card that I designed using The Golf Club and Grunge Elements from ArtisticOutpost by Our Daily Bread Designs for the Splitcoaststampers’ SC605 Sketch Challenge.

I also incorporated last week’s Way To Use It WT595 “Sports Theme” Challenge into the design.

If you have not had a chance to visit the above challenge galleries yet, I encourage you to do so- wonderful inspiration from all!

To create this card:

Ink the grid image from Grunge Elements with Mowed Lawn Distress Ink and repeatedly stamp onto a piece of white cardstock,  add the border stamp from Grunge Elements  and stamp around the edges with Faded Denim Distress Ink and die cut the entire panel with the frame die from the ODBD Flourished Star Pattern Dies.

Mount the background panel onto a piece of black cardstock, trim and mount onto the white card base.

Ink the collage map image from The Golf Club stamp set with archival Black Ink, stamp onto white cardstock, die cut with the ODBD Double Stitched Rectangle Dies, watercolor using Mowed Lawn Distress Ink, add the vintage watercolor with a water-based black pen (see the Splitcoaststampers' tutorial here) and cut the panel in half.

Mount the two pieces onto black cardstock and position on the card front per the sketch.

Die cut a piece of white cardstock and two pieces of black cardstock with the ODBD Double Stitched Circle Dies, stamp The Golf Club flag image onto the white cardstock circle die cut, follow the steps above for the adding the background and vintage watercolor, stamp the grid from Grunge Elements and mount onto the two black cardstock circle die cuts (layered to show just a small border).

Using embossing ink, stamp the golfer image from The Golf Club onto white cardstock, heat emboss with black embossing powder and fussy-cut out the image.

Heat emboss the sentiment and the advertising image from The Golf Club with white embossing powder onto black cardstock and hand trim the images.

Die cut a piece of black cardstock with the ODBD Pennant Swag Die, trim off the ends of the pennant and position onto the card front, mount the advertising image and sentiment with dimensional foam.

Adhere the die cut circle and the fussy-cut golfer image to finish off the card.

I had fun designing this card and hope I have inspired you to create a project this week!  If so, why not create a card using the sketch above, upload to the Splitcoaststampers gallery (there is no fee to join) and come join in on the fun with us with the Splitcoaststampers' SC605 Sketch Challenge!

Thanks again for stopping by, hugs and have a blessed week! 

Sunday, August 7, 2016

By The Sea

Hi Friends! 

I hope you are having a fabulous weekend so far!  In honor of National Lighthouse Day and the flash sales at Artistic Outpost and Our Daily Bread Designs, I wanted to create one more Mixed Media lighthouse card.

This card uses the Beyond the Sea and Grunge Elements stamp sets by the Artistic Outpost from Our Daily Bread Designs - both of these sets complement each other so well!

I have incorporated a few of my favorite online challenges into the design- the Pals Paper Arts PPA312 Sketch Challenge (I flipped the sketch over), the Paper Players PP307 “You Light Up My Life” Challenge, the Splitcoaststampers’ (SCS) Dare To Get Dirty DTGD16justwritedesigns Challenge and the SCS F4A332 “Beach” Challenge (from July 1).

If you have not had a chance to visit the above challenge galleries or the Artistic Outpost blog yet, I encourage you to do so- wonderful inspiration from all!

To create this card:

Ink the lighthouse along with girl on the beach, seashells, starfish and sentiment from Beyond the Sea with black archival ink and stamp onto white cardstock (stamp all of the images by themselves on separate pieces of white cardstock).

Die cut the girl on the beach image with the ODBD Double Stitched Circle Dies, create a mask for the girl image, mask the girl and stamp the lighthouse image over the girl.

Watercolor the lighthouse as well as the girl/lighthouse and seashells/starfish images with neutral distress inks, use a calligraphy marker to add the vintage watercolor (see the Splitcoaststampers tutorial here for the vintage watercolor technique) and a few white highlights to the starfish with a white paint pen.

Water color the lower portion of the main background panel with the neutral distress ink , add a bit of distressing with the large splatter stamp from Grunge Elements and use a clear glitter pen to add a bit of shimmer to the sand.

Fussy-cut the starfish and seashell images, shape a bit with your fingers and use a clear glitter pen to add sparkle (hard to see this in the photo).

Hand tear the edges of the sentiment and distress with your fingers, mount onto a piece of tan cardstock, distress the edges with your finger, use the grid image along with the large splatter image from Grunge Elements to add a bit of texture and add the antique brass spiral clip.

Die-cut the main lighthouse image panel with the ODBD Double Stitched Rectangle Dies (using the largest rectangle), mount onto a piece of tan cardstock, trim and mount on a piece of dark brown cardstock (it is hard to see in the photo but I distressed the dark brown cardstock with a crazing medium).

Adhere the layered background panel onto the white card base, add the burlap ribbon stands to the card front (I used hot glue to adhere the strands), mount the die cut circle with the girl (lining up the lighthouse image to the background) and the seashells with dimensional foam.

To finish off the card, add the sentiment with dimensional foam.

Again, I hope I have inspired you with this card to take some time to relax this weekend!  I think this young lady has the right idea- to explore along the beach and check out the nearby lighthouse and don't you think she looks very determined :-)  I told my hubby that her boyfriend did not want to join her so she was giving him the "look"- lol!


Thanks again for stopping by- hugs and have a blessed week, my friends!

Saturday, August 6, 2016

Beyond the Sea


Hi Friends! 

I hope you are having a great week so far!  

Today I am sharing this Mixed Media card I designed using Beyond the Sea, Ephemera Backgrounds and Grunge Elements by the Artistic Outpost from Our Daily Bread Designs at the Artistic Outpost blog and wanted to share it with you here as well :-)

I just love the images from all three of these stamp sets- they are so versatile for so many projects! 

I decided to play along with a few of my favorite online challenges and incorporated the Mojo Monday #459 Sketch Challenge, the Global Design Project #47 Nautical Challenge, Word Art Wednesday #242/#243  and the Splitcoaststampers' MIX174 “Beachy News” Challenge into my design.

If you have not had a chance to visit the above challenge galleries or the Artistic Outpost blog yet, I encourage you to do so- fabulous inspiration from all!

To create this card:

Ink the lighthouse, seashells, starfish and sentiment from the Beyond the Sea stamp set with black archival ink and stamp onto white cardstock.

Watercolor the lighthouse as well as the seashells/starfish images with neutral distress inks and use a calligraphy marker to add the vintage watercolor (please see the Splitcoaststampers tutorial here).

Fussy-cut the starfish and seashell images, shape a bit with your fingers and use a clear glitter pen to add sparkle (it is hard to see the glitter in the photo).

Hand tear the edges of the sentiment and distress with your fingers, use the grid image along with the large splatter image from Grunge Elements to add a bit of texture.

Die cut the lighthouse with the ODBD Double Stitched Rectangle Dies and mount onto dark brown cardstock.

Create the background panel by stamping the music image from Ephemera Backgrounds with walnut distress ink and the Grunge Elements images (I used the grid and the splatter images) onto a piece of light tan paper from the ODBD Ephemera Essentials 6x6Paper Collection.

Cut the panel into strips (per the Mojo459 Sketch) and mount onto a piece of dark brown cardstock die cut with frame from the ODBD Flourished Star Pattern Dies.

Adhere the layered background panel onto another piece of light tan paper from the ODBD Ephemera Essentials 6x6 Paper Collection,  mount onto the dark brown cardstock base, adhere the lighthouse image on an angle (per the sketch) and add the sentiment with dimensional foam.

Adhere a knotted piece of burlap twine to the sentiment and mount the seashells with the starfish using dimensional foam to finish off the card.

I hope I have inspired you with this card to take some time to relax this weekend!  Maybe, if you are like me, relaxing means stamping- if so, I hope you have a great time, my friends :-)


Thanks again for stopping by- hugs!


Friday, August 5, 2016

Faith is the Substance of Things Hoped For...


Hi Friends!  I am having fun this week designing with new release stamps and today I am showcasing the brand new Scribble Flowers ClearStamp Set from Sweet ‘n Sassy Stamps.

I paired this fun floral stamp set with the previously released Faith Clear Stamp Set for a quick Clean and Simple (CAS) card.

I have linked this card to a few challenges as well- the Addicted to Stamps and More Photo Inspiration #205 "Do What You Love" (I love Scripture and this card also uses a fun technique, Emboss Resist which I love:-)) and the Just Add Ink JAI323 "Just Add F" Challenge (F= Faith). 

To create this card:

Ink the large branch from ScribbleFlowers with Versamark™ ink, stamp onto white cardstock, apply white embossing powder and heat set with a heat tool.

Once the embossing has cooled, color with a water-based marker, spritz lightly with water and wipe the excess ink off with a paper towel.

Stamp the sentiment from the Faith Clear Stamp Set with the same color ink as the marker, trim the panel and mount onto coordinating cardstock.

Add the silver cord bow and rhinestones to finish off the card.
Quick and easy- perfect for a note of encouragement!

The new Scribble Flowers Clear Stamp Set will be released later today along with a bundle including a large set of dies (the bundle is available for a limited time)- I think that you will be surprised at the versatility of this set- I know I am :-)


Thanks again for visiting- I hope you have a blessed weekend, my friends!

Wednesday, August 3, 2016

SC604 A True Friend Loves At All Times


Hi Friends!

I hope all of you are having a fabulous week so far!  Woohoo!  I am excited to announce that I will be on the Splitcoaststampers Sketch Challenge Design Team for the next few months!  

I truly love participating in sketch challenges and am always amazed at how many interpretations can be designed using one sketch.

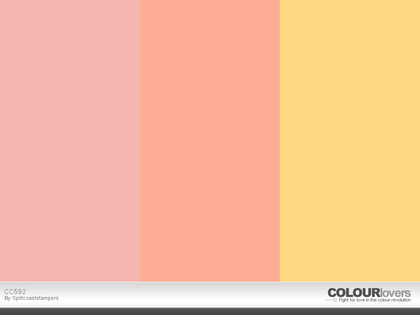
For this Mixed Media card, I used the Splitcoaststampers' SC604 Sketch (see the rest of the SC604 Sketch Gallery here),   the SCS CC592 Color  Challenge and the SCS Dare To Get Dirty “DTGD16basementstamper” Challenge (sorry, I cannot share the details but if you are a Splitcoaststampers Fan Club Member, you can see the details here and if not, you can check out how to join here) as well as the JustUs Girls #354 Wild Card “Let’s Hear It for the Girls” Challenge.


If you have not already visited the above challenge sites, I hope you will have a chance to do so- fabulous inspiration from my Sketch Design Team "Sisters" as well as the rest of the challenge sites!

To create this card:

Die cut a piece of white cardstock with the Our Daily Bread Designs (ODBD) Flourished Star Patterns Dies and mount onto a piece of black cardstock.

Die cut the piece of So Saffron cardstock with the largest ODBD Double Stitched Rectangle Dies, mount onto a piece of black cardstock, trim and mount onto the card front.

Add the strip of 1” Black Satin Ribbon and mount the entire card front onto the white card base.

Die cut a piece of the ODBD Christmas Collection 2015 6x6 Paper with the next to the largest  ODBD Double Stitched Rectangles  Dies, mount onto black cardstock, trim and mount onto the card front.

Die cut and emboss the ODBD Doily Dies from white cardstock and layer onto the front of the card.

Ink the ODBD Star Quilt image using black archival ink, stamp onto white cardstock, color the image with water-based markers and die cut with the ODBD Double Stitched Rectangle Dies.

Layer the quilt image onto black cardstock, trim and apply ModPodge to the entire surface.

Stamp the sentiment from ODBD A True Friend with archival black ink onto white cardstock, die cut with the ODBD Double Stitched Circle Dies and mount onto a die cut from black cardstock using the ODBD Flourish Pattern Dies.

Add the sentiment to the card front with dimensional foam to finish off the card.

I hope this card inspires you to create a project this week and if so, come play along with us at Splitcoaststampers!


Thanks again for visiting- hugs and have a blessed week, my friends!


Tuesday, August 2, 2016

SUO154 Bloomin' Heart Congratulations

Hi Friends!   


Stampin’ Up! has so many fabulous dies and we want you to highlight them on your card for this challenge.

I decided to use Bloomin’ Hearts Thinlits™ as well as the Detailed Floral Thinlits™ to create my Clean and Simple Inlaid Die-Cuts card.

I am also linking to a few challenges at Splitcoaststampers- the CAS375 "I Do" Challenge from May (these challenges do not have deadlines :-)) and the Dare To Get Dirty DTGD16dini challenge (again, you have to be a Fan Club Member to see the fun details on this challenge- see here on how to join).  

I hope you will stop by the SU-Only Challenge site to checkout my sister Design Team projects as well as pull out your Stampin’ Up! supplies and join in on the fun!

This card is very easy to create:

Use the Big Shot™ with the Bloomin’ Hearts Thinlits™ to cut the heart from a piece of Whisper White cardstock, cut the large and small flowers from Tempting Turquoise cardstock.

Die cut a piece of Whisper White and Tempting Turquoise with the Detailed Floral Thinlits™ as well (to decorate the inside bottom of the card).

Adhere the flowers to the Bloomin’ Hearts die cut along with Pearls for the flower centers and add Stampin’ Dimensionals® behind the flowers on the die cut.

Ink the sentiment from Floral Phrases with Versamark™ and stamp below the heart area on the Whisper White die cut panel, apply Stampin’ Emboss® Silver Embossing Powder and heat set with the Heat Tool.

Trim the edges of the heat embossed panel, add Stampin’ Dimensionals® to the perimeter of the panel, insert the heart die cut back into the die cut opening and mount onto a piece of Mint Macaron cardstock.

Mount onto a piece of Tempting Turquoise cardstock and adhere the entire panel onto a card base of Extra Thick Whisper White cardstock.

Add the layered Whisper White and Tempting Turquoise Detailed Floral Thinlit™ to the lower portion of the card center.

Stamp Sets:  Floral Phrases

Ink: Versamark™

Paper/Cardstock:  Whisper White, Mint Macaron, Tempting Turquoise, Extra Thick Whisper White

Tools/Accessories: Big Shot™, Bloomin’ Hearts Thinlits™, Detailed Floral Thinlits™, Embossing Buddy®, Stampin’ Emboss® Silver Embossing Powder, Heat Tool, Pearls

I think that this card would be perfect for a wedding or anniversary card- don’t you?  Plus, you could customize the colors to the wedding or season. 

Thanks again for stopping by and we hope to see your Stampin’ Up! Only project in our “Delightful Dies” Challenge gallery!

Monday, August 1, 2016

ODBD August 2016 New Release!


Hi Friends!

Welcome to the Our Daily Bread Designs August 2016 Release!! My husband and I love watching birds so this new release is perfect for this bird loving gal! :-)

I know that you will not want to miss the inspiration from the rest of the Breadbaskets and we would love to have you hop along with us- see more details below...


Sympathy cards are sometimes difficult to design and I just love the sentiments along with the die in the new ODBD With Sympathy (Stamp/Die Duos-Clear Stamps) plus this was an easy card to design- a bit of die cutting, stamping the sentiment, layering and adding satin ribbon and pearls to finish off the card.

My second card features the Vintage Bird Labels (Clear Stamps) embossed with gold embossing powder and paired with several ODBD Dies- Layered Lacey Ovals Dies, Vintage Borders Dies, Vintage Labels Dies, Ovals Dies, Rustic Beauty 6x6 PaperCollection and finished off with gold satin ribbon and pearls.


I had a great time designing with these new stamps and dies and hope you will take the time to check out the rest of the gorgeous inspiration from my Sisters on the “Breadbasket” DT : 

RobinMelissa * Julie * Sandee * Cathy 
Dawn * Lori * Chris * Grace * Lisa 
Sabrina * Diana * Angie * Diane (Guest Designer)


Prize Information: 
Three randomly selected winners will each receive a $25 Gift Code to the ODBD Website just for commenting on the Design Team cards!  You have until August 2, 2016 at 9:00 p.m. EDT to leave your comments on the Designers Blogs for a chance to win!  The Winners will be posted on the ODBD Blog on August 3rd, so be sure to check back there to see if you won!


Thanks again for visiting- hugs and have a blessed week, my friends!
Related Posts Plugin for WordPress, Blogger...