Friday, July 22, 2016

July's MISSION- Cards for A Cause

Hi Again Friends!

It has been a busy summer and it seems as though the days are just flying by!! 

This past week I started working on a few cards for this month’s Splitcoaststampers’ C4AC41 "MISSION- Cardsfor A Cause" and the cards for July will be sent to the South Carolina Department of Juvenile Justice (see details here). 

I decided to keep the cards fairly Clean and Simple (CAS) and for most of them used some of my retired Stampin’ Up! Paisley Prints Designer Series Paper (DSP) and incorporated a few online challenges with some of the designs (I will the online challenge cards separately).
 
Since the cards are pretty straightforward on design, I will be just listing the additional stamp sets used, etc.  If you have any questions, please let me know in the comments :-)

Card #1- Because I Care (retired SU! Hostess Set),  Stāz-On® Jet Black Ink, retired Paisley Petals DSP,  Barooque Burgundy cardstock, Rhinestones, Faber-Castell® Pitt Pen White Marker, Gray Watercolor Pencil, AquaPainter™, Rhinestones


Card #2- Lovely & Lacy (retired SU!),  Versamark™ Ink, Cherry Cobbler Embossing Powder, Heat Tool, retired Paisley Petals DSP,  retired Barooque Burgundy & Not Quite Navy cardstock, Faber-Castell® Pitt Pen White Marker, Gray Watercolor Pencil, AquaPainter™, Sequins, White Tea Lace Doily


Card #3- Lovely & Lacy (retired SU!),  Versamark™ Ink, Gold Embossing Powder, Heat Tool, retired Paisley Petals DSP,  retired Barooque Burgundy & Not Quite Navy cardstock, Faber-Castell® Pitt Pen White Marker, Gray Watercolor Pencil, AquaPainter™

Card #4- Absolutely Fabulous (retired SU!),  Versamark™ Ink, Gold Embossing Powder, Heat Tool, retired Paisley Petals DSP,  Early Espresso & Whisper White cardstock


Card #5- Butterfly Basics (SU!), Lovely & Lacy (retired SU!), Versamark™ Ink, Gold Embossing Powder, Heat Tool, retired Paisley Petals DSP,  Always Artichoke & Whisper White cardstock

Card #6- Floral Phrases (retired SU! Hostess Set),  Stāz-On® Jet Black Ink, retired Paisley Petals DSP,  Early Espresso cardstock, MFT Stitched Circle STAX Dies, 1” Dark Brown Satin Ribbon, White Tea Lace Doily


Card #7- All Year Cheer I (retired SU!),  Versamark™ Ink, Gold Embossing Powder, Heat Tool, retired Paisley Petals DSP,  Early Espresso cardstock, MFT Stitched Oval STAX Dies, 1” Dark Brown Satin Ribbon, White Tea Lace Doily


Card #8- TLC591 Mega Background; Elegant Greetings (retired SU!),  Versamark™ Ink, Gold Embossing Powder, Heat Tool, retired Paisley Petals DSP,  Early Espresso cardstock, MFT Stitched Oval STAX Dies, 1” Dark Brown Satin Ribbon


Card #9- Absolutely Fabulous (retired SU!),  Versamark™ Ink, SilverEmbossing Powder, Heat Tool, retired Paisley Petals DSP,  retired Not Quite Navy cardstock, 1” Gray Satin Ribbon, Distressing Tool, retired Lacy Brocade Embossing Folder, Hexagon Punch, Sequins


Card #10- Favorite Greetings (retired SU!), Versamark™ Ink, Cherry Cobbler Embossing Powder, Heat Tool, retired Paisley Petals DSP,  retired Baroque Burgundy and Not Quite Navy cardstock, Faber-Castell® Pitt Pen White Marker, Gray Watercolor Pencil, AquaPainter™. White Tea Lace Doily, MFT Stitched Oval STAX Dies, ½” Dark Cherry Satin Ribbon


Card #11- TLC591 Mega Background; Papillon Potpourri, Because I Care (retired SU! hostess set),  Stāz-On® Jet Black Ink , Versamark™ Ink, Black Embossing Powder, Heat Tool, retired Paisley Petals DSP,  Early Espresso cardstock, MFT Stitched Circle STAX Dies, 1” Dark Brown Satin Ribbon, Honeycomb Stencil, Old Paper Distress Ink; Elegant Butterfly Punch
Card #12- Absolutely Fabulous (retired SU!),  Versamark™ Ink, Silver Embossing Powder, Heat Tool, retired Paisley Petals DSP,  Early Espresso and retired Mossy Meadow cardstock, 1” Dark Brown Satin Ribbon, Hexagon Punch, Gray Watercolor Pencil, AquaPainter™


As I mentioned above, I have a few more that will be posted separately and there were some that were so similar that I will not post them at all :-)

I am thankful for Teresa Kline who is the hostess for the MISSION- Cards for A Cause project at Splitcoaststampers and I also hope that I have inspired you to come join us each month!! Again, details for July can be found here


Thanks for stopping by- hugs and have a great day! 

Tuesday, July 19, 2016

SUO153 Black and White with a Pop of Color


Hi Friends!   


I decided to combine a few sets for my card and incorporate the Splitcoaststampers SC600 Sketch Challenge (using the previous SC502 Sketch) along with the Splitcoaststampers CAS382 “Wing It” Challenge.

In addition to visiting the above Splitcoaststampers challenge galleries, I hope you will stop by the SU-Only Challenge site to check out my sister Design Team projects as well as pull out your Stampin’ Up! supplies and join in on the fun!

This card is very easy to create:

Ink the floral image from Butterfly Basics with Stampin’ Archival Basic Black ink, stamp onto a piece of Whisper White cardstock and heat set with the Heat Tool.

Stamp another floral image onto a piece of sticky note paper, fussy cut to create a mask and cover the image stamped onto the Whisper White cardstock.

Ink the honeycomb stamp from Butterfly Basics with Stampin’ Archival Basic Black ink and stamp repeatedly over the masked image (re-inking the stamp each time before stamping). 

Stamp the two canceled stamp images as well with the Stampin’ Archival Basic Black Ink, remove the mask and heat set the images with the Heat Tool.

Use the AquaPainter™ with ink from the Stampin’ Archival Basic Black Ink to watercolor the floral image, add shadows with the Smoky Slate Stampin’ Write Marker and color the flower stamens with the Crushed Curry Marker.

Use the Big Shot™ with the Square Framelits™ Collection to cut out the stamped panel, mount onto a piece of Basic Black cardstock, trim and mount onto a piece of Crushed Curry cardstock, trim and mount once more onto a piece of Basic Black cardstock to create the frame.

Use the Simply Scored™ Scoring Tool to score diagonal lines onto a piece of Whisper White cardstock, trim and mount this panel onto a piece of Crushed Curry cardstock, trim and mount onto the Basic Black card front and adhere the entire panel onto the Extra Thick Whisper White card base.

Stamp the sentiment from Rose Wonder with Stampin’ Archival Basic Black Ink onto Whisper White cardstock, cut out with the Circle Framelits™ Collection (also cutting two Basic Black circles from the same size framelit™, layer the two Basic Black circles behind the sentiment to create a thin frame).

Stamp the butterflies from Papillon Potpourri with Stampin’ Archival Basic Black Ink onto Whisper White cardstock, color the image with the Crushed Curry Stampin’ Write Marker and punch out with the Elegant Butterfly Punch.

Using dimensional foam, mount the stamped floral panel onto the card front at an angle adding the sentiment as well as the two butterflies.

Add the strands of Pearls to the butterflies to finish off the card.

Stamp Sets:  Butterfly Basics, Papillon Potpourri, Rose Wonder

Ink:  Basic Black Stampin’ Archival Pad™; Stampin’ Write Markers- Crushed Curry, Smoky Slate

Paper/Cardstock: Whisper White, Basic Black, Crushed Curry
Accessories: Big Shot™, Circle and Square Framelits™, Simply Scored™ Scoring Tool,  AquaPainter™, Pearls

Thanks again for stopping by and we hope to see your Stampin’ Up! Only project in our “Black and White with a Pop of Color” Challenge gallery!

Saturday, July 16, 2016

Rather Be on My Farm


Hi Friends!! 

I hope all of you are having a great start to the weekend so far!!  

Today it is my turn to highlight a card on the Artistic Outpost blog and I created another monochromatic Mixed Media card using Seed Packets Background along with Harvest and Grunge Elements from the 2016 Spring Release at ArtisticOutpost.

I decided to incorporate the Mojo Monday #456 Sketch Challenge  into the design (love the Mojo Monday sketches!) and if you have not already visited the Artistic Outpost blog (or the Mojo Monday challenge site yet), I hope you will do so- fabulous inspiration from all!

This card is a bit lighter IRL :-)
To create this card:

Use the Big Shot™ to emboss a piece of paper from the Our Daily Bread Designs (ODBD) Vintage Ephemera 6x6 Paper Collection with the retired Honeycomb Embossing Folder, trim  the panel and mount onto a piece of taupe cardstock, trim again to mount onto the dark brown card front.

Ink the Seed Packets Background with Vintage Photo Distress Ink, lightly spritz with water and stamp onto a piece of taupe cardstock.

Use a Sponge Dauber to apply Tea Dye Distress Ink to “age” the paper.

Enhance the shadows with a chocolate water-based marker and use a water brush to blend the color.

Ink the splatter image from Grunge Elements with Vintage Photo Distress Ink and stamp over the panel.

Use the Big Shot™ with the ODBD Double Stitched Rectangle Dies to cut out the main panel and the ODBD Double Stitched Circle Dies to cut the central circle.

Mount the panel onto a piece of dark brown cardstock, trim and mount onto taupe cardstock (sponging the edges with the TH Tea Dye Distress Ink).

Add the die cut/stamped circle piece in the center with dimensional foam and mount the antique brass spiral clip with the knotted twine to the upper left hand corner of the panel.

Adhere the entire panel to the card front and add the antique brass brads to the lower right hand corner before mounting the card front onto the white card base.

De-static a scrap piece of the ODBD Vintage Ephemera Paper with an Embossing Buddy®, stamp the sentiment from Harvest using Versamark™ ink onto the prepared paper and apply white embossing powder (heat set with the Heat Tool).

Use scissors to hand-trim the banner points, adhere the knotted twine to the sentiment banner before mounting onto the card front with dimensional foam.


Ink/Mediums: Versamark™;Tim Holtz® Vintage Photo and Tea Dye Distress Ink; Chocolate Chip Marker

Paper/Cardstock: Early Espresso, Tip Top Taupe; ODBD Vintage Ephemera 6x6 Paper Collection

Accessories/Tools: Big Shot™, ODBD Double Stitched CircleDies,  ODBD Double Stitched Rectangle Dies, AquaPainter™, Embossing Buddy®, White Embossing Powder, Heat Tool, Antique Brass Hodgepodge Hardware, Hemp Twine, Honeycomb Textured Impressions™ Embossing Folder 

Thanks again for stopping by- your visits and comments are such an encouragement to me!  Hugs and have a great week, my friends!


Friday, July 15, 2016

ODBD Sweet As Perfume


Hello Friends!

Today we are taking a look back at the July 2016 Release from Our Daily Bread Designs.

This card was fairly easy to create with just a bit of patience needed for all of the masking and watercolor :-)).  


The main panel is all one layer (the sentiment is popped up with dimensional foam) and I used two of the new ODBD July release stamp sets- Sweet As Perfume and You Bless Me along with the new ODBD Layered Lacey Oval Dies and the previously released ODBD Double Stitched Rectangle Dies.

I hope you will find the time to check out the ODBD blog to see the rest of the gorgeous inspiration from the Breadbasket as well as visit their individual blogs:


Lori
 * Robin * Melissa * Julie (me)* 
Sandee * Cathy * Dawn * Lisa 
Sabrina * Diana * Diane (Guest Designer)


Ink/Mediums: Stāz-On® Jet Black, Distress Markers and Ink- Tumbled Glass, Crushed Olive, Brushed Corduroy, Mowed Lawn, Spun Sugar, Picked Raspberry and Seedless Preserves; Sahara Sand marker

Paper/Cardstock: Watercolor; Rich Razzleberry and Whisper White 

Accessories/Tools: Big Shot™, ODBD Layered Lacey Oval Dies, ODBD Double Stitched Rectangle Dies, Masking Paper, 5/8” White Organdy Ribbon, ½” Olive Green Ribbon, Pearls

Thanks again for taking the time to stop by- you are all such a blessing to me!

Hugs and have a great weekend, my friends!


My Creator Knows My Name


Hi Friends!  

Today Sweet ‘n Sassy Stamps is releasing a brand new Creative Worship clear stamp set, My Creator (designed by Krista Hamrick) and I decided to play around with this set to create a card with the galaxy technique.

This fabulous new set, My Creator can be used for Bible Art Journaling as well as card making!  Krista Hamrick has designed several other stamp sets in the Creative Worship line at Sweet ‘n Sassy Stamps and they all coordinate so well together.   

I just love all of the images in the My Creator clear stamp set as well as the sentiments and can see several projects in the future :-)

I decided to use a galaxy technique to create the background  and will be linking this card to the July #26 Mixed Media Monthly Challenge “Reach for theStars” as well as the Splitcoaststampers WT574 “Celestrial Sensation” (I am playing "catch-up" on these challenges since the original challenge date was 03/10/16 but the SCS challenges never expire :-)).

If you have not already had a chance to visit the above challenge galleries, I hope you will find the time to do so- gorgeous inspiration from all!

To create the galaxy background for this card:

Use a sponge applicator to apply Ranger® Tim Holtz® Distress Ink to a piece of Whisper White cardstock (I used Mustard Seed, Picked Raspberry, Chipped Sapphire and Black Soot).

When you are satisfied with the sponging, add drops of water for some of the “galaxies” and heat set with the Heat Tool.

Add Titanium White Acrylic Paint with a splatter tool to create the stars.

To create the rest of the card:

Trim the background panel, layer the sentiment and stars (I used my MISTI® Tool), prepare the background panel with an Embossing Buddy®, stamp the sentiment from My Creator with Versamark™ ink, apply White Embossing Powder and heat set with the Heat Tool.

Ink the Jesus My Creator image with archival black ink, stamp onto a piece of white cardstock, heat set with the Heat Tool, stamp another Jesus My Creator image onto plum designer paper, heat set and fussy cut the robe from the image.

Watercolor the globe, clouds, face and hands on the stamped image using water-based markers, fussy-cut the image and mount the fussy-cut plum robe onto the main image.

Use plum markers to add shadows and color to the robe (along with a water brush to soften the colors).

Trim the galaxy sentiment background panel and mount onto a piece of white cardstock, trim and mount onto the plum card front before mounting onto the white card base.

Add the finished paper pieced Jesus My Creator image using dimensional foam to finish off the card.


Ink/Mediums: Versamark™, Ranger® Tim Holtz® Distress Inks- Mustard Seed, Picked Raspberry, Chipped Sapphire, Black Soot; Ranger® Tim Holtz® Distress Markers- Mowed Lawn, Salty Ocean; Zig® Clean Color Real Brush- #091 Light Gray; Stampin’ Write Markers- Blush Blossom, Perfect Plum; Faber-Castell® Pitt Pen Black Marker; Titanium White Acrylic Paint

Paper/Cardstock: Whisper White, Perfect Plum; retired Perfect Plum Designer Series Paper

Accessories/Tools: AquaPainter™, Embossing Buddy®, Stampin’ Emboss® White Embossing Powder, Heat Tool, Sponge Applicator, Splatter Tool


Thanks for stopping by- hugs and I hope you have a wonderful weekend!

Saturday, July 9, 2016

By The Seeds You Plant


Hi Friends!! 

I hope all of you are having a great weekend so far!!  Today it is my turn to highlight a card on the Artistic Outpost blog and I wanted to share this Mixed Media card using Seed Packets Background along with Harvest and Grunge Elements from the 2016 Spring Release at Artistic Outpost.

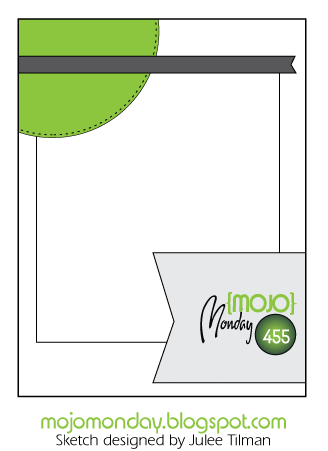
I love playing along with online challenges and decided to incorporate the Mojo Monday #455 Sketch Challenge along with the Splitcoaststampers’ WT591 “Celebrate Chocolate” Challenge into the design :-)

If you have not already visited the Artistic Outpost blog, or the other challenge sites yet, I hope you will do so- fabulous inspiration from my Design Team sisters at the Artistic Outpost as well as the Mojo Monday and Splitcoaststampers' challenge galleries!

To create a card:

Ink the Seed Packets Background with Ranger® Tim Holtz® Walnut Stain Distress Ink and stamp onto a piece of Tip Top Taupe cardstock.

Use the Big Shot™ with the Double Stitched Circle Dies from Our Daily Bread Designs (ODBD) to cut the circle portion from the upper left hand side of the stamped panel.

Use a Distressing Tool to distress the outside edges of the panel, sponge Ranger® Tim Holtz® Vintage Photo Distress Ink over the edges as well as the stamped area to age the paper, mount onto Early Espresso cardstock and distress the edges again.

Ink the Seed Packets Background with Ranger® Tim Holtz® Tea Dye and Vintage Photo Distress Ink, stamp onto a piece of Very Vanilla cardstock.

Trim the stamped Very Vanilla cardstock panel, mount onto a piece of Very Vanilla cardstock and adhere to the Early Espresso card base.

Add the distressed Seed Packets Background focal image panel on an angle, add a piece of 3/8” Early Espresso Seam Binding Ribbon with the Very Vanilla Ribbon Slide and mount onto the card base.

Using images from Grunge Elements, ink the grid and the large splatter with Ranger® Tim Holtz® Vintage Photo Distress Ink and stamp over the panel, ink the coffee stain with Whisper White Craft Ink and stamp a few times onto the panel as well.

Ink the sentiment from Harvest with Stāz-On® Jet Black Ink, stamp onto a piece of Very Vanilla cardstock, hand trim the banner and distress the edges with a distressing tool.

Mount the sentiment onto Early Espresso cardstock, distress the edges once more, stamp the grid image from Grunge Elements with Ranger® Tim Holtz® Vintage Photo Distress Ink and sponge additional ink along the edges to age the paper.

Mount the sentiment to the
card front with layers of dimensional foam to finish off the card.

After finishing this card and photographing it for the Artistic Outpost blog post, I decided to add additional shadows with the Vintage Watercolor Technique (using a Speedball® Elegant Writer® Black Pen with an AquaPainter™) plus adding watercolor to the vegetables with Ranger® Tim Holtz® Mowed Lawn, Ripe Persimmon and Gathered Twigs Distress Markers for the “stepped up” version #2.

Stamp Sets:  Seed Packets Background, Harvest, Grunge Elements (Artistic Outpost)

Ink/Mediums: Stāz-On® Jet Black, Whisper White Craft Ink; Ranger® Tim Holtz® Vintage Photo and Walnut Stain Distress Ink; Card #2- Ranger® Tim Holtz® Gathered Twigs, Mowed Lawn, Ripe Persimmon Distress Markers; Speedball® Elegant Writer® Black Marker

Paper/Cardstock: Very Vanilla, Early Espresso, Tip Top Taupe (Stampin’ Up!)

Accessories/Tools: Big Shot™, ODBD Double Stitched Circle Dies,  AquaPainter™, Distressing Tool, 3/8” retired Early Espresso Seam Binding Ribbon, retired Very Vanilla Hodgepodge Hardware Ribbon Slide, Burlap Twine pieces

So which one do you prefer- the monochromatic version #1 or the “stepped up” version #2?  I am leaning toward version #2 but I tend to like more details....

Thanks again for stopping by- your visits and comments are such an encouragement to me!  Hugs and have a great week, my friends!

Related Posts Plugin for WordPress, Blogger...