Sunday, June 2, 2013

CAS Daydream Birthday


Hi Stampers! 

I decided to create a CAS Card using this week’s Dynamic Duos DD55 Color Challenge- I hope you will take the time to visit their site and check out the Design Team entries as well as the other submissions!

This card was quick and easy:

Stamp the Daydream Jumbo Wheel using Raspberry Ripple Classic Ink and stamp onto Whisper White cardstock. Fill in the center of the floral scrolls with a Stampin’ Write marker in Wisteria Wonder.  

Use the Big Shot™ with the Square Lattice Textured Impressions™ Embossing Folder and mount onto Raspberry Ripple cardstock.

Also emboss a piece of Whisper White with the Modern Mosaic Textured Impressions™ Embossing Folder, adhere the Daydream panel at the top along with the sentiment from Petite Pairs.

Add the Satin Ribbon double bow (from my stash and it matches Wisteria Wonder perfectly) and mount onto Raspberry Ripple and again onto a Whisper White card base.

Use the Elegant Butterfly Punch to punch out three butterflies from Raspberry Ripple cardstock and add the Rhinestones to finish off the card.

­Stamp Sets: Daydream (Jumbo Wheel), Petite Pairs

Ink:  Raspberry Ripple, Stampin’ Write marker- Wisteria Wonder

Paper: Whisper White, Raspberry Ripple

Accessories:  Big Shot™, Modern Mosaic and Square Lattice Textured Impressions™ Embossing  Folders, XL Oval and Elegant Butterfly Punches, Rhinestones, Satin Ribbon (from my stash)


Thanks again for visiting- I hope you have a wonderful Sunday!

Saturday, June 1, 2013

Imagine The Possibilities- A Vintage Graduation


Hi Stampers!

I needed another graduation card for a young lady that likes to read historical novels so I thought the retired set, Friendship’s Journey would be the perfect choice. 

To create this card:

Using the Embossing Buddy®, de-static a piece of Whisper White cardstock and stamp the image from Friendship’s Journey  and sentiment from Word Play using Versamark™ ink.  Apply Stampin’ Emboss® Early Espresso Embossing Powder and heat with the Heat Tool.   

Once cooled, color with the vintage girl image using Stampin’ Write markers- So Saffron, River Rock, Wild Wasabi, Crumb Cake, Blush Blossom, Bashful Blue, Elegant Eggplant, Wisteria Wonder and Perfect Plum. Distress the edges with the Distressing Tool and use a Sponge Dauber to apply Crumb Cake and Soft Suede Classic Ink to “antique” the paper.

Ink the vintage girl image with Crumb Cake Classic Ink and stamp over the sentiment.  Punch out using the 2 ½” Circle Punch and adhere a 2 ½” circle of Early Espresso cardstock behind the sentiment. 

Use the Big Shot™ to emboss a piece of Crumb Cake cardstock with the Lacy Brocade Textured Impressions™ Embossing Folder (ink the interior of the folder with Crumb Cake Classic Ink prior to embossing). 

Add the 5/8” Satin Ribbon triple ribbon bow and sentiment.   Adhere the focal image using Stampin’ Dimensionals®.  Add the Elegant Eggplant rolled flowers with Pearl centers to finish off the card.  

Stamp Sets: Friendship’s Journey, Word Play

Ink: Versamark™, Stampin’ Write Markers- So Saffron, River Rock, Wild Wasabi, Crumb Cake, Blush Blossom, Bashful Blue, Elegant Eggplant, Wisteria Wonder and Perfect Plum

Paper/Cardstock:  Whisper White, Early Espresso, Crumb Cake

Accessories:  Big Shot™,  Lacy Brocade, Vintage Wallpaper Textured Impressions™ Embossing Folder, Punches- 2 ½” Circle, 1 ¼” Scallop Circle (for rolled flowers), Embossing Buddy®, Stampin’ Write® Early Espresso Embossing Powder, Heat Tool, Pearls, 5/8” Satin Ribbon (from my stash)


Thanks again for visiting- I hope all of you have a great weekend!

Friday, May 31, 2013

CAS Doodling- A Quick and Easy Card

Hi Stampers! 

I decided to create a Clean and Simple (CAS) Card using this week’s Splitcoaststampers Way To Use It Challenge-  WT429 DoodleDefined (check out the gallery).  

I have not had a chance to doodle lately and decided to use the Stampin' Up! White Gel Pen on Midnight Muse cardstock to draw the flower and fill in the area with dots. 

 
Quick and easy- stamped the sentiment with Midnight Muse Classic Ink and extended the flourishes on the ends to create a larger tulip type image as well.

Layered with Stampin’ Dimensionals® and added a previously embossed panel (using the soon to be retired Lacy Brocade Textured Impressions™ Embossing Folder). 

Quick and easy-very relaxing, I will have to try this again soon!!  

­Stamp Sets: My Friend

Ink:  Midnight Muse, White Gel Pen, Stampin’ Write Marker- Midnight Muse

Paper: Whisper White, Midnight Muse

Accessories:  Big Shot™, Lacy Brocade Textured Impressions™ Embossing  Folder, Stampin’ Dimensionals®


Thanks again for dropping by!  Have a wonderful Friday!

Thursday, May 30, 2013

Imagine the Possibilities- A Modified Straw Technique for a Sketch and Color Challenge


Hi Again Stampers! 

I had so much fun with the PP147sketch at The Paper Players
that I decided to create one more card using the sketch along with the DD54 Dynamic Duos Color Challenge.

I have created similar cards in the past using one of my favorite sets, By The Tide and this time I used a modified straw technique along with Sponge Daubers.  For some reason, even though I am organizing, I have "misplaced" my brayers for the moment (actually having a “senior moment”- I cannot recall exactly where I stashed them- lol!! :-).

Again, if you have the time, check out all of these sites for wonderful ideas and inspiration!

To create this card:

Drop a few drops from a Bashful Blue re-inker onto Glossy White cardstock and using a straw, blow around the ink (be careful, you will become "dizzy"- for me, more than usual :-)).

I modified the technique and patted the ink dry using a scrap piece of paper and then sponged more Bashful Blue Classic Ink over the background.  Stamp the script sentiment stamp from By The Tide repeatedly using Bashful Blue ink as well.

Stamp the coral, seahorse, shell, Nantucket sign and fish image over the background using Midnight Muse Classic Ink (stamping off occasionally).  Stamp the sentiment (from soon to be retired Word Play), seashell, fish and Nantucket sign image again using Midnight Muse Classic Ink onto Whisper White cardstock as well.

Close up of background- the script faded a bit :-)
Trim the images to the desired sizes and mount onto Midnight Muse cardstock.   Adhere to the Whisper White panel (embossed using the Woodgrain Textured Impressions™ Embossing Folder) and add the additional images stamped onto Whisper White using Stampin’ Dimensionals®.

Stamp Sets: By The Tide, Word Play
Ink: Bashful Blue, Midnight Muse
Paper/Cardstock:  Whisper White, Midnight Muse, Glossy White
Accessories: Big Shot™,  Woodgrain Lattice Textured Impressions™ Embossing Folder, Punches- ¾” and 2 ½” Circle, Sponge Daubers, Drinking Straw
Thanks again for visiting- I may use this as a graduation card (do you think a young lady would like this one or only a guy card)?

I hope you have a terrific day- God Bless!!

Thinking of You on Father's Day- A Sketch Using Retired Sets :-)


Hi Stampers!!

I have been busy organizing my craft room and decided to create an additional Father's Day card to have on hand using some of my neglected retired items along with Leanne’s PP147 sketch at The Paper Players.   

Again, if you have a chance, stop by The Paper Players site for terrific inspiration from their Design Team as well as the other entries- great job by all!


To create this card:     
                                              
                                        
De-static a piece of Very Vanilla cardstock using the Embossing Buddy® and ink the clock and gear images from Sense of Time using Versamark™ ink.  Apply Stampin’ Emboss® Winter White Espresso Embossing Powder and heat with the Heat Tool to melt the powder. 

Once cooled using Sponge Daubers, apply Classic Ink- first Crumb Cake, followed by the new 2013-2015 In Color Baked Brown Sugar, the new Smoky Slate, Soft Suede and finally Early Espresso.  Ink the retired Wonderfully Worn background stamp using Basic Gray Classic Ink to add a bit of distressing along with a bit more Winter White embossing powder and a White Gel Pen.  

Carefully cut out the clock image and also trim the gear image panel.  Cut into panels for the sketch and mount onto Very Vanilla and/or embossed panels of Baked Brown Sugar per the  PP147 sketch

Add the 3/8” Early Espresso Quilted Ribbon along with the sentiment from the retired set, Thinking of Father (the sentiment was stamped onto Very Vanilla cardstock using Early Espresso Classic Ink and the edges were punched with the New Artisan Punch).

Stamp Sets:  Sense of Time, Thinking of Father, Wonderfully Worn (all retired)

Ink: Versamark™, Crumb Cake, Baked Brown Sugar, Smoky Slate, Basic Gray, Early Espresso, Soft Suede

Paper: Early Espresso,  Very Vanilla, Baked Brown Sugar

AccessoriesEmbossing Buddy®, Stampin’ Emboss® Winter White Embossing Powder, Heat Tool, Big Shot™, Woodgrain Textured Impressions™ Embossing Folder, Artisan Punch, 3/8” Early Espresso Quilted Satin Ribbon, Sponge Daubers, White Gel Pen, Game Spinners


Thanks again for stopping by- I hope you like this card using retired products.  

Have a great Thursday!!

Monday, May 27, 2013

Remembering Those Who Have Gone Before

Hi Stampers! 


I hope all of you are having a great Memorial Day weekend!  I wanted to take a moment to reflect on the reason for our holiday- remembering those who have sacrificed their lives for service to our country and our freedom.

I am praying for those families who have lost loved ones in our military and other branches of service- may we never forget their sacrifice nor their courage, bravery and commitment to our country and freedom!  May the Lord richly bless America and may we always be free!


Thanks again for taking the time to stop by and visit- have a wonderful day!

Saturday, May 25, 2013

Happy Graduation- A Horse with a Musical Background :-)


Hi Stampers! 

I wanted to create a card for a special young lady that is graduating this year (hopefully I will not spoil the surprise- I do not believe she checks my blog :-)).  She loves horses and music so I decided to combine the two and use the colors from this week’s CQC190 ColourQChallenge along with the SR177 Sketch from Stampin’ Royalty


Again, if you have the time, check out both sites- great inspiration from the Design Teams and other entries!

To create this card:

Use the Big Shot™ to emboss a piece of a piece of Really Rust DSP and a piece of Baja Breeze cardstock with the Lacy Brocade Textured Impressions™ Embossing Folder.  Lightly sand the DSP to show the white core and layer the DSP onto the Midnight Muse cardstock layer.   


Layer the embossed Baja Breeze cardstock onto Midnight Muse as well as the other two DSP layers for the sketch.

Ink the horse image from Horse Frontier and stamp onto Whisper White cardstock.  Color using Watercolor Pencils and create a mask from copier paper. Ink the background stamp, Musical Score (retired) with Midnight Muse Classic Ink and stamp off a few times before masking the horse image and stamping over the horse.

Cut the horse out with a Circle Cutter or Circle Framelits™.  Lightly sponge Baja Breeze Classic Ink over the edges and background.  Mount onto a Midnight Muse cardstock circle and add the partial Tea Lace Paper Doily.

Adhere the layers, add the 5/8” Rust Satin Ribbon layers along with the sentiment and rolled flowers.

Stamp Sets: Horse Frontier, Teeny Tiny Wishes, Musical Score (retired background)

Ink: Midnight Muse, Baja Breeze, Watercolor Pencils

Paper/Cardstock:  Baja Breeze, Midnight Muse, Designer Series Paper- Comfort Café, retired Spice Cake & Really Rust Hostess Pack Level I

Accessories: Big Shot™,  Lacy Brocade Textured Impressions™ Embossing Folder, Circle Framelits™, Punches- 1 ¼” Scallop Circle (for rolled flowers), Word Window, Modern Label; Tea Lace Paper Doily, Sponge Daubers, Sanding Block, Pearls, 5/8” Rust Satin Ribbon (from my stash)

Thanks again for stopping by- hope you have a wonderful Memorial Day weekend!!  

Friday, May 24, 2013

Farewell to Tiny Tags and the Jewelry Tag Punch!

Hi Stampers! 

I hope all of you are having a great week so far!  I wanted to take another moment to highlight another one of the retiring sets, Tiny Tags along with the corresponding punch, Jewelry Tag. 


I love how the Tiny Tags can be added to any card and the punch can be used for more than just the stamp set. 

Here are a few examples of how this set can be used:


Tiny Tags were used for the sentiment on this card :-)

Layered the Tiny Tags with cardstock punched from the Jewelry Tag Punch


Used part of Artistic Etchings for the center tag 


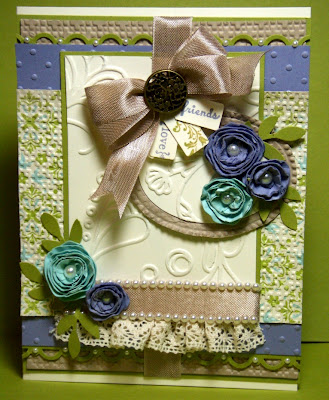
Tiny Tags under the bow add a sentiment that does not overwhelm the card 


Jewelry Tag Punch and Nature's Pace for the Tiny Tags


I hope you have enjoyed this farewell to Tiny Tags and the Jewelry Tag Punch and again, if this is one that has been on your wish list of a while, now is the time since it is only be available until May 31st.

Thanks for stopping by- have a great evening!!

Related Posts Plugin for WordPress, Blogger...