Showing posts with label Thank You. Show all posts

Saturday, January 2, 2021

Clean and Simple Thank You


 Happy New Year Friends!

We are focusing on Clean and Simple (CAS) thank you cards this week on the Stamp Simply blog and today I am sharing a very quick CAS card that I designed using several Stamp Simply stamp sets along with the coordinating die.  

As many of you who follow my blog know that I enjoy participating with online challenges.  I will be linking this card to the Word Art Wednesday #470-#472 Christmas Blog Hop Challenge along with the Double Trouble#73- December “Die-Lirious” Challenge  (I used a Gemini, Jr. to cut out my die for option #1 plus I used silver twine for the Twisted Sister option as well:-)) and the Bitten by the Bug
2 "Die-Lirious Holiday Season Partnering with Double Trouble" Challenge (
they loosened up their rules for this challenge- need to use a die cut, which I did :-)). 

If you have not had a chance to visit the Stamp Simply blog yet (to check out all of the gorgeous cards from the rest of the Design Team), or the other challenge sites,  I hope you will find the time to do so- fabulous inspiration from all


To create this card:

De-static a piece of white cardstock with an embossing powder tool. Ink the buck image from A Godly Man with Versafine Onyx Black ink, stamp onto the prepared cardstock, apply  clear embossing powder and heat set with a heat tool. 

Once the embossing powder has cooled, die cut the image with the coordinating A Godly Man Buck die. Using the same buck die, die cut a few more bucks from white cardstock and mount the plain dies behind the embossed image (to create a thicker die cut).

On a 4” x 5 ¼” piece of white cardstock, repeat the stamping/embossing steps above with the “Thank You” sentiment from A Godly Man, stamping into the lower left hand part of the panel and once cooled, mount the panel onto a piece of 4¼” x 5 ½” piece of black cardstock before adhering the entire background panel to a white card base.

Trim a piece of plaid designer paper to approx. 4” x 2¼” and mount onto a piece of black cardstock, trimming close to the edge.  Add this panel directly to the card front.

Add the looped silver twine using glue dots to hold into place and mount the die cut buck image with dimensional foam over the twine.

Add a few silver rhinestones to finish off the card.


Stamp Sets:  A Godly Man (Stamp Simply)

Ink/Mediums: Versafine Onyx Black

Cardstock/Paper:  White, Black; Memory Box Christmas Plaid with Foil 6x6

Tools/Accessories:  Gemini, Jr., Stamp Simply Dies- A Godly Man Buck, Embossing Powder Tool, Clear Embossing Powder, Heat Tool, Silver Twine, Silver Rhinestones

Thanks again for taking the time to visit- I hope all of you have a wonderful New Year weekend!!

Monday, May 15, 2017

Thank You for All That You Do


Hi Friends!  

I am having such a great time using the Our Daily Bread Designs May 2017 Release this month and decided to create another card using the new Teacher Tools and Seeds of Knowledge stamp sets along with the A+ Apples Dies and previously released Double Stitched Rectangles Dies.


If you have not had a chance to visit the ODBD Blog or the other challenge sites yet, I hope you will find time to do so- gorgeous inspiration from all!! 

To create this card:

1). Ink the Teacher Tools stamp with archival black ink, stamp onto white cardstock, die cut and emboss with the Double Stitched Rectangles Dies.  Color the image with watercolor pencils, mount onto black cardstock and trim close to the edge.


2). Ink the sentiment from Seeds of Knowledge using embossing ink, stamp black cardstock and heat emboss with white embossing powder.  Once the powder has cooled, trim and create the flag banners by hand.

3). Die cut and emboss red, brown and green cardstock using the A+ Apple Dies for the apple and black cardstock for the A+.  Assemble the apple die and set aside.

4). Trim a piece of Birthday Brights Collection 6x6 Paper Pad, mount onto white cardstock, trim and mount onto the black card base.

5). Mount the Teacher Tools image and A+ die cut directly to the card front and add the die cut apple along with the “Thank You” sentiment with dimensional foam to finish off the card.

Thanks again for taking the time to stop by- hugs and I hope you have a fabulous week, sweet friends!

Tuesday, September 27, 2016

SUO158 Thankful- Vintage Leaves


Hi Friends!   


We are encouraging you to pull out your Stampin' Up! supplies and stamps to create a Thanksgiving card, project or a general "Thank You" card/project and link your artwork in the SUO158 Gallery!  

Thanksgiving is one of my favorite holidays and I always need to have “Thank You” cards on hand so this challenge is perfect to create something to show your appreciation for that someone special or a card/project for your Thanksgiving event :-)


I hope you will stop by the SU-Only Challenge site to check out the rest of the Design Team projects as well as the other challenge galleries- fabulous inspiration from all!

To create this card:

Ink the maple leaf image from Stampin’ Up! (SU!) Vintage Leaves with Basic Black Archival Ink and stamp onto a piece of Whisper White cardstock.

Using Stampin’ Write Markers- Crushed Curry, Cajun Craze, Garden Green and Chocolate Chip, color the maple leaf and use an AquaPainter™ to blend the ink.

Continue to build up the color until you are satisfied with the result, fussy-cut the leaf and crunch a bit by hand to mimic a real leaf.

Ink the interior of the Woodland Textured Impressions™ Embossing Folder with Sahara Sand Classic Ink and emboss a piece of Very Vanilla cardstock.

Trim the embossed panel and mount onto a piece of Chocolate Chip cardstock.

Emboss a piece of Garden Green cardstock along with a panel of Very Vanilla cardstock with the Woodgrain Textured Impressions™ Embossing Folder, trim the Garden Green piece and mount onto a piece of Chocolate Chip cardstock.

Trim the embossed Very Vanilla panel and mount onto a piece of Chocolate Chip cardstock, trim again and mount onto the Garden Green card base.

Ink the sentiment from SU! Acorny Thanks with Chocolate Chip Classic Ink and stamp onto a piece of Very Vanilla cardstock.

Use the Big Shot™ with the retired Bitty Banner Framelits™ to die cut the sentiment.
Add the Garden Green embossed panel to the card front directly and mount the Woodland embossed panel with Stampin’ Dimensionals®.

Adhere the Burlap Ribbon Threads along with Gold Metallic Thread loops, cover with the leaf image and mount the sentiment with Stampin’ Dimensionals®.

Add a few Pearls along with Clear Wink of Stella® to the leaf to finish off the card.

Stamp Sets:  Vintage Leaves, Acorny Thanks

Ink: Stampin’ Archival Pad™- Basic Black, Classic Ink- Chocolate Chip, Sahara Sand; Stampin’ Write Markers- Cajun Craze, Crushed Curry, Chocolate Chip, Garden Green; Clear Wink of Stella®

Paper/Cardstock:  Whisper White, Very Vanilla, Chocolate Chip, Garden Green

Tools/Accessories: Big Shot™,  Woodland and Woodgrain Textured Impressions™ Embossing Folders, retired Bitty Banners Framelits™, AquaPainter™, Gold Metallic Thread, 1 ¼” Burlap Ribbon, Pearls

I hope this card has inspired you to pull out your Stampin’ Up! products and come  join us in the SU-Only“Thanks and Thanksgiving” Challenge.

Thanks again for stopping by- hugs and have a great week!

Wednesday, January 6, 2016

TCC46 Thanks A Latte!


Hi Friends!!

Woohoo!  It is time for The Card Concept #TCC46 "Warm Your Heart" Challenge and we are so thrilled to be back for 2016!

I love the inspiration photo and was inspired by the hot chocolate, the texture of the mittens and, of course the warm, luscious colors.


Just a reminder that the Card Concept is a bi-weekly challenge that has an inspiration photo along with a number of design styles that you can choose from to create your card- Clean and Simple, Clean and Graphic, Clean and Layered, Shabby Chic, Freestyle Collage, Classy and Elegant and Mixed Media. 

Also, if you have not had a chance to do so, I hope you will take the time to visit us at The Card Concept and check out the rest of our Design Team samples as well as the Just Us Girls and Splitcoaststampers' sites- fabulous inspiration from all!

To create this card:

Using the Memory Box™ Texture Flourish Stencil, use a palette knife to apply Finnabair® ArtExtravagance Copper Crackle Texture Paste over a piece of Blushing Bride Designer Series Paper (retired from a hostess pack years ago).

Allow the crackle paste to dry (I used a Heat Tool, carefully, to speed up the process).

Add Ranger® Tim Holtz® Picket Fence Distress Stain to tone down the bright copper color, also add a bit of Gesso® (I used my finger to spread).

Distress the edges of the crackle texture panel with a Distressing Tool,  mount onto a die-cut piece of Early Espresso cardstock  and add the 1” Dark Chocolate Satin Ribbon with the Ivory Crochet Lace (wrapping the edges of the ribbon around the back).

Mount the entire background panel onto a piece of Very Vanilla cardstock, trim and mount onto the Early Espresso card base.

Trim a piece of the retired Sending Love DSP to size, color with a Spectrum Noir™ DR3 Alcohol Marker to darken the DSP and mount inside a die cut rectangle from Early Espresso cardstock.

Add the Dark Chocolate Triple Ribbon bow to the top of the tag element and mount onto the card front using dimensional foam.

Ink the coffee mug, steam and chevron images from the Sweet ‘n Sassy Stamps (SNSS), PickMe Up using Early Espresso Classic Ink and stamp onto Very Vanilla cardstock. 

Use the coordinating Pick Me Up Die Set with the Big Shot to cut out the images.

Color the heart shape on the coffee mug using the Spectrum Noir™ DR3 Alcohol Marker and add the steam image and Rhinestone to the coffee mug.

Mount the stamped images to the card front using dimensional foam.

Stamp the sentiment from Pick Me Up (SNSS) with Early Espresso Classic Ink onto Very Vanilla cardstock, trim and create the banner points with the Hexagon Punch, mount onto Early Espresso cardstock (using the Hexagon Punch to create the points).

Mount the layered sentiment onto the card front with dimensional foam to finish off the card.

Stamp Sets: Pick Me Up (Sweet ‘n Sassy Stamps)

Ink: Early Espresso, Spectrum Noir™ DR3 Alcohol Marker, Ranger® Tim Holtz® Picket Fence Distress Stain

Paper: Very Vanilla, Early Espresso, retired Sending Love DSP and Blushing Bride DSP

Accessories: Big Shot™,  Pick Me Up Dies (SNSS), MFT Blueprints 13 Die, MFT Stitched Rectangle STAZ, Memory Box™ Texture Flourish Stencil , Finnabair® ArtExtravagance Copper Crackle Texture Paste, Palette Knife, Gesso®, Distressing Tool, 1” Dark Chocolate Satin Ribbon, Ivory Crochet Lace, Rhinestone


Thanks again for taking the time to stop by- I hope you have a wonderful week and come play along with us at The Card Concept!

Sunday, November 15, 2015

CAS Lighthearted Leaves- So Grateful For You


Hi Again Stampers!!

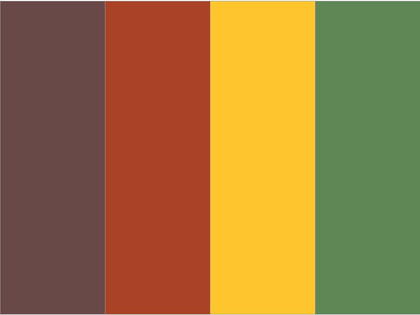
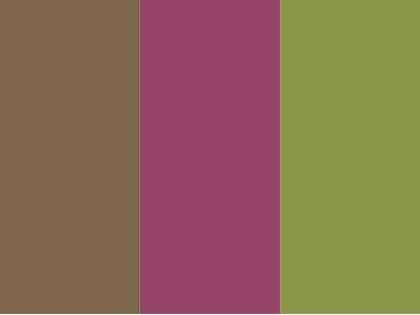
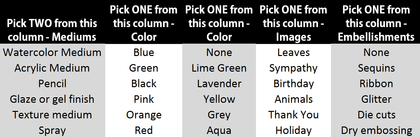
This Clean and Simple (CAS) card was created for the CASology #177 Give Challenge using the Splitcoaststampers’ CC555 Color Challenge with the MIX-Ability MIX145 "Enter the MatrIX" Challenge (Watercolor, Glaze, Green, Lavender, Leaves and Ribbon- Gold Cording in this case :-)).


To me the cue word "Give" this time of year means "Give Thanks" so I decided to create a "Thank You" card using a few leftovers from a previous project :-)

Again, if you have not had the chance to do so, I hope you will find the time to visit all of the above challenge sites- tremendous inspiration from all!

To create this card:

Stamp the Lighthearted Leaves images using Stāz-On® Jet Black Ink onto Whisper White cardstock. 

Color the images using Stampin’ Write Markers- Rich Razzleberry, Mossy Meadow and Soft Suede.  Spritz with water, dry with the Heat Tool and once dried, cut the images out with the coordinating die (for the larger leaf) and fussy-cut the smaller leaves.

Use a foam brush to apply Mod Podge® to the leaves and allow to thoroughly dry.

Use the Simply Scored™ tool to score the Whisper White cardstock, stamp the sentiment using Rich Razzleberry Classic Ink, trim and adhere to the Soft Suede cardstock.

Add the Gold Cold Trim and mount the panel onto the Whisper White card base.

Add the three leaves with Stampin’ Dimensionals® along with the Gold Cord bow to finish off the card.

Stamp Sets: Lighthearted Leaves

Ink: Stāz-On® Jet Black, Stampin’ Write Markers- Mossy Meadow, Rich Razzleberry, Soft Suede

Paper: Whisper White, Soft Suede

Accessories: Big Shot™, Leaves Framelits™, Mod Podge®, Simply Scored™ Scoring Tool, Gold Cord Trim


Thanks again for stopping by- I hope you have a fantastic week, my friends!

Thank You- Watercolor Wash with Fall Leaves


Hi Again Friends!

I wanted to share a card that I created using the TGIF Challenge! #29 Sketch  along with the Fab Friday 77 Color Challenge.

I love this fabulous fall color combination so I decided to use the leaves from the retired French Foliage stamp set to create a fall "Thank You" card :-)

I hope you will have the time to stop by both of the above sites to check out the inspiration from their fabulous Design Teams as well as their gallery entries!

To create this card:

Using Stāz-On® Jet Black, stamp the leaves from the retired French Foliage stamp set onto Whisper White cardstock.

Color the leaves using Stampin’ Write Markers- Hello Honey, Cajun Craze and Blackberry Bliss.

Lightly spritz the leaves with water and once dry, fussy-cut the leaves.

Using Sponge Daubers, apply Hello Honey and Cajun Craze Classic Ink to the Watercolor Wash background stamp, spritz with water and lightly lift a bit of the color with a paper towel before stamping the image onto Whisper White cardstock.

Trim off approx. 1 ½” of the background panel, ink the honeycomb stamp from the Butterfly Basics set with Blackberry Bliss Classic Ink and stamp onto the trimmed piece of the background panel and mount onto a piece of Blackberry Bliss cardstock.

Trim the remaining background panel, stamp the sentiment from the Mama Elephant Sunday Sentiments and large splatter stamp from Gorgeous Grunge using Blackberry Bliss Classic Ink.

Add the trimmed background panel onto a piece of Cajun Craze cardstock, add the vertical honeycomb strip and mount onto the Blackberry Bliss card base.

Add the fussy-cut leaves using Stampin’ Dimensionals® along with the 3/8” Stitched Blackberry Bliss Satin Ribbon bow to finish off the card.

Stamp Sets:  French Foliage (retired), Watercolor Wash, Butterfly Basics, Gorgeous Grunge- all Stampin’ Up!, Sunday Sentiments (Mama Elephant)

Ink: Stāz-On® Jet Black, Cajun Craze, Hello Honey, Blackberry Bliss Classic Ink and Stampin’ Write Markers

Paper:  Whisper White, Cajun Craze, Blackberry Bliss

Accessories: Sponge Daubers, Water Spritzer Bottle, 3/8” Blackberry Bliss Stitched Ribbon


Thanks again for visiting- have a blessed weekend, my friends! 

Saturday, October 31, 2015

HYCCT1529 Thank Pink

Hi Again Friends!

This card was created for the Splitcoaststampers’  “Hope You Can Cling To” HYCCT1529 Mary’s  “Thank Pink” Challenge to create a thank you card using "pinks".

Just a reminder- the Hope You Can Cling To Challenges at Splitcoaststampers is a yearly card drive in October for the MD Anderson Cancer Center.  The challenge is a daily one (with multiple challenges on a few of the days) for a total of 40 challenges in one month and the goal is not only to create the cards but also mail them to the center to be used by the patients undergoing treatment.

It is a very worthy card drive and some of my cards have been sent to friends that are struggling with cancer and the remainder will be sent to the center in early November.

For this fairly simple card, I decided to use the brand new Stampin' Up! October 15 My Paper Pumpkin exclusive stamp set, Blissful Bouquet along with a few other stamps to create my “Thank Pink” card.  

I sure hope you have a chance to visit the HYCCT1529 gallery and possibly gather your supplies to join in on the fun for this worthwhile card drive!!

This Mixed Media card took a bit of time due to the masking, fussy-cutting and painting but it was a lot of fun to create!

First stamp the floral image, mask to add the additional flowers and leaves, color with markers and the AquaPainter™, add Frost White Shimmer Paint to the petals and fussy-cut one of the flowers for additional dimension.

Add splatter and script to the background, trim and mount to cardstock layers, add White Acrylic Paint to the flower stamen ends and Pearls to the flower centers to finish off the card.  

*** FYI- I tried Pink Pirouette for the background splatter, but it stamped almost a light orange color-oops! Possibly my grunge stamp was not clean so I switched to Melon Mambo, stamping off once before applying to the card :-) *** 

Stamp Sets:  Blissful Bouquet (Stampin’ Up! MPP), Gorgeous Grunge, Notable Notions (retired)

Ink: Stāz-On® Jet Black, Melon Mambo, Pink Pirouette; Stampin’ Write Markers- Pink Pirouette, Melon Mambo, Pear Pizzazz, Sahara Sand; Frost White Shimmer Paint, Titanium White Acrylic Paint

Paper: Whisper White, Basic Black, Melon Mambo

Accessories: AquaPainter™, Pearls

I will be sharing a few more of the Hope You Can Cling To Challenge cards this evening (the challenge month is over today and I finished six cards yesterday and have three more posts for those cards plus three more challenge cards to create for today's final challenges :-))


Thanks again for visiting- I hope you have had a chance to visit the HYCCT galleries and possibly time to leave some comment “love” for the participants- wonderful designs and inspiration from all for this very worthy card drive!  Have a blessed weekend, my friends!

Wednesday, September 2, 2015

Lighthearted Leaves- A CAS Sketch Challenge :-)


Hello Friends!

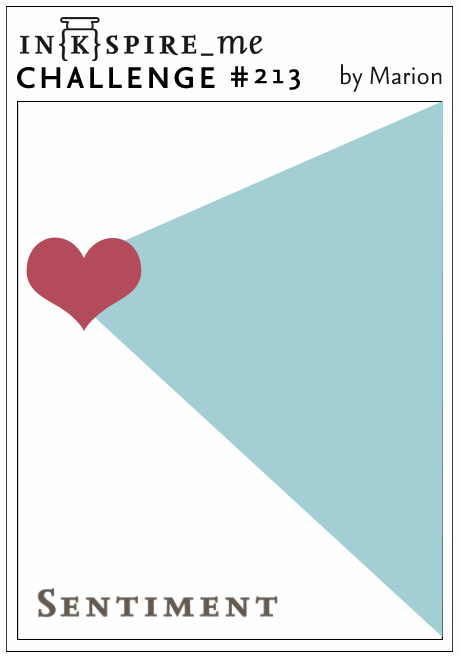
I am still playing around with the new Lighthearted Leaves set and created this quick card using the IN{K}SPIRE_me #213 Sketch Challenge. 

If you have not had a chance to visit the above challenge site yet, again, I would encourage you to do so- wonderful Design Team samples and as well as inspiration from their gallery!

To create this card:

Use the Embossing Buddy® to de-static a piece of Very Vanilla cardstock, ink the Lighthearted Leaves image using Versamark™ Ink, stamp onto the panel, apply Stampin’ Emboss® Black Embossing Powder and use the Heat Tool to heat set the powder.

Color the image with the Sahara Sand Stampin’ Write marker and cut out using the Big Shot™ with the Leaflets Framelits™.

Emboss a piece of Very Vanilla cardstock with the Boho Chic Textured Impressions™ Embossing Folder, trim and mount onto a piece of Basic Black cardstock.

Stamp the sentiment using Memento™ Tuxedo Black Ink onto a piece of Sahara Sand cardstock, trim and mount onto a piece of Basic Black cardstock, add the angled embossed panel and mount onto the Sahara Sand card base.

Add the embossed leaf using Stampin’ Dimensionals®.

Create the bow with the Bow Builder Punch from Basic Black cardstock, adhere to the card front and add the Antique Brad to the center of the bow to finish off the card.

Stamp Sets:  Lighthearted Leaves

Ink: Versamark™, Memento™ Tuxedo Black ; Sahara Sand Stampin’ Write Marker
Paper/Cardstock:  Very Vanilla, Basic Black, Sahara Sand
Accessories:  Big Shot™, Boho Chic Textured Impressions™ Embossing Folder, Embossing Buddy®, Stampin’ Emboss® Black Embossing Powder, Heat Tool, Bow Builder Punch, Antique Brad

Thanks again for taking the time to stop by- you visits are always an encouragement to me!  Hugs and have a great day!  
Related Posts Plugin for WordPress, Blogger...