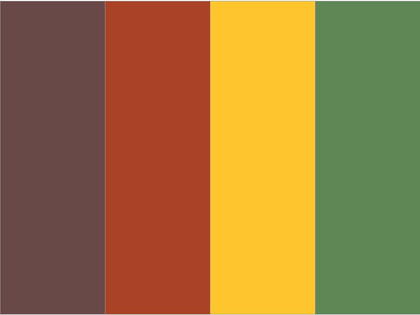
Showing posts with label Leaves. Show all posts

Saturday, August 5, 2023

In All Things, Give Thanks


Hi Friends!

This week at the Stamp Simply blog, the Design Team have been sharing a variety of beautiful fall/autumn cards.    

Again, if you have not had a chance to check out my Sister DT cards yet, I hope you will do so- wonderful inspiration from all!


I decided to create a fall card using the Tim Holtz Fall Foliage Thinlits Dies along with the Welcome Fall stamp set and the Craft Consortium Sunset Ink Drops 6x6 Paper Pad.


This paper has such great colors and textures- perfect for fall leaves and you do not need to watercolor!  Easy, peasy. 

Die cut various leaves from a piece of the Sunset Ink Drops 6x6 Paper using the different dies from the Tim Holtz Fall Foliage Thinlits set. Crumple gently by hand and set aside.


Emboss a piece of white cardstock with the Sizzix 3D Texture Fades A6 Foliage embossing folder. Trim and mount onto a piece of black cardstock, trim again and mount onto a piece of the Craft Consortium Sunset 6x6 paper.  FYI- I used same piece of paper that I had used to die cut all of the leaves as the final background panel of the main card front, love it when that happens!

Trim a piece of black cardstock for the horizontal panel.

De-static the horizontal panel with an embossing powder tool, ink the verse sentiment from the Welcome Fall stamp set with Versamark, stamp onto the prepared cardstock, apply white embossing powder and heat set with a heat tool.

Layer the horizontal panel onto the card front, add the die cut leaves tucking a few around the edge of the panel.

Use a water brush with frost white shimmer paint to add shimmer to the leaves and finish off the card with orange rhinestones.


I enjoy playing along with online challenges and will be joining the Double D Challenges "Collaboration with Altenew Stencils/Anything Goes Challenge and the Can You Handle the Pressure? "Anything Goes Embossing with a twist of Nautical Challenge. 


Stamp Sets: Welcome
Fall
(Stamp Simply)

Inks/Mediums: Versamark, Frost White Shimmer Paint

Cardstock/Paper: White, Black, Craft Consortium Ink Drops- Sunset 6x6 Paper Pad

Accessories/Tools: Gemini, Jr., Sizzix Thinlits Dies by Tim Holtz- Fall Foliage, Sizzix 3D Texture Fades A6 Embossing Folder- Foliage, Kaisercraft Self-Adhesive Round Rhinestones- Orange,  Embossing Powder Tool, White Embossing Powder, Heat Tool

Don’t miss out on the current specials at Stamp Simply!


Thanks again for stopping by!  I hope all of you have a great weekend and come back to visit again soon!


Tuesday, November 7, 2017

SUO187 Gather Together and Give Thanks


Hi Friends!   

It’s time for the #187  “Being Thankful” Challenge at SU-Only Challenges!  

I can always use a few more “thank you” cards in my stash so I decided to create a fall themed card using Vintage Leaves (along with the coordinating dies), Timeless Textures and Painted Harvest to create a Clean and Simple/Mixed Media card.


If you have not had a chance to stop by the SU-Only Challenge site to check out the rest of the Design Team’s samples or the other challenge sites yet, I encourage you to do so- wonderful inspiration from all!

To create this card:

1). Tap the Pumpkin Pie and Tangerine Tango Classic Ink pads onto a silicone craft mat, spritz lightly with water and press a piece of Whisper White cardstock into the ink, left and re-press the paper in the ink.  Repeat the above steps with a bit of Fresh Fig Classic Ink and once you are satisfied with the colors, dry the panel with the Heat Tool.

2). Ink the leaves from Vintage Leaves with Fresh Fig Classic Ink and stamp onto the panel created in Step 1.  Die cut the leaves with the coordinating Leaflet Framelits™.

3). Using images from the Timeless Textures stamp set, stamp the grid image with Pumpkin Pie Classic Ink several times onto a piece of Whisper White cardstock.  Stamp the polka dot image over the grid image a bit using Tangerine Tango Classic Ink and add a bit of distressing using Fresh Fig Classic Ink with the small splatter stamp.  Trim the panel and mount onto a piece of Tangerine Tango cardstock, trim once more and mount onto a piece of Fresh Fig cardstock.  Mount the entire card front panel onto the Extra Thick Whisper White card base.

4). Use Metallic Gold Thread to create a large loop (adhere to the center area of the card) and layer the long oak leaf directly to the card front and add the other two using Stampin’ Dimensionals® (tucking some of the leaves under the metallic thread).

5). De-static a piece of Fresh Fig cardstock with an Embossing Buddy®, ink the sentiment from Painted Harvest with Versamark™ ink, apply Stampin’ Emboss Gold Embossing Powder and heat set with the Heat Tool.  Trim the sentiment and add to the card front with Stampin’ Dimensionals®.

6). Finish off the card by applying a bit of shimmer to the leaves with the Clear Wink of Stella® Pen.

Stamp Sets: Vintage Leaves, Timeless Textures, Painted Harvest

Ink/Mediums: Versamark™, Fresh Fig, Pumpkin Pie, Tangerine Tango

Paper: Whisper White, Fresh Fig, Tangerine Tango, Extra Thick Whisper White
Accessories/Tools: Big Shot™, Leaflet Framelits™, Gold Metallic Thread, Embossing Buddy®, Stampin’ Emboss® Gold Embossing Powder, Heat Tool

Thanks again for taking the time to stop by and I hope that you will create your own Stampin’ Up! Only project and join us for our “Being Thankful” challenge!

Tuesday, September 27, 2016

SUO158 Thankful- Vintage Leaves


Hi Friends!   


We are encouraging you to pull out your Stampin' Up! supplies and stamps to create a Thanksgiving card, project or a general "Thank You" card/project and link your artwork in the SUO158 Gallery!  

Thanksgiving is one of my favorite holidays and I always need to have “Thank You” cards on hand so this challenge is perfect to create something to show your appreciation for that someone special or a card/project for your Thanksgiving event :-)


I hope you will stop by the SU-Only Challenge site to check out the rest of the Design Team projects as well as the other challenge galleries- fabulous inspiration from all!

To create this card:

Ink the maple leaf image from Stampin’ Up! (SU!) Vintage Leaves with Basic Black Archival Ink and stamp onto a piece of Whisper White cardstock.

Using Stampin’ Write Markers- Crushed Curry, Cajun Craze, Garden Green and Chocolate Chip, color the maple leaf and use an AquaPainter™ to blend the ink.

Continue to build up the color until you are satisfied with the result, fussy-cut the leaf and crunch a bit by hand to mimic a real leaf.

Ink the interior of the Woodland Textured Impressions™ Embossing Folder with Sahara Sand Classic Ink and emboss a piece of Very Vanilla cardstock.

Trim the embossed panel and mount onto a piece of Chocolate Chip cardstock.

Emboss a piece of Garden Green cardstock along with a panel of Very Vanilla cardstock with the Woodgrain Textured Impressions™ Embossing Folder, trim the Garden Green piece and mount onto a piece of Chocolate Chip cardstock.

Trim the embossed Very Vanilla panel and mount onto a piece of Chocolate Chip cardstock, trim again and mount onto the Garden Green card base.

Ink the sentiment from SU! Acorny Thanks with Chocolate Chip Classic Ink and stamp onto a piece of Very Vanilla cardstock.

Use the Big Shot™ with the retired Bitty Banner Framelits™ to die cut the sentiment.
Add the Garden Green embossed panel to the card front directly and mount the Woodland embossed panel with Stampin’ Dimensionals®.

Adhere the Burlap Ribbon Threads along with Gold Metallic Thread loops, cover with the leaf image and mount the sentiment with Stampin’ Dimensionals®.

Add a few Pearls along with Clear Wink of Stella® to the leaf to finish off the card.

Stamp Sets:  Vintage Leaves, Acorny Thanks

Ink: Stampin’ Archival Pad™- Basic Black, Classic Ink- Chocolate Chip, Sahara Sand; Stampin’ Write Markers- Cajun Craze, Crushed Curry, Chocolate Chip, Garden Green; Clear Wink of Stella®

Paper/Cardstock:  Whisper White, Very Vanilla, Chocolate Chip, Garden Green

Tools/Accessories: Big Shot™,  Woodland and Woodgrain Textured Impressions™ Embossing Folders, retired Bitty Banners Framelits™, AquaPainter™, Gold Metallic Thread, 1 ¼” Burlap Ribbon, Pearls

I hope this card has inspired you to pull out your Stampin’ Up! products and come  join us in the SU-Only“Thanks and Thanksgiving” Challenge.

Thanks again for stopping by- hugs and have a great week!

Tuesday, November 17, 2015

CAS Birthday Wishes


Hi Friends!!

Here is another Clean and Simple (CAS) card that I created with a quick watercolor technique using the Pals Paper Arts PPA275 Color Challenge along with the Splitcoaststampers Clean and Simple CAS351 “Fall Leaves” Challenge and the TLC524 "Stamped Acrylic Block Background" Challenge. 

 Again, if you have not already visited the above sites, I hope you will take a moment to do so- wonderful inspiration from all!

To create this card:

Lightly spritz water onto a piece of watercolor paper, ink an acrylic block with Hello Honey Classic Ink and roll into Tangelo Twist Classic Ink, pressing down onto the watercolor paper and re-inking.

Lightly spritz the inked acrylic block images to allow the ink to spread and dry with the Heat Tool.

Ink the branches from the retired Watercolor Trio using Blackberry Bliss Classic Ink and stamp repeatedly over the acrylic block background, spritz with water to diffuse the branches and dry with the Heat Tool.

Once you are satisfied with the background, ink the branches again using Blackberry Bliss Classic Ink and stamp onto the background, lightly spritz and dry again with the Heat Tool.

Use a paint brush to drop water onto the panel and dry with the Heat Tool.

Stamp the sentiment with Blackberry Bliss Classic Ink, trim the panel and mount onto the Blackberry Bliss card base.

Stamp Sets:  Watercolor Trio (retired)

Ink:  Blackberry Bliss, Hello Honey, Tangelo Twist

Paper: Watercolor, Blackberry Bliss

Accessories: Acrylic Block, Water Spritzer Bottle, Paint Brush


Thanks again for stopping by- have a wonderful week, my friends!

Sunday, November 15, 2015

Thank You- Watercolor Wash with Fall Leaves


Hi Again Friends!

I wanted to share a card that I created using the TGIF Challenge! #29 Sketch  along with the Fab Friday 77 Color Challenge.

I love this fabulous fall color combination so I decided to use the leaves from the retired French Foliage stamp set to create a fall "Thank You" card :-)

I hope you will have the time to stop by both of the above sites to check out the inspiration from their fabulous Design Teams as well as their gallery entries!

To create this card:

Using Stāz-On® Jet Black, stamp the leaves from the retired French Foliage stamp set onto Whisper White cardstock.

Color the leaves using Stampin’ Write Markers- Hello Honey, Cajun Craze and Blackberry Bliss.

Lightly spritz the leaves with water and once dry, fussy-cut the leaves.

Using Sponge Daubers, apply Hello Honey and Cajun Craze Classic Ink to the Watercolor Wash background stamp, spritz with water and lightly lift a bit of the color with a paper towel before stamping the image onto Whisper White cardstock.

Trim off approx. 1 ½” of the background panel, ink the honeycomb stamp from the Butterfly Basics set with Blackberry Bliss Classic Ink and stamp onto the trimmed piece of the background panel and mount onto a piece of Blackberry Bliss cardstock.

Trim the remaining background panel, stamp the sentiment from the Mama Elephant Sunday Sentiments and large splatter stamp from Gorgeous Grunge using Blackberry Bliss Classic Ink.

Add the trimmed background panel onto a piece of Cajun Craze cardstock, add the vertical honeycomb strip and mount onto the Blackberry Bliss card base.

Add the fussy-cut leaves using Stampin’ Dimensionals® along with the 3/8” Stitched Blackberry Bliss Satin Ribbon bow to finish off the card.

Stamp Sets:  French Foliage (retired), Watercolor Wash, Butterfly Basics, Gorgeous Grunge- all Stampin’ Up!, Sunday Sentiments (Mama Elephant)

Ink: Stāz-On® Jet Black, Cajun Craze, Hello Honey, Blackberry Bliss Classic Ink and Stampin’ Write Markers

Paper:  Whisper White, Cajun Craze, Blackberry Bliss

Accessories: Sponge Daubers, Water Spritzer Bottle, 3/8” Blackberry Bliss Stitched Ribbon


Thanks again for visiting- have a blessed weekend, my friends! 

Tuesday, November 10, 2015

CAS Season of Change

Hi Friends!!

I hope you had a fantastic Monday!  Whenever I am designing a card, I tend to create a few “trial” pieces that as I mentioned in my last post, usually end up in a scrap bin or filed for a later date.

In an effort to "complete what I started" :-) , I decided to finish one of the panels that used the Pals Paper Arts PPA274 Color Challenge and also link this to the Addicted to Stamps and More #169 Clean and Simple  Challenge.

I hope you have a chance to visit the above sites and check out all of the wonderful inspiration!


To create this card:

Using Sponge Daubers, apply Crushed Curry, Calypso Coral and Chocolate Chip to the maple leaf from the retired Season of Change from Sweet ‘n Sassy Stamps (SNSS).

Stamp onto Whisper White cardstock, masking a few of the leaves as you continue stamping.

Ink the sentiment with Chocolate Chip Classic Ink and stamp along the edge of the panel.

Use the Stampin’ Write Chocolate Chip Marker with the Color Spritzer Tool to add a bit of “distressing” and stamp the bold splatter from Gorgeous Grunge with Crushed Curry Classic Ink (stamping off before stamping onto the panel).

Trim the panel and mount onto Calypso Coral cardstock , trim and mount onto the Chocolate Chip card base to finish off the card.

Stamp Sets:  Season of Change (retired SNSS)

Ink:  Calypso Coral, Crushed Curry, Chocolate Chip; Chocolate Chip Stampin’ Write Marker

Paper: Whisper White, Calypso Coral, Chocolate Chip

Accessories: Sponge Daubers, Color Spritzer Tool

Thanks again for stopping by- I will be sharing the new SUO Challenge shortly :-)  I hope all of you have a terrific Tuesday!

Monday, October 26, 2015

HYCCT1524 With Gratitude

Hi Again Friends!!

This card was created for the Splitcoaststampers’ “Hope You Can Cling To”  HYCCT1524Holly’s “Thanks Bunches” Challenge to create a “Thank You” card with a “bunch” of fruit, leaves, etc. 

Fall is in full color here in the Mid-Atlantic region and after our trip to Shenandoah (Skyline Drive) this past Thursday, I was inspired to create fall leaves for my "bunches" :-)

Rocky Mount Overlook

Again, if you have not had a chance to do so, I hope you will find the time to visit the above galleries- wonderful inspiration from all!!

To create this card:

Stamp the leaves using Stāz-On® Jet Black Ink onto Whisper White cardstock, color using Sponge Daubers with Hello Honey, Cajun Craze, Tangerine Tango and Cherry Cobbler Classic Ink.

Fussy-cut the leaves and scrunch by hand to create a realistic texture.

Ink the large solid splatter stamp from Gorgeous Grunge using Hello Honey and stamp onto a piece of Very Vanilla cardstock, clean the stamp and stamp as well with Cherry Cobbler Classic Ink.

Add the large splatter stamp using Cajun Craze Classic Ink as well as Cherry Cobbler Classic Ink.

Cut the panel out using the Big Shot™ with the My Favorite Things™ Blueprints 13 Die and mount onto a piece of Cajun Craze cardstock, trim and adhere to Very Vanilla card base.

Stamp the sentiment using Stāz-On® Jet Black Ink onto Very Vanilla cardstock, punch the banner using the Hexagon Punch and stamp a bit of splatter with Cajun Craze Classic Ink.

Arrange and mount the leaves using dimensional foam along with the sentiment (loosely interpreting the sketch) and add the clip to finish off the card.

Stamp Sets:  With Gratitude (retired Stampin' Up!) , Gorgeous Grunge (Stampn' Up!)

Ink: Cajun Craze, Cherry Cobbler, Hello Honey, Tangerine Tango

Paper: Very Vanilla, Cajun Craze, Whisper White

Accessories: Big Shot™, MFT Blueprints 13 Die, Hexagon Punch, Sponge Daubers, Antique Brass Clip

Thanks again for taking the time to stop by- have a terrific Monday, my friends!

Friday, October 23, 2015

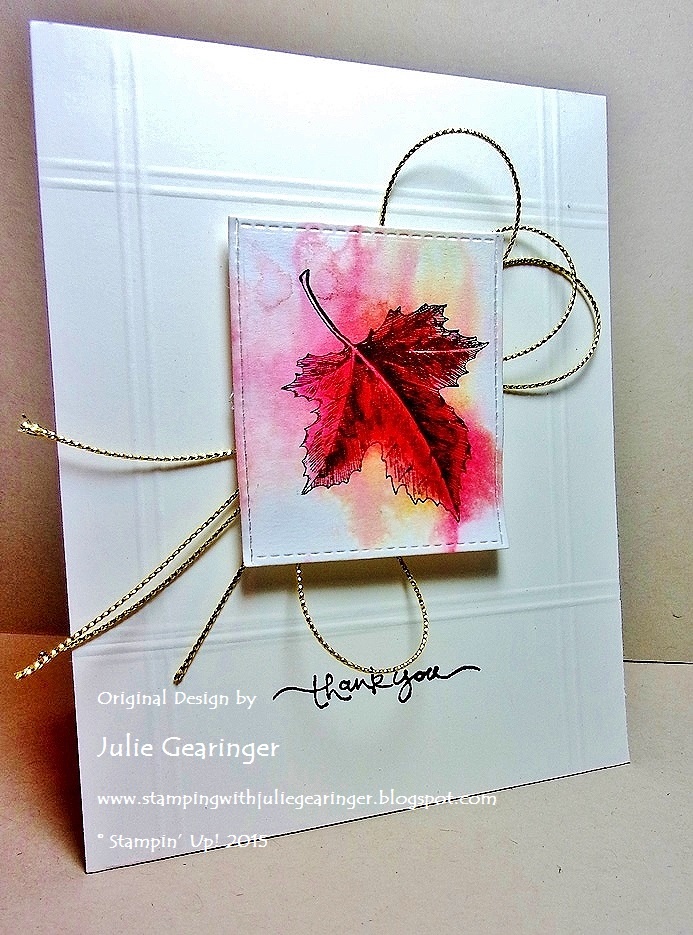
CAS Leaves for Three Challenges


Partial view from our favorite overlook- Jewell Hollow
Hi Friends!!

My husband and I visited Skyline Drive in Shenandoah National Park today and it was absolutely gorgeous!! 

Look at that tall spindly tree he is in :-)
We saw a Bald Eagle flying across a field before we even left our own county (in an area we never expected to see an eagle) plus in addition to the wonderful fall leaves, we had the thrill of seeing a black bear up in a tree approx. 50 feet high!

We could not believe this branch would hold him :-)
He was quite the acrobat :-)
We were not the first to spot this bear so we are not sure if he climbed the tree in front of the spectators, or if he was already at the top of the tree when they spotted him, but we had the pleasure of watching him for a few minutes.   It is amazing how agile these bears are and the tree trunk was very small compared to the other trees around him but he have loved the nuts  and/or leaves on that particular tree (since he did not even seem to notice that we were congregating on the drive snapping pictures of him)!

All in all, a wonderful fall day marveling at God’s amazing creation!!  Just glorious!


I was so inspired by all of the fall colors, I decided to create a quick card for Nance’s PP267 “CAS Leaves” Challenge at The Paper Players along with the Stampin’ Royalty SR#300 Photo Inspiration Challenge and the FMS209 Sketch atFreshly Made Sketches.

I hope you have a chance to visit the above galleries- wonderful inspiration from all!

To create this card:

Stamp the leaf image from the retired Best of Autumn stamp set using Stāz-On® Jet Black Ink onto a piece of watercolor paper.

Use an AquaPainter™ to add water to the image and color with the Hello Honey, Tangerine Tango, Cajun Craze and Cherry Cobbler Classic Ink pads (“spritzing” and adding more color to create the watercolor wash).

Dry with the Heat Tool and add additional detail with the Stampin’ Write Markers of the same colors.

Use the Big Shot™ with the My Favorite Things™ Stitched Rectangle Dies to cut out the image (I actually shortened the die cut image by overlapping the sides).

Stamp the sentiment from the retired Short & Sweet stamp set using Stāz-On® Jet Black Ink onto a piece of Very Vanilla cardstock, flip the cardstock over and use the Simply Scored™ Tool to score along the sides and top.

Add the scored panel to the Very Vanilla card base, adhere the Gold Twine loops and finish off the card by mounting the leaf focal image using dimensional foam.

Another view- of course, my card can
never compare to the splendor of the real thing!


Stamp Sets:  Best of Autumn, Short & Sweet(retired Stampin’ Up!)

Ink: Stāz-On® Jet Black, Hello Honey, Cajun Craze, Cherry Cobbler, Tangerine Tango Classic Ink; Stampin’ Write Markers- Cajun Craze, Cherry Cobbler

Paper: Watercolor, Very Vanilla

Accessories: Simply Scored™ Scoring Tool, AquaPainter™, Water Spritzer Bottle, Gold Twine


While I had these colors out, I did create one more fall card with leaves and will share a bit later today.  Thanks again for stopping by- hugs to you, my friends!
Related Posts Plugin for WordPress, Blogger...