Showing posts with label Create with Connie and Mary. Show all posts

Tuesday, February 14, 2017

SUO168 Sale-A-Bration Fun!


Hi Friends!   

Woohoo! It’s that time again for a new challenge at SU-Only Challenges and challenge #168 is all about “Sale-A-Bration Fun”.

I decided to create a Mixed Media card using the Sale-A-Bration (SAB) sets, Delicate Details and Avant-Garden along with the main catalog sets, Papillon Potpourri and Timeless Textures.

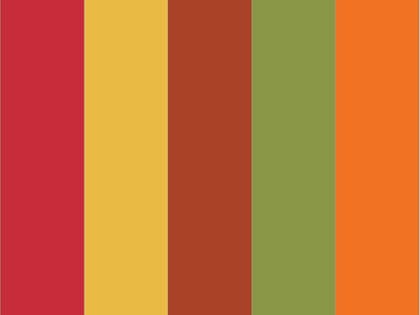
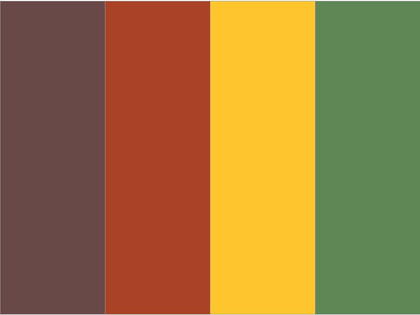
I incorporated the Create with Connie and Mary CCMC444 Color Challenge as well as the FabFri105 Sketch Challenge into the design.

If you have not had a chance to stop by the SU-Only Challengesite to check out the rest of the Design Team projects or the other challenge sites, I hope you will do so- gorgeous inspiration from all!

To create this card:

1). De-static a piece of Whisper White cardstock with the Embossing Buddy®, ink the stamps from Delicate Details (SAB) with Versamark™ ink, stamp onto the prepared cardstock, apply Stampin’ Emboss® White Embossing Powder and heat set with the heat tool.

2). Once the embossing has cooled, use an AquaPainter™ with ink from the Dapper Denim Classic Ink Pad to watercolor over the embossing.  Add a bit of splatter distressing with the small splatter stamp from Timeless Textures and wipe away all excess ink from the embossed areas with a slightly damp paper towel. Trim the embossed panel and mount onto a piece of Crumb Cake cardstock.  Trim the panel again and mount onto a piece of Dapper Denim cardstock, finally trimming once more before adhering the entire panel to the Extra Thick Whisper White card base.

3). Use the Big Shot™ along with the Layering Circles Framelits™ to die cut a piece of Whisper White and Crumb Cake from a smaller circle die and Dapper Denim cardstock using the next larger circle die.  Split the Crumb Cake die cut circle in half and adhere behind the white die cut circle allowing the edges to just peek out from behind.  Layer onto the Dapper Denim die cut circle.  Add a bit of splatter with the Timeless Textures small splatter image using Dapper Denim ink and adhere directly to the card front (per the sketch).

4). Ink the floral image from Avant-Garden (SAB) with Stampin’ Archival Basic Black ink, heat set with the heat tool and watercolor using the AquaPainter™ and Stampin’ Write Markers- Crumb Cake for the leaves, Peekaboo Peach for the  blossoms.  Once you are satisfied with the coloring, fussy-cut the images and mount onto the card front with Stampin’ Dimensionals®.

5). Ink the lace border image from Delicate Details (SAB) with Dapper Denim Classic Ink, stamp onto Whisper White cardstock, lightly apply Clear Wink® over the stamped lace image (this will watercolor the image a bit), fussy-cut around the lace edge and mount onto the card front with Stampin' Dimensionals®. 


 6). Heat emboss the sentiment from Avant-Garden (SAB) with Stampin’ Emboss® White Embossing Powder onto Dapper Denim cardstock, trim the image and mount onto the card front with Stampin’ Dimensionals®.

7). Ink the butterfly image from Papillon Potpourri with Stampin’ Archival Basic Black Ink and stamp three images onto Whisper White cardstock, watercolor with the AquaPainter™ using the Stampin’ Write Peekaboo Peach marker, punch out with the Elegant Butterfly Punch and mount onto the card front. 

8). Apply Clear Wink of Stella® to the butterfly wings and pearls to the centers of the butterflies as well as to the upper right hand corner along with the sentiment. Use the White Gel Pen to add a few highlights to the center of the flowers to finish off the card.
Stamp Sets: Delicate Details and Avant-Garden (both SAB), Papillon Potpourri, Timeless Textures
Ink: Versamark™, Dapper Denim; Stampin’ Write Markers- Crumb Cake, Peekaboo Peach; Clear Wink of Stella®, White Gel Pen
Paper/Cardstock: Whisper White, Extra Thick Whisper White, Crumb Cake, Dapper Denim
Accessories: Big Shot™, Layering Circles Framelits™, AquaPainter™, Embossing Buddy®, Stampin’ Emboss® White Embossing Powder, Heat Tool, Pearls

Thanks again for taking the time to visit – I hope that you will create your own Stampin’ Up! Only project and play along with our “Sale-A-Bration Fun” challenge!

Tuesday, January 3, 2017

SUO 165 New Stuff, New Year- Beautiful You


Hi Friends!   


For my quick CAS card, I decided to use the brand new Occasions Mini Stamp Set, Beautiful You along with the Timeless Textures Stamp Set (from the Idea Book and Catalog).


If you have not had a chance to stop by the SU-Only Challenge site to check out the rest of the Design Team projects or the other challenge sites, I hope you will do so- wonderful inspiration from all!

This was an extremely easy card to create:

1). Ink the Beautiful You image with Stampin’ Archival Basic Black Ink and stamp onto Whisper White cardstock.

2). Using Stampin’ Write Markers- Flirty Flamingo, Pool Party and Smoky Slate with an AquaPainter™, add color to the image.  FYI- I use a silicone mat, scribble the ink onto the mat and pick it up with the AquaPainter™.  Just be careful not to “work” the area too much since the Whisper White cardstock will start to “pill”.

3). Add additional color with the markers directly to the images and use the AquaPainter™ to soften the edges.

4). Ink one of the scribbly wash images from Beautiful You to add additional Pool Party to the area below the dancing image and area for the sentiment.

5). Ink the Beautiful You sentiment with Stampin’ Archival Basic Black Ink and stamp.
6). Add a bit of splatter with the small splatter stamp from Timeless Textures (I inked the stamp with the Pool Party and Smoky Slate SU! markers).

7). Trim the panel, mount onto Flirty Flamingo cardstock, trim again and mount onto Pool Party cardstock before trimming once more and mounting onto the Extra Thick Whisper White card base.

8). Add shimmer to her dress and hat with Clear Wink of Stella® to finish off the card.
Stamp Sets:  Beautiful You, Timeless Textures
Ink: Stampin’ Archival™ Basic Black, Stampin’ Write Markers- Flirty Flamingo, Pool Party, Smoky Slate; Clear Wink of Stella®
Paper/Cardstock: Whisper White, Flirty Flamingo, Pool Party, Extra Thick Whisper White
Accessories: AquaPainter™
 Thanks again for taking the time to visit – I hope that you will create your own Stampin’ Up! Only project and play along with our “New Year, New Stuff” challenge!

Tuesday, October 25, 2016

SUO160 Thinking of You This Fall


Hi Friends!   

Fall/Autumn is my favorite time of year with all of the glorious colors that nature has on display here on the East Coast. 

 I was inspired by our recent trips to Skyline Drive and wanted to create a card using the oak images from SU! Lovely As A Tree- for some reason, the oak tree and oak leaf images have not been inked as often as the others in this stamp set, so they were begging for some “love” :-)

This photo was taken along Skyline Drive last week- the colors were not quite peak yet- they were a bit brighter today but I have not uploaded those photos yet :-)

I was inspired by our recent trips to Skyline Drive and wanted to create a card using the oak images from SU! Lovely As A Tree- for some reason, the oak tree and oak leaf images have not been inked as often as the others in this stamp set, so they were begging for some “love” :-)

I also incorporated the Create with Connie and Mary CCMC429 SketchChallenge along with the Splitcoaststampers’ CC603 Color Challenge and Free For All F4A344  “Into the Woods”Challenge in the design.

If you have not had a chance to do so, I hope you will stop by the SU-Only Challenge site to check out the rest of the Design Team projects as well as the other challenge galleries- fabulous inspiration from all!

To create this card:

Ink the oak tree and oak leaves images from Stampin’ Up! (SU!) Lovely As A Tree with Basic Black Archival Ink, stamp onto a piece of Whisper White cardstock and heat set with the Heat Tool.

Using Stampin’ Write Markers- Hello Honey, Cajun Craze and Old Olive for the leaves and Soft Suede for the trunk and acorn (use an AquaPainter™ to blend the ink).

Fussy-cut the oak leaves and use the Big Shot™ with the Circle Framelits™ to die cut the oak tree (also cutting two circles the same size from Cajun Craze cardstock).  Layer the Cajun Craze circles behind the oak tree image.

Use the Big Shot™ with the Woodgrain Textured Impressions™ Embossing Folder to emboss a piece of Old Olive cardstock, trim and mount onto a piece of Cajun Craze cardstock, trim and mount onto the Extra Thick Whisper White card base.

Lightly sponge Sahara Sand Classic Ink in the interior of the Woodland Textured Impressions™ Embossing Folder  before inserting a piece of Whisper White cardstock, emboss with the Big Shot™, trim the panel, mount onto a piece of Cajun Craze cardstock and adhere to the card front.

Add a scrap piece of Crushed Curry cardstock (oops!  I just realized that I pulled Crushed Curry out by mistake versus Hello Honey),  frayed piece of 1 ¼” Burlap Ribbon and a sliver of Cajun Craze cardstock (I found all of these in my scrap bin- the Crushed Curry and Cajun Craze pieces were previously embossed with the Woodgrain EF and ready to go).

Stamp the sentiment from Teeny Tiny Wishes with Basic Black Archival Ink, eat set with the Heat Tool, create the banner points by hand, mount onto a piece of Cajun Craze cardstock and trim close to the edge.

Add the sentiment along with the fussy-cut leaves and oak tree image with Stampin’ Dimensionals®.

Finish off the card by applying Clear Wink of Stella® to the leave on the tree as well as the fussy-cut leaves.

Stamp Sets:  Lovely As A Tree, Teeny Tiny Wishes

Ink: Stampin’ Archival Pad™- Basic Black, Classic Ink- Sahara Sand; Stampin’ Write Markers- Cajun Craze, Hello Honey, Old Olive; Clear Wink of Stella®

Paper/Cardstock:  Whisper White, Extra Thick Whisper White, Cajun Craze, Crushed Curry, Old Olive

Tools/Accessories: Big Shot™,  Woodland and Woodgrain Textured Impressions™ Embossing Folders, retired Circle Framelits™, AquaPainter™,  1 ¼” Burlap Ribbon

I hope this card has inspired you to pull out your Stampin’ Up! products and come  join us in the SU-Only “Fall Fun” Challenge.

Thanks again for stopping by- hugs and have a great week!

Tuesday, September 27, 2016

SUO158 Thankful- Vintage Leaves


Hi Friends!   


We are encouraging you to pull out your Stampin' Up! supplies and stamps to create a Thanksgiving card, project or a general "Thank You" card/project and link your artwork in the SUO158 Gallery!  

Thanksgiving is one of my favorite holidays and I always need to have “Thank You” cards on hand so this challenge is perfect to create something to show your appreciation for that someone special or a card/project for your Thanksgiving event :-)


I hope you will stop by the SU-Only Challenge site to check out the rest of the Design Team projects as well as the other challenge galleries- fabulous inspiration from all!

To create this card:

Ink the maple leaf image from Stampin’ Up! (SU!) Vintage Leaves with Basic Black Archival Ink and stamp onto a piece of Whisper White cardstock.

Using Stampin’ Write Markers- Crushed Curry, Cajun Craze, Garden Green and Chocolate Chip, color the maple leaf and use an AquaPainter™ to blend the ink.

Continue to build up the color until you are satisfied with the result, fussy-cut the leaf and crunch a bit by hand to mimic a real leaf.

Ink the interior of the Woodland Textured Impressions™ Embossing Folder with Sahara Sand Classic Ink and emboss a piece of Very Vanilla cardstock.

Trim the embossed panel and mount onto a piece of Chocolate Chip cardstock.

Emboss a piece of Garden Green cardstock along with a panel of Very Vanilla cardstock with the Woodgrain Textured Impressions™ Embossing Folder, trim the Garden Green piece and mount onto a piece of Chocolate Chip cardstock.

Trim the embossed Very Vanilla panel and mount onto a piece of Chocolate Chip cardstock, trim again and mount onto the Garden Green card base.

Ink the sentiment from SU! Acorny Thanks with Chocolate Chip Classic Ink and stamp onto a piece of Very Vanilla cardstock.

Use the Big Shot™ with the retired Bitty Banner Framelits™ to die cut the sentiment.
Add the Garden Green embossed panel to the card front directly and mount the Woodland embossed panel with Stampin’ Dimensionals®.

Adhere the Burlap Ribbon Threads along with Gold Metallic Thread loops, cover with the leaf image and mount the sentiment with Stampin’ Dimensionals®.

Add a few Pearls along with Clear Wink of Stella® to the leaf to finish off the card.

Stamp Sets:  Vintage Leaves, Acorny Thanks

Ink: Stampin’ Archival Pad™- Basic Black, Classic Ink- Chocolate Chip, Sahara Sand; Stampin’ Write Markers- Cajun Craze, Crushed Curry, Chocolate Chip, Garden Green; Clear Wink of Stella®

Paper/Cardstock:  Whisper White, Very Vanilla, Chocolate Chip, Garden Green

Tools/Accessories: Big Shot™,  Woodland and Woodgrain Textured Impressions™ Embossing Folders, retired Bitty Banners Framelits™, AquaPainter™, Gold Metallic Thread, 1 ¼” Burlap Ribbon, Pearls

I hope this card has inspired you to pull out your Stampin’ Up! products and come  join us in the SU-Only“Thanks and Thanksgiving” Challenge.

Thanks again for stopping by- hugs and have a great week!

Tuesday, February 2, 2016

SUO141 Happy Floral Birthday


Hi Friends!   

It’s time for the SUO141 “Happy Birthday” Challenge and I decided to create a Clean and Layered (CAL) card using the Create with Connieand Mary CCMC391 Sketch Challenge along with the FUSION “Woodgrain Neutral” Inspiration Photo Challenge (I was inspired by the blue and white along with the neutral colors :-)).

I hope you will have a chance to check out my sister Design Team member samples at the SU-Only Challenge site as well as the fantastic Design Team samples at the other two challenge sites- gorgeous inspiration from all!

To create this card:

Use the Big Shot™ with the Zig Zag Textured Impressions™ Embossing Folder to emboss a piece of Tip Top Taupe cardstock.

Trim the embossed panel and mount onto Whisper White cardstock, trim again and mount onto the Night of Navy card base.

Stamp the sentiment from Rose Wonder using Night of Navy Classic Ink onto Whisper White cardstock, trim and create a banner using the Hexagon Punch.

Add a strip of Night of Navy cardstock to the card base, adhere the loops of Gold Thread and mount the sentiment using Stampin’ Dimensionals®.

De-static a piece of Vellum with the Embossing Buddy®, ink the floral stamp from Flower Shop and the branch image from Choose Happiness using Versamark™ Ink and stamp three of the floral images and two of the branches onto the vellum.

Apply White Stampin’ Emboss® Embossing Powder and heat set with the Heat Tool. 
Color the images using Stampin' Write Markers- Marina Mist for the flowers and Wild Wasabi for the leaves.

Wipe off the excess ink from the embossing and carefully fussy cut the images.

Mount the leaves and flowers to the card front, add the Early Espresso buttons (with Night of Navy strips as “thread”) to finish off the card. 

Stamp Sets:  Rose Wonder, Flower Shop, Choose Happiness

Ink:  Versamark™, Night of Navy; Stampin' Write Markers- Marina Mist and Wild Wasabi
Paper/Cardstock: Whisper White, Night of Navy, Tip Top Taupe
Accessories: Big Shot™, Zig Zag Textured Impressions™ Embossing Folder, Embossing Buddy®, Stampin’ Emboss® White Embossing Powder, Heat Tool, Hexagon Punch, Gold Thread, retired Early Espresso buttons

Thanks again for stopping by and we hope to see your Stampin’ Up! Only project in our “Happy Birthday” Challenge gallery!

Monday, January 11, 2016

What I Love- You!

Hi Friends! 

I hope all of you had a wonderful weekend!  I have been working on a few projects and wanted to share a quick, easy Valentine’s Day card using the new What I Love (2016 SAB set) along with the Bloomin’ Love (Occasions Mini set).

I decided to incorporate the Create with Connie and Mary CCMC388 Color Challenge as well as the Pals Paper Arts PPA282 Sketch and if you have not had a chance to either site yet, I encourage you to do so, fabulous inspiration from all!

To create this Clean and Simple (CAS) card: 

Trim a piece of Whisper White cardstock and mount onto the Blackberry Bliss card base.

Ink the heart image from Bloomin’ Love with Blackberry Bliss Classic Ink and stamp onto a piece of Whisper White cardstock.

Using the Bermuda Bay and Pear Pizzazz Stampin’ Write Markers, color the flower centers as well as around the leaves/ background and carefully fussy-cut out the heart (be careful as you color since the Blackberry Bliss Classic Ink will definitely run if you touch it too much with your markers :-)).

Ink the banner stamp with Blackberry Bliss Classic Ink, stamp onto a piece of Whisper White cardstock, fussy-cut the banner and mount the banner behind the fussy-cut heart image.

Use the Big Shot™ with the Heart Framelits™ to cut a heart from Bermuda Bay and Blackberry Bliss cardstock, split the Blackberry Bliss in half and adhere behind the Bermuda Bay heart.

Mount the fussy-cut heart/banner onto the layered cardstock heart using Stampin’ Dimensionals®.

Use the Big Shot™ with the Happy Heart Textured Impressions™ Embossing Folder to emboss a piece of Pear Pizzazz cardstock, trim and mount onto a piece of Blackberry Bliss cardstock and mount the panel onto the card front.

Ink the sentiment from What I Love using Blackberry Bliss Classic Ink and stamp onto a piece of Whisper White cardstock. 

Trim the sentiment panel and mount onto a piece of Blackberry Bliss cardstock, adhere this panel to the card front using Stampin’ Dimensionals®.

Mount the heart layer to the card front to finish off the card.

Quick, easy and fun!!  You know me, I may have to add a few Rhinestones or Pearls but tried to leave it CAS for now :-)

Stamp Sets:  Bloomin’ Love (2016 Occasions Mini), What I Love (2016 SAB)

Ink: Blackberry Bliss, Stampin’ Write Markers- Bermuda Bay, Pear Pizzazz

Paper: Whisper White, Bermuda Bay, Blackberry Bliss, Pear Pizzazz

Accessories: Big Shot™, Happy Hearts Textured Impressions™ Embossing Folder

Thanks again for stopping by- hugs and have a blessed week, my friends!


Tuesday, October 19, 2010

CCMC120 Color Challenge- Two Cards, One Challenge!

Hi Stampers!

I created two cards for the Create with Connie and Mary CCMC120 Color Challenge this week (http://www.createwithconnieandmary.com),   

Both cards are quick and easy and utilized a few scraps that I had from previous projects. The first card uses a masking technique with Sponge Daubers to create the scene prior to stamping the tree images. 

Stamp Sets:  Lovely As A Tree, French Foliage, Short & Sweet
Cardstock:  Whisper White, Elegant Eggplant, Pumpkin Pie, Wild Wasabi
Ink: Elegant Eggplant, Pumpkin Pie, Tempting Turquoise, Wild Wasabi
Accessories: Big Shot, Vintage Wallpaper EF, Sponge Daubers, Color Spritzer Tool, SU! Elegant Eggplant Marker, 5/8” Pumpkin Pie Satin Ribbon, Antique Brads


The second card implements SU! Classic Ink Pads with a Blender Pen to watercolor the images.  Cut a few layering circles, add some ribbon and pearls and the card is finished! 

Stamp Sets:  Fast & Fabulous (Hostess Level II), Teeny Tiny Wishes
Cardstock:  Whisper White, Elegant Eggplant
Ink: Elegant Eggplant
Accessories: Big Shot, Square Lattice EF, Blender Pens, 5/8” Pumpkin Pie Satin Ribbon, Pearls, Circle Cutter

Thanks again for taking the time to visit- have a great evening!

Sunday, October 10, 2010

French Foliage & Day of Gratitude- Three Challenges in One!

Hi Stampers!     I used three challenges to create today’s card –
The Pals Paper Arts Color Challenge PPA63 (see http://www.palspaperarts.com/),
 the CCMC119 sketch challenge from Create with Connie and Mary
SUO Challenges #3- Holiday Mini (see  http://suochallenges.com/?p=36). 


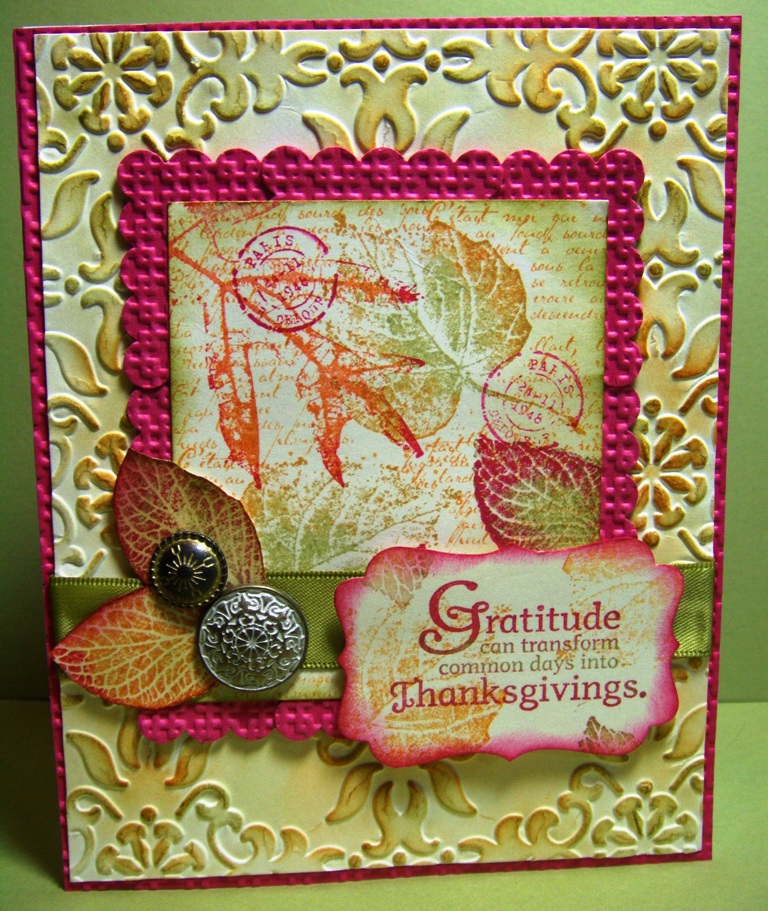
I decided to use my new set from the Holiday Mini- French Foliage and the colors from the PPA63 challenge.  The colors were a bit pastel for a fall card, but I decided to focus on the Melon Mambo as the accent color.

Using Very Vanilla as the base with the Big Shot, I embossed the panel with the Vintage Wallpaper EF and sponged Pear Pizzazz and Peach Parfait to highlight the embossing. 

I also embossed the Melon Mambo layer with the Square Lattice EF and using the Square Scallop Punch, overlapped the individual punched out shapes to create the scallop border around the focal image. 

Using the Rock-n-Rock technique, I first stamped the leaves on the focal image with Pear Pizzazz and rolled in either Peach Parfait or Melon Mambo.  Using the Masking Technique, I covered the leaves and stamped the word background stamp from the French Foliage set using Peach Parfait.  A bit of sponging with Pear Pizzazz finished off the effect.

I did not have any Pear Pizzazz ribbon, so I substituted Old Olive for the ribbon layer and stamped a few of the leaf images (again with the Rock-n-Roll technique) and cut them out for layering and added a few of the new Antique Brads.

The sentiment is from another new stamp set in the Holiday Mini, Day of Gratitude and I first stamped the image in Pear Pizzazz and using a Sponge Dauber, pounched  Melon Mambo on the Gratitude and Thanksgivings area. 

I took the previously inked leaf stamps and "huffed” to re-moisten the ink. I stamped these images over the sentiment to tone down the Very Vanilla and give a distressed appearance.  Punched out the sentiment using the new Decorative XL Label Punch and sponged the edges with Melon Mambo.    

Stamp Sets:  French Foliage, Day of Gratitude
Cardstock:  Melon Mambo, Very Vanilla
Ink: Pear Pizzazz, Peach Parfait, Melon Mambo      
Accessories: Big Shot, Square Lattice and Vintage Wallpaper EF, 5/8” Old Olive Satin Ribbon,Sponge Daubers, Square Scallop and Decorative XL Punches, Antique Brads, Dimensionals

I know the colors in this card are somewhat unconventional but I hope you like it!  Thanks again for visiting- have a great day!

Tuesday, October 5, 2010

CCMC118- Anything But A Card

One More Challenge- Create with Connie and Mary CCMC118- Anything But A Card
(see http://www.createwithconnieandmary.com) If you have a chance, check out their site- the design team created some wonderful examples and all of the submissions are terrific as well! 

I created this note holder that utilizes an inexpensive 5x7 acrylic photo holders- it is so easy to make for gifts.

The background paper started out as Whisper White and using So Saffron , Almost Amethyst and Always Artichoke, the ink was lightly "brayered" on at random.  The mini background stamp from Flores Suaves was used with Elegant Eggplant and sponge daubers were used to ink up the Medallion image.  

Stamp Sets:  Lovely As A Tree, Medallion, Flores Suaves
Cardstock:  Whisper White, Almost Amethyst (retired), Always Artichoke, Elegant Eggplant
Ink: So Saffron, Always Artichoke, Elegant Eggplant      
Accessories: Big Shot, Finial Press EF, Brayer, Sponge Daubers, ¼” Always Artichoke Grosgrain Ribbon (retired)

I hope you enjoy this idea- God Bless!  

Sunday, September 26, 2010

Friends Never Fade with the CCMC117 Inspiration Challenge

Hi Stampers! 

I wanted to create a card for this week’s Create with Connie and Mary CCMC117 Photo Inspiration Challenge (see http://www.createwithconnieandmary.com) along with the SSC170 Sketch Challenge from Stamping411 with the Operators (http://www.stamping411.blogspot.com/  . 

I love this sketch and this birthday cake has so many details! 

I decided to focus on some of the colors versus the birthday theme and chose to ink up my Friends Never Fade stamp set.

This card utilizes the emboss resist technique on the new Blushing Bride Hostess Level I Designer Paper.  I stamped the floral image from the set with Versamark ink first, then directly into Cajun Craze before applying the Clear EP.

Using a sponge dauber, I applied additional Blushing Bride ink onto the embossed images to soften the design on the DP and before running the Blushing Bride Cardstock through the Big Shot, I sprayed the cardstock with alcohol (70%) to achieve a deeper impression. 

I only had the larger SU! pearls left (my new order will arrive on Wed) so I may replace these pearls with the 3mm size.  The ribbon is from my stash and matches the Cajun Craze ink perfectly.

Stamp Sets:  Friends Never Fade
Cardstock: Blushing Bride, Cajun Craze
Ink: Versamark, Blushing Bride, Cajun Craze
Accessories:  Big Shot, Finial Press EF, Sponge Daubers, Heat Gun, Clear EP, Scallop Trim Border Punch, Texturz Backgrounds I, Pearls, 5/8” Satin Ribbon from my stash

I hope  you enjoy this card- I had fun making it!  Have a great week and thanks again for visiting and leaving a comment :-)

Friday, September 17, 2010

Two Challenges- Three Cards (well almost) :-)

Hi Stampers!  I have not had a chance to stamp since Monday evening and was starting to have withdrawal symptoms :-) ! 

I love the colors for this weeks Curtain Call Challenge (see http://www.stampinwithstacey.blogspot.com for more details) and decided to create a card using these colors along with the Create with Connie and Mary sketch challenge #CCMC116 (see http://www.createwithconnieandmary.com for more details).

When I first looked at the colors this week, I immediately thought of Lovely as A Tree and the new set Day of Gratitude.

Lovely As A Tree is such a classic set and even though it has been around for awhile, I tend to turn to it quite often (especially for masculine cards). 
Also I have decided to start using all of the current sets that I own – even if they are not new to the 2010-2011 catalog.  Why buy stamp sets if you do not use them?

The first card I created also uses the new Decorative Label XL Punch with the medallion from Day of Gratitude and Sincere Saluations for the sentiment.  I also had a scrap piece of Always Artichoke already embossed with the Vintage Wallpaper EF and topped it off with the Early Espresso ribbon.  I decided not to add the three brads that were in the sketch, I felt that the three trees in the background would be a great substitute. 

The second card utilizes the same medallion from Day of Gratitude, the new Vintage Wallpaper EF, pearls, Whisper White ribbon and the piece of Always Artichoke was already embossed with the Texture Plate (love being able to pull things from my stash) and just sponged both of the embossed pieces with Early Espresso.


The third card uses the same colors but I wanted to use the oak tree from the set.  I hardly ever use the oak tree- I think it is beautiful, but I tend to stamp the large pine or the tree border.  Again, I wanted to update the look of this set with new accessories- the Vintage Wallpaper EF, Scallop Trim Border Punch and Early Espresso Ribbon.  I also used the Medallion Background stamp (center portion) on the label and background behind the tree.  Sponged and distressed the embossing and images to complete the look.


Thanks again for visiting- I love to read your comments!  You are such an encouragement to me and I thank the Lord for all of you! 

Related Posts Plugin for WordPress, Blogger...