Showing posts sorted by date for query Spritzer. Sort by relevance Show all posts

Wednesday, May 12, 2021

TCC155 Garden Pleasures- Cast All Your Cares


Hi Friends!


Welcome to The Card Concept #155 {Garden Pleasures} Challenge!

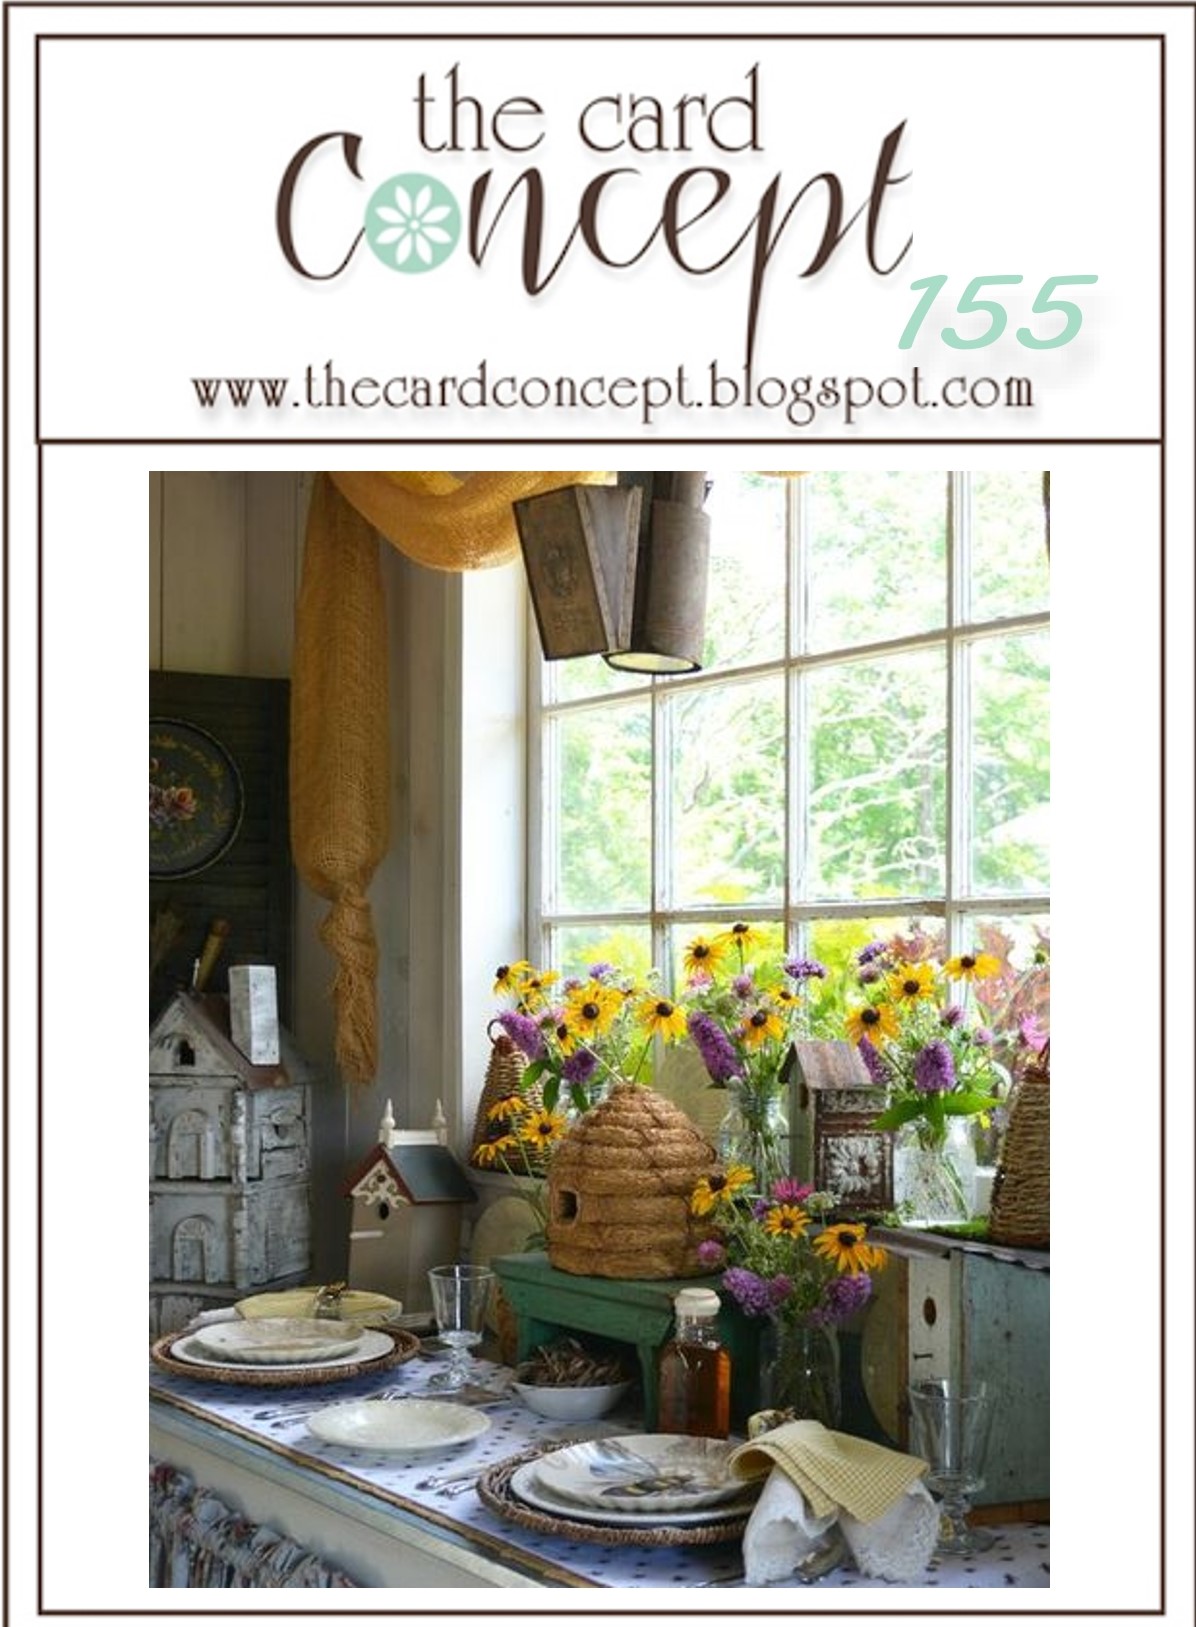
For those of you who are not familiar with The Card Concept Challenge, we are a bi-weekly challenge that uses an inspiration photo for you to create a card.  

You can choose one style and/or a combination of card making styles, the choice is yours!  Plus, our Design Team of ten ladies create a card to inspire you. 

I love the overall feel of this photo- the bright window with the beautiful Black-eyed Susans as well as the gorgeous birdhouses (especially the one in the same of a beehive) and the gold curtain and black accents, all inspired my Shabby and Vintage Mixed Media card!

I have mentioned in the past that my husband and I collect antique honey dishes and I love vintage images of bees, so I had to pull out this bee image from the French Country Collection by
Graphic 45.


I am still working my way through the Splitcoaststampers Sketches and was able to incorporate the SCS #SC276 Sketch into the layout (moved panel #4 up a bit). I am also participating in the A Place to Start May #5- “Anything Goes” Challenge and the Watercooler Wednesday #315 Marsha’s Challenge: All Things Feminine.  

If you have not had a chance to visit The Card Concept, or the other challenge sites yet, I encourage you to do so- fabulous inspiration from all! 

To create this card:

Ink the inside of a 3D Honeycomb Embossing Folder with Ground Espresso Distress Ink, insert a piece of mustard cardstock, and run through an embossing machine.  Repeat the process so you have two embossed panels.


Spritz the panels lightly with water to dilute the espresso ink a bit.  Stamp various splatter images using Wild Honey distress ink and allow the panels to dry.

Trim one of the panels to approx. 3 ¾” x 3 ¼”.  Distress the edges, mount onto a piece of black cardstock, distress the edge and use a straight stitch on a sewing machine with white thread.

Distress the edges of the other panel, mount onto black cardstock, distress the edges again.

Mount the smaller panel onto the larger background panel, add the strip of lace and stitch around the edges with a zigzag stitch.

Trim the Graphic 45 French Country image, mount onto mustard cardstock. Distress and mount again onto black cardstock, distressing the edges before adhering to the card front using dimensional foam (or chipboard).

Stamp the sentiment onto mustard cardstock with Versafine™ Onyx Black ink, apply clear embossing powder and heat set with a heat tool.


Once the embossing has cooled, trim to a rectangle, distress the edges, mount onto black cardstock, and distress the edges again before mounting onto the panel with dimensional foam (or, as I prefer, chipboard).

Mount the entire layered background panel onto a white card base.

Add the bulb pin with the key charm plus a few pearls to the outside corners. 

To finish off the card,  apply a few drops of Morning Dew Nuvo™ Jewel Drops as well as "smoosh" a bit in the upper left hand corner to mimic dripping honey.

Stamp Sets: Faith Medley (retired Verve Stamps), Grunge Elements, Timeless Textures (both retired Stampin’ Up!)

Ink/Mediums: Versafine™ Onyx Black Ink, Tim Holtz™ Early Espresso, Wild Honey Distress Ink, Nuvo™ Morning Dew Jewel Drops

Paper/Cardstock: More Mustard, Basic Black; French Country 12 x 12 (Graphic 45)

Tools/Accessories: Texture Boutique™ (Sizzix™), 3D Honeycomb Embossing Folder (Stampin’ Up!), Heat Tool, Embossing Buddy, Clear Embossing Powder, Water Spritzer Bottle, Distressing Tool, Sewing Machine, White Thread, Lace (retired Stampin’ Up!), Pearls, Antique Brass Bulb Pin and Key Charm

Thanks again for taking the time to visit!  We hope you will have the time to create a card based on our inspiration photo and join us at The Card Concept! The challenge is open until May 24th at noon EDT.

Wednesday, April 28, 2021

TCC154 Your Labor in the Lord


Hi Friends! 

Welcome to The Card Concept #154 {Happy Mother’s Day} Challenge!

For those of you who are not familiar with The Card Concept Challenge, it is a bi-weekly challenge that uses an inspiration photo for you to create a card. 

You can choose one style and/or a combination of card making styles, the choice is yours!  Plus, our Design Team of ten ladies create a card to inspire you. 

This beautiful table setting looks like a perfect way to celebrate with your Mother or another special lady in your life.  I was inspired by the flowers as well as the blues and white to create a simple Mixed Media card.

I am also linking this card to the Simon Monday “Add a Quote” Challenge along with the Word Art Wednesday #489-#490 “Anything Goes” Challenge.

If you have not had a chance to visit The Card Concept, or the other challenge sites yet, I encourage you to do so- fabulous inspiration from all! 


To create this card:

Lightly tap Tumbled Glass, Broken China, and Peacock Feathers Distress Oxide Ink pads onto a silicone crafting mat, spritz with water and press a piece of white cardstock into the ink. 

Lift the panel and re-press into the ink until you are satisfied with the background, drying with a heat tool.

De-static the lower right-hand side of the panel with an embossing powder tool, stamp the sentiment from the retired Serve the Lord stamp set (Divinity Designs formerly Our Daily Bread Designs) with Versafine™ Onyx Black Ink, apply clear embossing powder and heat set with a heat tool.

Trim the edges of the background panel and mount onto a white card base.

De-static another panel of white cardstock with an embossing powder tool, stamp the leaves and flowers from the retired Choose Happiness stamp set (Stampin’ Up!) with Versafine™ Onyx Black Ink, apply clear embossing powder and heat set with a heat tool.

Once the embossing has cooled, watercolor the images with water-based markers and fussy-cut.

Mount the leaves and flowers onto the card front.

Use a clear glitter pen to add sparkle to the flowers and finish off the card with an extra fine white paint pen.

Stamp Sets: Choose Happiness (retired Stampin’ Up!), Serve the Lord (retired ODBD/Divinity Designs LLC)

Ink/Mediums: Versafine™ Onyx Black Ink, Tim Holtz™ Tumbled Glass, Broken China, and Peacock Feathers Distress Ink, Stampin' Write Markers- Lemon Lime Twist, Wild Wasabi, Blushing Bride, Melon Mambo; Spectrum Noir™ Clear Glitter Pen, Extra Fine White Paint Pen

Paper/Cardstock: Whisper White

Tools/Accessories: Heat Tool, Embossing Buddy, Clear Embossing Powder, Water Spritzer Bottle

Thanks again for taking the time to stop by!  We hope you will have the time to create a card based on our inspiration photo and join us at The Card Concept! The challenge is open until May 10th at noon EDT.

Tuesday, July 28, 2020

Let the Earth Rejoice


Hi Friends!

I am sharing a quick Clean and fairly Simple Mixed Media card that was designed with the retired Sweet ‘n Sassy Stamps Bare Tree Die set along with a retired Scripture Medley 4 (Verve Stamps) verse sentiment.

As many of you know, mixed media does not have to be complicated- use any two mediums along with some texture or dimension and that usually qualifies as mixed media.  Since I tend to heat emboss and watercolor almost all of my cards, I am usually creating with mixed media:-)

For this card,  I used distress oxide inks along with acrylic paint and heat embossing as the "mediums".  Texture was added with dimension as well as the sequins.  If you follow my blog, you know that Clean and Simple (CAS) is not my normal  "go-to" style but I am am working on it, lol!

I enjoy participating with online challenges and will be linking this card to the Just Add Ink #515 “Mixed Media” Challenge and the Word Art Wednesday #448-#449 “Anything Goes”Challenge.

To create this card:

Using an acetate envelope (or craft sheet), pat distress oxide ink onto the surface, spritz with water and press a piece of white cardstock into the ink.  Continue the process until you are satisfied with the results and heat dry with a heat tool between layers.

Trim the panels and apply white acrylic shimmer paint, allow the panels to dry before mounting onto black cardstock.

Use an embossing powder tool to de-static the lower right hand corner of a piece of white cardstock, stamp the verse sentiment with archival black ink, apply clear embossing powder and heat set with a heat tool.

Die cut the verse panel with a stitched rectangle die, mount onto black cardstock (trim close to the edge).

Die cut several of the trees from black cardstock and layer onto one another (this adds dimension plus a bit of strength to the die cut).

Layer the four oxide panels onto the card front using chipboard (or dimensional foam) and add the tree die cut.

Mount the panel onto a white card base and finish off the card with a few clear iridescent sequins.

Stamp Sets: Scripture Medley 4 (retired Verve Stamps)

Ink/Mediums: Versafine™ Onyx Black, Tim Holtz™ Broken China, Picked Raspberry, Tumbled Glass Distress Oxide; Frost White Shimmer Paint

Paper/Cardstock: Whisper White, Basic Black

Accessories/Tools: Gemini, Jr™, Dies- My Favorite Things™ Stitched Rectangle A2 Set 1, Sweet ‘n Sassy Stamps retired Tree; Embossing Buddy®, Clear Embossing Powder, Heat Tool, Clear Iridescent Sequins, Acetate Envelope, Water Spritzer Bottle

Thanks again for taking the time to stop by- I hope I have inspired you to create a mixed media project :-)  Hugs and have a great week, sweet friends!

Wednesday, March 4, 2020

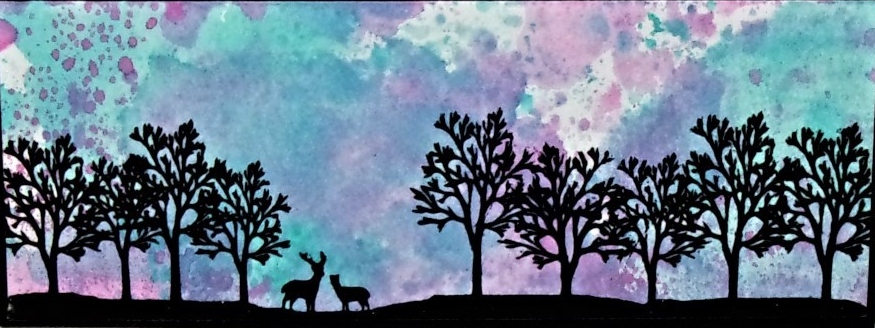
Sympathy Skyline


Hi Friends!!

This morning, I am sharing a Clean and Simple (CAS) Mixed Media card that I designed using two stamps sets currently available at Sweet 'n Sassy Stamps- Landscape Silhouettes and Tender Thoughts.

I needed to restock my supply of sympathy cards and thought that the Splitcoaststampers SC42 Sketch Challenge  would be great for the layout (woohoo, another sketch, now only approx. 450 or so to go :-)) and I love the font on the "With Deepest Sympathy" stamp from the Tender Thoughts set.

In case you have not seen my previous blog posts, I have a personal goal to create a card for each of the Splitcoaststampers Sketch Challenges and they now are up to sketch #791 thankfully the challenges never expire :-)).

I am also playing along with the CASOLOGY #363 “Skyline” Challenge (most of their Design Team had city skylines so hopefully a nature skyline will qualify) :-). 

To create this card:

On a piece of acetate (I used a clear envelope that had saved from stamp set packaging), tap a bit of Tumbled Glass, Broken China and Picked Raspberry Distress Oxide Ink onto the acetate. 

Lightly spritz the ink with water, fold the acetate together to “smoosh” the ink, insert a piece of white cardstock and press the ink onto the paper.  Keep repeating until you are satisfied with the results.

De-static the panel with an embossing powder tool, ink the landscape image with Versafine™ Onyx Black Ink (I used my MISTI™ tool to ink up a few times) and stamp onto the panel.  Apply clear embossing powder and heat set with a heat tool. 

Trim the panel and mount onto a piece of black cardstock, trim close to the edge.

De-static a piece of white cardstock for the background, ink the sentiment with Versafine™ Onyx Black Ink and stamp onto the panel (below where you will position the focal image panel).  Apply clear embossing powder and heat set with a heat tool. 

Trim the background panel, mount onto black cardstock and trim close to the edge.  

Mount onto a white card base.

Mount the focal image using dimensional foam to finish off the card.

Stamp Sets: Landscape Silhouettes, Tender Thoughts (both Sweet ‘n Sassy Stamps)

Ink/Mediums: Versafine™ Onyx Black;Tim Holtz™ Distress Oxide Inks- Tumbled Glass, Broken China, Picked Raspberry

Cardstock/Paper:  Whisper White, Basic Black

Accessories: MISTI™, Embossing Buddy®, Clear EP, Heat Tool, Acetate Envelope, Water Spritzer

I am so thankful that you took the time to visit my blog- hugs and I hope you have a fabulous week!

Tuesday, March 3, 2020

Country Road- A Man Plans His Course


Hi Friends!!

This evening I am sharing a card that I designed using the current Country Road (Stampin’ Up!) set along with a verse from the current Godly Man stamp set (Stamp Simply).

This is the first card that I have created with the Country Road stamp set (although I have owned it for over a year- so little time, lol!).  I love the images in the set and thought that this verse sentiment from Stamp Simply would be perfect!


To create this card:

Cut open a clear acetate envelope (I used one that I had saved from a clear stamp set packaging), open the envelope and tap a bit of Tumbled Glass, Peacock Feathers and Seedless Preserves Distress Oxide Ink onto the acetate. 

Lightly spritz the ink with water, fold the envelope together and use your fingers to “smoosh” the ink, insert a piece of white cardstock (I used a piece from my stash that has a slight wax coating) and press the ink onto the paper.  

Keep repeating this process until you are satisfied with the results (I also used a water brush with some of the ink to even out the splatters in places).

Use a heat tool to thoroughly dry the panel, ink the wheel and grass images from Country Road with Hickory Smoke Distress Oxide Ink and stamp onto the lower part of the panel (again, drying the ink with a heat tool).

De-static the entire panel with an embossing powder tool, ink the weathervane image with Versafine™ Onyx Black Ink (I used my Stamparatus™ tool to line up so I can stamp the image a few times) and stamp onto the panel.  Apply clear embossing powder and heat set with a heat tool. 

Repeat the above process with the tall grass image and heat set the black ink with clear embossing powder.

Once the embossing as cooled, die cut the panel with a stitched rectangle die (saving the portion of the background that you can use for the lower part of the card). Trim the remaining background panel to card front size and mount onto black cardstock (trimming close to the edge).

Dry emboss a piece of gray designer paper (this is a piece from my stash) with a woodgrain embossing folder, cut on an angle for the sketch elements and layer onto black cardstock.  Adhere the layers and add a strip of 1” black satin ribbon.
Mount the entire background layered panel onto a white card base.

Adhere the main focal image with dimensional foam or chipboard (I have been using scrap chipboard lately).

Heat emboss the sentiment from the Godly Man stamp set, trim to a rectangle and mount onto black cardstock.  Add the sentiment to the card front using dimensional foam or chipboard for the area that is not attached to the main focal image.

Use an extra fine white paint pen to add highlights to the grass and finish off the card.

Stamp Sets: Country Road (Stampin’ Up!), Godly Man (Stamp Simply)

Ink/Mediums: Versafine™ Onyx Black;Tim Holtz™ Distress Oxide Inks- Tumbled Glass, Peacock Feathers, Hickory Smoke, Seedless Preserves; Extra Fine White Paint Pen

Cardstock/Paper:  Whisper White, Basic Black;  misc gray designer paper (not sure of manufacturer)

Accessories: Gemini, Jr™,  Woodgrain Textured Impressions™ Embossing Folder, MFT Stitched Rectangle A2 STAX Set 1,  Embossing Buddy®, Clear EP, Heat Tool, Acetate Envelope, Tim Holtz™ Water Spritzer, 1" Black Satin Ribbon 

I had fun creating this card and hope I have inspired you to get "inky" this week! 

Thanks again for taking the time to visit- I have been busy creating and plan on posting more cards shortly (I have 50+ card designs that I have created recently and not posted to my blog yet, yikes!!)!  Hugs and I hope you have a blessed week!

Monday, July 9, 2018

His Love Endures Forever


Hi Friends!

Today I am sharing a fun simple Mixed Media card designed with retired stamps from my massive stash :-)  The butterfly image is from the retired Stampin’ Up! Ageless Adornment (hostess set) and the sentiment is from the recently retired Verve Stamps, Scripture Medley 3.  

I had this butterfly image already stamped, colored , fussy-cut and layered in my stash and in my recent (and continuing) organization project, I decided to pull out my "stashed" images and create a few cards:-).

If you have not had a chance to visit the above challenge galleries yet, I encourage you to do so- wonderful ideas and projects by all!

To create this card:

1). De-static a scrap piece of white cardstock with an embossing powder tool, stamp the butterfly image with Versafine™ Onyx Black ink onto the prepared cardstock, apply clear embossing powder and heat set with a heat tool.  Once the embossing as cooled, watercolor using ink from water-based markers.  Fussy-cut the image, mount onto black cardstock and cut close to the edge.

2). Die cut a piece of white cardstock with a stitched rectangle die.  Scribble a bit of green water-based marker onto a silicone craft mat, lightly spritz with water and press the die cut panel into the ink.  Lift up and repeat until you are satisfied with the background.

3). De-static the background panel with an embossing powder tool, stamp the verse image with Versafine™ Onyx Black ink, stamp onto a piece of white cardstock, apply clear embossing powder and heat set with a heat tool.  Mount the panel onto a piece of black cardstock, trim and mount onto the white card base.

4). Mount the fussy-cut butterfly image with dimensional foam.  Add white highlights to the butterfly’s wings using an extra fine white paint pen and use a clear glitter pen to add shimmer to the wings.

5). Finish off the card with a few jewel drops.

Stamp Sets: Ageless Adornment (retired Stampin’ Up!), Scripture Medley 3 (retired Verve Stamps)

Ink: Versafine™ Onyx Black, Zig® Real Clean Color Markers- Light Green, Yellow, Orange, Light Purple; Stampin’ Write Tangerine Tango Marker; Clear Wink of Stella® , Sharpie® Extra Fine White Paint Pen, Nuvo™ Lime Jewel Drops

Paper: Whisper White, Basic Black, Extra Thick Whisper White

Accessories: AquaPainter™, Embossing Buddy®, Clear Embossing Powder, Heat Tool, Water Spritzer Bottle

Thanks again for visiting- you are all such an encouragement to me!!  Hugs and I hope you have a fabulous week, my friends!


Tuesday, August 29, 2017

SC600 Floral Sympathy


Hi Friends!

Woohoo- it’s time for the new SC600 sketch at Splitcoaststampers!  This is such a fun sketch and wow, our Design Team did a fabulous job with showing off the versatility!

I pulled out a few retired Stampin' Up! stamp sets, Element of Style and Bloom with Hope along with Distress Oxide/Distress Inks for a quick Media card.  


If you have not had a chance to check out the Splitcoaststampers Sketch Gallery or the other challenge galleries yet, I hope you will find the time to do so- as always, gorgeous inspiration from all!

To create this card:

1). Using Tim Holtz® Distress Oxide Inks, press the Picked Raspberry pad onto a silicone craft mat, lightly spritz with water, lay a piece of white cardstock into the ink, lift up and press again.  Dry with a heat tool and repeat the process using Peacock Feathers and Seedless Preserves.  Once you are satisfied with the background, spritz water over the ink, press lightly with a paper towel and dry with the heat tool.

2). De-static the background with an embossing powder tool, ink the Elements of Style stamp set with an archival black ink, apply clear embossing powder and heat set with the heat tool.

3). Use the AquaPainter™ with ink from Tim Holtz® Distress Ink pads- Seedless Preserves and Picked Raspberry to watercolor the flowers and the surrounding background around the flowers.  Color the leaves with the Mowed Lawn TH Distress Marker.  Trim the panel and mount onto a piece of Blackberry Bliss cardstock, trim close to the edge.

4). Trim a piece of white cardstock, mount onto a piece of Blackberry Bliss cardstock, adhere the entire panel to the white card base.

5). Die cut and emboss the scroll corners from Blackberry Bliss cardstock using a Big Shot™ with the Shapeablilites© Fleur de Lis Accents dies, wrap around the corners (per the sketch) and mount the panel onto the card front using dimensional foam.

6). Stamp the sentiment from Bloom with Hope using archival black ink onto white cardstock, apply clear embossing powder, heat set with the heat tool and create the fish tail banner (I used a retired hexagon punch).  Mount onto a piece of Blackberry Bliss cardstock and adhere directly to the card front.

7). Add white accents to the flower centers with an extra fine white paint pen and shimmer to the flower petals with a clear glitter pen. Add a few pearls to the corners to finish off the card.

Stamp Sets: Elements of Style, Bloom with Hope

Ink/Mediums: Stampin’ Archival™ Basic Black; Tim Holtz™ Distress Oxide Ink- Peacock Feathers, Picked Raspberry, Seedless Preserves; TH Distress Inks- Picked Raspberry, Seedless Preserves; Spectrum Noir™ Clear Glitter Pen; Extra Fine White Sharpie® Paint Pen

Paper: Extra Thick Whisper White, Whisper White, retired Blackberry Bliss

Accessories/Tools: AquaPainter™, Big Shot™, Shapeablilites© Fleur de Lis Accents Dies. Embossing Buddy®, Clear Embossing Powder, Heat Tool, Water Spritzer Bottle, retired Hexagon Punch, Pearls

Thanks again for taking the time to stop by! I hope you can find the time to come join us at Splitcoaststampers- we would love to see your artwork in our gallery!  Hugs and have a wonderful week, sweet friends!
Related Posts Plugin for WordPress, Blogger...