Showing posts with label Love and Sympathy. Show all posts

Wednesday, September 25, 2019

TCC120 Sending Love and Sympathy


Hi Friends! 

Welcome to The Card Concept #120 {Cozy Cottage} Challenge!  Isn’t this a cozy picture- I can imagine a cottage in the woods with a beautiful scene from the kitchen window!  I was inspired by the blue, white as well as the soft yellow along with the patterns to create a Shabby and Vintage/Mixed Media card!

I decided to pull out a current Stampin’ Up! Set, Petal Palette and pair it with a sentiment from the retired set, Love & Sympathy.  I also used some very old blue checked and soft yellow patterned paper (Stampin’ Up! circa 1999 or so)- this is what they offered prior to their one-sided designer paper line, lol!  I still have many of the colors and patterns in my “stash” :-)


If you have not had a chance to visit us at The Card Concept or the other challenge sites yet, I hope you will find time to do so- gorgeous inspiration from all!


The floral image from Petal Palette was stamped twice onto prepared white cardstock with with Versafine™ Onyx Black and were heat embossed with clear embossing powder.  Once the embossing powder had cooled, the images were colored with Stampin’ Write Markers (see colors below) using a water brush to soften the edges before fussy cutting (also cutting some of the images apart to layer).

Layer the patterned and embossed papers per the sketch, add the grosgrain and crochet lace along with the pearls.  

Adhere the fussy-cut flowers to finish off the card. 

Stamp Sets:  Petal Palette, Botanicals, Love & Sympathy (all Stampin’ Up!)

Ink/Mediums: Versafine™ Onyx Black,  Night of Navy Classic, Stampin’ Write Markers- So Saffron, Crushed Curry, Pear Pizzazz, Old Olive; Spectrum Noir™ Clear Glitter Pen

Cardstock/Paper: Whisper White, Night of Navy; retired SU! Patterned Paper- Navy Check, Barely Banana Plaid (circa 1999)

Tools/Accessories: Big Shot™, Gemini™, Ornate Lace 3D EF (Crafters Companion™), My Favorite Things™ Dies- Stitched A2 Rectangle STAX, Stitched Circle STAX; Sixxiz™ Ovals and Circles; Embossing Buddy®, Clear Embossing Powder, Heat Tool, 1” Navy Grosgrain Ribbon, White Crochet Lace

Thanks again for taking the time to stop by!  I hope I have inspired you to create your own card based on our {Cozy Cottage}  photo and link up to our gallery at The Card Concept- we would love to see your interpretation!! The challenge is open until Monday, October 7th. 

Saturday, October 3, 2015

JUGS313 Love & Sympathy


Hi Friends!!

Woohoo!  Another fun announcement!!  I am so excited to be the October Guest Designer for Just Us Girls!   I just love their weekly challenges as well as their wonderful Design Team – what an honor to join them this month!

Challenge #313 is Word Week and the word for this week is “Sympathy”.  

While it is a difficult and sorrowful time when a loved one passes away, I know that receiving a heartfelt sympathy card helps to ease the pain and allows those who are suffering to know that you truly care.

I hope you will have a chance to check out the rest of the Just Us Girls Design Team projects and create a sympathy card to have on hand in time of need. 

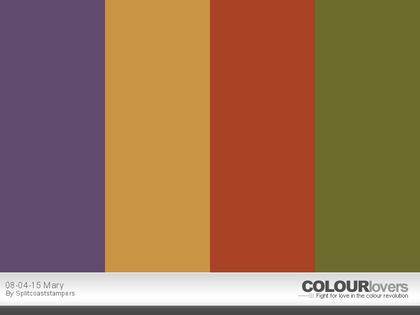
For this card, I also incorporated the Splitcoaststampers’ SC558 Sketch Challenge, CC542 Color Challenge (skipped the "dessert" although I accidentally pulled out the Blackberry Bliss marker before I realized it but then added Elegant Eggplant - oops!) and TLC552 "Floral Frenzy" Challenge.


To create this card:

Ink the background stamp, Corner Garden as well as the sentiment from the retired Love & Sympathy stamp set using Stāz-On® Jet Black Ink and stamp onto a piece of Whisper White cardstock.

Using Stampin’ Write Markers along with an AquaPainter™  (I scribble the marker onto a craft mat or acrylic block and pick up the ink with the water brush), color the flowers and leaves.

Add additional color with the markers direct to the images and follow with the AquaPainter™ to soften the edges.

Use the Big Shot™ with the Circle Collection Framelits™ to cut out the corner with the sentiment.

Also cut the corner with the same circle from a piece of Cajun Craze cardstock.

Trim the Corner Garden image and mount onto Cajun Craze cardstock, trim again and mount onto Elegant Eggplant cardstock.

Add the sentiment to the corner (mounted onto the curved piece of Cajun Craze cardstock) and mount onto the Whisper White card base.

Create a loose mask from scrap paper and use the Color Spritzer Tool with the Stampin’ Write Cajun Craze marker to add a bit of interest to the background.

To finish off the card- adhere the two strings of Pearls to corner area and use the White Gel Pen to add highlights to the flower centers.

Stamp Sets:  Corner Garden, Love & Sympathy (retired)

Ink: Stāz-On® Jet Black Ink; Stampin’ Write Markers- Blackberry Bliss, Cajun Craze, Delightful Dijon, Elegant Eggplant, Mossy Meadow, Sahara Sand; White Gel Pen

Paper: Whisper White, Pumpkin Pie, Cajun Craze, Elegant Eggplant

Accessories: Big Shot™, Circle Collection Framelits™, AquaPainter™, retired Color Spritzer Tool, Pearls


Thanks again for visiting- I hope you have a great week and come play along with us at Just Us Girls !

Saturday, June 6, 2015

SC528 Sending Love & Sympathy

Hi Again Stampers!!

Here is another quick sympathy card that I created from scraps this past weekend using the Splitcoaststampers’ SC528 Sketch Challenge (see details here and thegallery here).

Again, if you have not already done so, I hope you will find the time to visit the above site to check out the wonderful Design Team samples as well as the wonderful gallery!

To create this card:

I already had the Pool Party background panel embossed with the retired Finial Press Textured Impressions™ Embossing Folder as well as the focal image stamped and colored from a previous project.

Mount the focal image onto a piece of Pool Party cardstock, trim and mount onto a piece of Island Indigo cardstock.

Ink the retired Notable Notions script stamp using Island Indigo Classic Ink and stamp repeatedly on a 2 ¼” square of Pool Party cardstock, mount onto a piece of Island Indigo cardstock, trim and mount on an angle behind the layered focal image.

Stamp the sentiment using Island Indigo Classic Ink onto Whisper White cardstock, trim and mount onto Island Indigo cardstock, create the “photo” corners  with a  1” Square Punch and mount the corners to the panel. 

*** To create the "photo" corners, punch the corner edge of the punch on the corner of the cardstock, toss the punched piece, move the punch up a bit and punch again- this will give you the square "photo" corner, angle the edges with your scissors and you are done :-) ***

Adhere the layered sentiment to the embossed Pool Party background panel, mount onto a piece of Whisper White cardstock and add the panel of retired World Spectacular Designer Series Paper (DSP) with the paper “lace” border.

Mount the entire panel to the Island Indigo card base and add the focal image using Stampin’ Dimensionals® along with the Pearls to the photo corners to finish off the card.

Stamp Sets: Love & Sympathy, Notable Notions, Nature’s Wonders

Ink:  Island Indigo, Stampin’ Write Markers- Pool Party, Island Indigo, Sahara Sand

Paper: Whisper White, Island Indigo, Pool Party; retired World Spectacular DSP

Accessories: Big Shot™, retired Finial Press Textured Impressions™ Embossing Folder,  Doily Border Die (SNSS), 1” Square Punch, Pearls


Thanks again for visiting- have a wonderful weekend, my friends!

Saturday, April 11, 2015

OLS15 One Layer Sympathy


Hi Stampers!!

I decided to create a one layer card using the OLS15 One Layer Simplicity “Blowin’in the Wind” Challenge  (this is the first time that I have played along with the OLS Challenge site :-))  along with the Splitcoaststampers WT520 Monochromatic Green Challenge (see details here and gallery here) along with the Splitcoaststampers Mix-Ability MIX112 First Day of Spring Challenge (see details here and gallery here).

I had purchased the Watercolor note cards from Stampin’ Up! last year and had yet to use them- I thought they would be perfect for this challenge and could hold up under the “abuse” of water for the mixed media elements :-)  Not sure if this card has the "simplicity" part of the challenge although it is only one layer :-)

Again, if you have not had time to visit the challenge sites yet, I encourage you to do so- wonderful ideas and inspiration from all!

To create this card:

Original Note Card (Before :-))
Use your craft mat to apply several layers of Ranger® Tim Holtz® Distress Stains- Mowed Lawn, Salty Ocean, Dusty Concord, Bundled Sage along with Picket Fence (and whatever other colors you prefer- I lost track :-)) and spritz with water before laying the card front into the ink.

Lift up and spritz the ink again lightly and tilt the card front to allow the ink to spread. 

Dry the card front between layers with the Heat Tool and continue to repeat until you are satisfied with the results.

Once the background was covered with Distress Stains, add a few layers of Ranger® Tim Holtz® Adirondack® Alcohol Inks- Denim, Eggplant, Pearl and Silver.  

Place a few drops of each color of the Alcohol Ink over the background (using only one color at a time), drop a bit of the Alcohol Blending Solution over the ink, then quickly used the retired Color Spritzer Tool to move the ink around (versus a drinking straw). 

Once the card front has dried, ink the retired script stamp from Notable Notions using Memento™ Tuxedo Black Ink and stamp over the background in a random fashion.

Use Versamark™ Ink to stamp the flower stems onto the card front, apply Stampin’ Emboss® White Embossing Powder and heat set with the Heat Tool.

Repeat the above steps for the sentiment to finish off the card.

Stamp Sets:  Love & Sympathy, Notable Notions, Agapanthus Thank You (Stampendous)

Ink: Versamark™, Memento™ Tuxedo Black; Ranger® Tim Holtz® Distress Stains- Mowed Lawn, Salty Ocean, Dusty Concord, Bundled Sage, Picket Fence; Ranger® Tim Holtz® Adirondack® Alcohol Inks- Denim, Eggplant, Pearl and Silver; Alcohol Blending Solution

Paper: Watercolor Note Cards (retired)

Accessories: Heat Tool, Stampin’ Emboss® White Embossing Powder, Craft Mat, Color Spritzer Tool


Thanks again for stopping by- I hope you have a wonderful weekend, my friends!

Tuesday, February 10, 2015

Sending Love & Sympathy- SUO116 & AW34

Hi Stampers!   

It’s time for the new SUO116 “Shape Up!” Challenge (any shape other than rectangle or square) and I decided to create a card using the AW34Color Challenge. 

I hope you will find the time to check the rest of the Design Team at both challenge sites and come join in on the fun!

To create this card:
Use the Big Shot™ with the large Window Frames Collection Framelits™ Die to cut out the shape of the card (fold the Very Vanilla card base in half and place the fold within the die so that the edge will not be cut).
Cut out another piece of Very Vanilla cardstock using the same size die and trim the top of the panel to match the card base.
Drop a few drops of So Saffron and Crisp Cantaloupe Classic Ink using re-inkers onto a craft mat and spritz with water.  Take the single die cut (from the step above) and lay face down into the ink and swirl it on the mat a bit, lift up and repeat until the coverage is to your liking :-)
Allow the panel to dry (I used a Heat Tool to speed up the process) and once dried, stamp the silhouette leaves using Crisp Cantaloupe and So Saffron Classic Ink onto the panel.
Stamp the stems with flower tops using Basic Gray Classic Ink and add the splatter with the large splatter stamp from Gorgeous Grunge using Crisp Cantaloupe Classic Ink. 
De-static the panel using the Embossing Buddy® and stamp the stems with flowers again using Versamark™ Ink, apply Stampin’ Emboss® Whtie Embossing Powder and heat with the Heat Tool. 
Stamp the butterflies onto So Saffron cardstock using Basic Gray Classic Ink and add additional color to the wings with the Crisp Cantaloupe Stampin’ Write marker.    Punch the butterflies out with the Elegant Butterfly Punch.
Stamp the sentiment onto Very Vanilla cardstock using Basic Gray Classic Ink and add a bit of distressing with the large splatter stamp (“huff” onto the stamp to re-moisten the existing Crisp Cantaloupe ink from the previous steps above).  
Punch out the sentiment using the Large Oval Punch and layer onto an extended Large Oval from Crisp Cantaloupe and So Saffron cardstock (punch out two ovals from each of the colored cardstock and adhere with just a bit of each color showing behind the sentiment layer).
Mount the background panel onto the card base and add the sentiment using Stampin’ Dimensionals®. 
Add the butterflies to the panel and adhere Pearls to the center of the butterflies. 
Create a bow from So Saffron cardstock using the Bow Builder Punch and adhere at the bottom of the card front (this bow will allow the card to remain upright since the die cut is curved). 
Add the Antique Brad to the center of the bow along with the Pearls in the corner to finish off the card.  
Stamp Sets:  Summer Silhouettes, Papillon Potpurri, Love & Sympathy, Gorgeous Grunge
Ink: Crisp Cantaloupe, So Saffron, Basic Gray, Versamark™,  Crisp Cantaloupe Stampin’ Write Marker
Paper/Cardstock: Very Vanilla, Crisp Cantaloupe, So Saffron
Accessories: Big Shot™,  Window Frames Collection Framelits™,  Embossing Buddy®, Heat Tool, Stampin’ Emboss® White Embossing Powder, Punches- Bow Builder, Elegant Butterfly, Large Oval; Pearls, Antique Brad

Thanks again for taking the time to visit – I hope that you will join in on in on the fun with your Stampin’ Up! Only creations and create your own “Shape Up!” project!

Thursday, January 15, 2015

CAS Sympathy- Three Challenges in One :-)


Hi Stampers!

I hope all of you are having a wonderful week so far!  I had a great evening with our Awana clubbers and once I arrived home, decided to spend some time in my craft area and create a card  for the PP227 Ann's Color Challenge Challenge along with inspiration from the FMS169 Sketch Challenge and the SR262 Inspiration Photo.  

If you have not had a chance to visit the above challenge sites yet, again, I would encourage you to do so- they all have wonderful Design Teams and tremendous inspiration from their galleries each week!


I chose to create another sympathy card since so many people in our lives have lost loved ones recently and I like to pray for them as I create the cards...

This Clean and Simple (CAS) card was fairly quick and easy since I already had the butterfly image embossed in my “organized” images from a previous project (believe me, not all of my images are organized, that’s for sure- a definite work in progress :-))  

Also, it was difficult to get a good photograph of this card- the Crisp Cantaloupe on the wings appears darker in the photo than IRL and the background is a bit greener IRL than the photo shows (where the Sahara Sand and Lost Lagoon overlap) - possibly due to the Frost White Shimmer Paint on the wings, and of course, lighting- ugh, always an issue!!  

To create this CAS card:

Ink the center of the retired background stamp, Medallion using Sahara Sand Classic Ink and using a Sponge Dauber randomly apply Lost Lagoon Classic Ink over the Sahara Sand (be careful not to cover the Sahara Sand completely).

Ink the large splatter stamp from Gorgeous Grunge using Lost Lagoon Classic Ink and stamp onto the Medallion background.
 
Ink the sentiment using Memento™ Tuxedo Black Ink and stamp onto the panel.  Trim the panel and mount onto a piece of Crisp Cantaloupe, trim again and mount onto the Lost Lagoon card base.

Using the Embossing Buddy®, de-static a piece of Whisper White cardstock and stamp the butterfly image using Versamark™ ink. 

Apply Stampin’ Emboss® Black Embossing Powder and heat with the Heat Tool.  

Using the Crisp Cantaloupe and Lost Lagoon Stampin’ Write marker, color the image.   Carefully cut out (“fussy cut”) the butterfly out and mount onto the card front.

Using an AquaPainter™, apply diluted Frost White Shimmer Paint to the colored portions of the butterfly wings to finish off the card.

Stamp Sets: Wonderful Wings, Medallion, Love & Sympathy, Gorgeous Grunge

Ink: Versamark™,  Lost Lagoon, Sahara Sand; Stampin’ Write Markers-Crisp Cantaloupe, Lost Lagoon

Paper/Cardstock:  Whisper White, Crisp Cantaloupe, Lost Lagoon

Accessories:  Embossing Buddy®, Stampin’ Emboss® Black Embossing Powder, Heat Tool, Sponge Daubers


Thanks again for visiting- you are all such an encouragement to me!!

Saturday, January 10, 2015

Sending Love and Sympathy- A Color, Sketch using "Old" and "New"


Hi Stampers!!

I wanted to take a moment to share a card that I created for the PPA235 Color Challenge at PalsPaper Arts along with the Mojo379 Sketch and the Simon Says Stamp “Make New Friends but Keep the Old” Monday Challenge.

I decided to pull out an "old" retired stamp along with a retired embossing folder to create this card using some of the "new" Mixed Media techniques (well, new to me :-)) for the focal image panel...

 If you have not already visited the above sites, I hope you will find the time to do so- fabulous Design Team inspiration as well as galleries!  It always amazes me to see the creations that one color combination, sketch or inspiration photo can generate!

To create this Mixed Media card:

Apply Gesso to a piece of Whisper White cardstock and allow it to dry (you can use the Heat Tool to speed up the drying process).

Once dried, apply Soft Sky Classic Ink to the background, add water and spread using a paint brush and once dried, repeat with Pool Party Classic Ink (making sure not to cover all of the Soft Sky).  

Once dried, apply Gelatos™ (Bubble Gum and Coconut) to the background, add water and use your finger to smooth onto the background.  

Using a Sponge Dauber apply Island Indigo Classic Ink to the Honeycomb portion of the Mini Punchella stencil by Balzar Designs.
Soften the stencil with a paper towel and apply again if needed. 
 
Ink the retired Very Vintage Jumbo Wheel (this is the “old” item of the Simon Says Stamp Challenge) using Island Indigo Classic Ink and stamp repeatedly on the background.  

Repeat with the Very Vintage Jumbo Wheel using Ranger® Tim Holtz® Vintage Photo Distress Ink  (** Note- this is one of the wheels that I have un-mounted and use as a stamp versus a wheel :-)).    Trim the panel, mount onto Island Indigo cardstock and add two strips of retired ¼” Sycamore Street Island Indigo Satin Ribbon. 

Add the embossed Soft Sky panel to a scrap piece of Island Indigo cardstock- I had both of these pieces in my organized scraps (the Soft Sky panel was previously embossed with the retired Lacy Brocade Textured Impressions™ Embossing Folder- another “old” item- love using scraps when I can).   Oh, also, not all of my scraps are organized- still a work in progress, lol!!

Re-ink the Very Vintage Jumbo Wheel using Pool Party Classic Ink and stamp onto the Pool Party background panel (some of the Distess ink also transferred to this panel).

Add the strips of retired ¼” Sycamore Street Island Indigo Satin Ribbon to the sides of the Pool Party background panel (lining up with the focal image panel) and mount onto a piece of Whisper White cardstock.  

Trim the panel and mount onto a piece of Island Indigo cardstock, trim and adhere to the Whisper White card base.

Stamp the sentiment using Island Indigo Classic Ink onto a piece of Vellum.  Trim and mount onto a scrap piece of Soft Sky cardstock, trim and mount onto a piece of Island Indigo cardstock.

Assemble the card by mounting the embossed Soft Sky panel to the Pool Party background panel, add the Mixed Media focal image panel and mount the sentiment using Stampin’ Dimensionals®.

Create the rolled flowers using Island Indigo and Pool Party cardstock (use the Big Shot™ with the Sizzix Flowers 3D Originals™ Die) and create the leaves using the Bird Builder Punch from Island Indigo cardstock.

Adhere the flowers and leaves to the sentiment panel.

Stamp the butterflies using Island Indigo Classic Ink and punch out with the Elegant Butterfly Punch.  Lightly color the butterflies using the Soft Sky Stampin’ Write Marker and mount onto the card front.

Add the Pearls to the butterfly centers to finish off the card.

Stamp Sets:  Love & Sympathy, Papillon Potpourri, Very Vintage Jumbo Wheel

Ink: Island Indigo, Pool Party, Soft Sky Classic Ink;  Gelatos™ -Bubble Gum and Coconut, Ranger® Tim Holtz® Vintage Photo Distress Stain, Stampin’ Write Soft Sky Marker

Paper: Whisper White, Island Indigo, Pool Party, Soft Sky Regular and Textured, Vellum

Accessories: Gesso, Big Shot™, retired Lacy Brocade Textured Impressions™ Embossing Folder, Sizzix Flowers 3D Originals™ Die,  Punches- Elegant Butterfly, Bird Builder; ¼”; Sycamore Street Island Indigo Satin Ribbon, Mini Punchenella Stencil (Balzar Designs), Sponge Dauber, Pearls


Thanks again for taking the time to stop by- I hope all of you have a wonderful weekend!!

Monday, December 1, 2014

Sending Love and Sympathy- Two Challenges in One!


Hi Again Stampers!

I hope all of you are having a wonderful Monday!  I was able to spend a few minutes in the craft room and decided to create a card using the Splitcoaststampers CC506 Color Challenge- Rose Red, Mossy Meadow and Basic Black (dessert option- ribbon) along with the PPA229 Pals Paper Arts Sketch Challenge.

Again, I hope you have the time to stop by both sites to check out the great inspiration from the Design Teams as well as the other entries!

To create this card:

Ink the floral stamp from Choose Happiness using Memento™ Tuxedo Black Ink and stamp repeatedly onto Whisper White cardstock (re-inking for each stamping). 

Use the AquaPainter™ with Rose Red Classic Ink, create a color wash and apply to all of the blossoms.  Apply darker ink to create dimension to the petals and carefully cut out each blossom.

Ink the leaf stamp using Memento™ Tuxedo Black Ink and stamp repeatedly onto a piece of Whisper White cardstock for the background panel. 

Color the leaves using the Mossy Meadow Stampin’ Write marker. 

Use the AquaPainter™ with Mossy Meadow Classic Ink, create a color wash and apply over the entire background.   Using Mossy Meadow Classic Ink, stamp the lattice from Summer Silhouettes over the background and add a bit of distressing using the large splatter stamp from Gorgeous Grunge.

Sporadically apply Ranger® Tim Holtz® Picket Fence Distress Stain over the entire background.  Mount the panel onto the Basic Black card front.

Adhere the flowers per the sketch and add the large flower in the upper left hand corner using Stampin’ Dimensionals®.

Stamp the sentiment using Memento™ Tuxedo Black Ink onto Whisper White cardstock- create the banner points using the Hexagon Punch. Mount onto a piece of Basic Black cardstock (creating the points again with the Hexagon Punch).

Mount the sentiment onto the card front using Stampin’ Dimensionals®- add a piece of one of the flowers to the edge of the sentiment. 

Use a Faber-Castelle White Pitt Pen to add highlights to the flower centers and adhere the larger Pearls to the corners and a few seed Pearls to the flower centers to finish off the card.

Stamp Sets:  Choose Happiness, Love & Sympathy, Summer Silhouettes, Gorgeous Grunge

Ink: Memento™ Tuxedo Black Ink, Mellow Moss, Rose Red; Stampin’ Write Marker- Mossy Meadow, Faber-Castelle White Pitt Pen, Ranger® Tim Holtz® Picket Fence Distress Stain

Paper:  Whisper White, Basic Black

Accessories:  AquaPainter™, Pearls


Thanks again for stopping by- I hope you have a wonderful evening!
Related Posts Plugin for WordPress, Blogger...