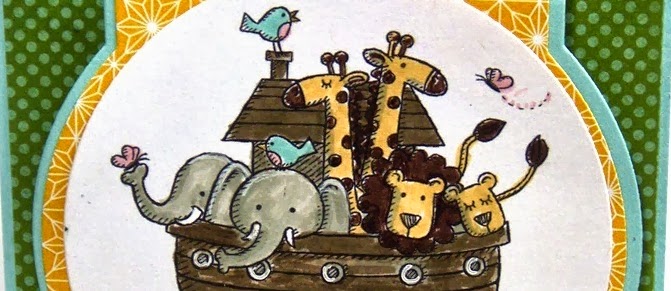
Showing posts with label Epic Day. Show all posts

Wednesday, November 16, 2016

TCC62 Sunflower Thanks


Hi Friends!!

It’s time for the #62 “Thanksgiving” Challenge at The Card Concept!  I just love our inspiration photo with the beautiful colors of the sunflowers, dinnerware, tablecloth as well as that dramatic black and white gingham. 

Since I was so inspired by the sunflowers as well as the overall colors and decided to pull out two retired Stampin’ Up! stamp sets for this card- Sunflower Background and Short and Sweet.

I also incorporated a few of my favorite online challenges- the Viva La Verve November Sketch #1 Challenge as well as the Simon Says Monday “Thanks/Thanksgiving”Challenge and the Retro Rubber Challenge #51 “Be Thankful” Challenge (the sunflower stamp as well as the sentiment is several years old) into the design.

I hope you have a chance to visit us at The Card Concept to check out the rest of our Design Team samples as well as the Verve, Simon Says Wednesday and Retro Rubber Challenge sites- fabulous inspiration from all!!

To create this card:

Distress the edges of the designer paper with a distressing tool (I used a miscellaneous piece of designer paper for the dark background and a piece of retired Epic Day This and That DSP for the orange layer), layer and mount onto a piece of a piece of Early Espresso cardstock.

Add the black and white gingham ribbon and mount the entire panel onto the white card base.

Ink the retired Sunflower Background stamp with archival black ink and stamp onto Whisper White cardstock.

Color the sunflower image with watercolor pencils using an AquaPainter™ adding additional color with Distress Inks (I used Wild Honey and Ripe Persimmon) along with Stampin’ Write Markers- Delightful Dijon and Crushed Curry, fussy-cut the image and set aside.

Distress a piece of retired Autumn Meadows DSP, mount onto a piece of Early Espresso cardstock and layer the fussy-cut sunflower, trimming the edge off the side.

Use a clear glitter pen to add shimmer to the petals of the sunflower.

Ink the sentiment from the retired Short & Sweet stamp set with archival black ink onto white cardstock, create the banner points with the retired Hexagon Punch, mount onto a piece of Early Espresso cardstock and add to the card front with dimensional foam to finish off the card.

Stamp Sets: Sunflower Background, Short & Sweet (both retired Stampin’ Up!)

Ink: Archival Black; Derwent® Watercolor Pencils, Tim Holtz® Distress Inks- Wild Honey, Ripe Persimmon, Ground Espresso, Walnut Stain; Stampin’ Write Markers- Crushed Curry, Delightful Dijon; Clear Glitter Pen

Paper: Whisper White, Early Espresso; retired Autumn Meadows and Epic Day This and That DSP, misc DSP

Accessories: AquaPainter™, Distressing Tool, retired Hexagon Punch, 1” Black and White Gingham Ribbon

Thanks again for taking the time to stop by!  I hope all of you have a fabulous week and you will be able to join us for the #62 ThanksgivingChallenge at The Card Concept!


Tuesday, September 2, 2014

Bloom with Hope- Get Well for Three Challenges :-)


Hi Stampers!

I had a chance to work in my craft room last night and this card was created using the CCMC318 Color Challenge along with the Mojo361 Sketch and PP211Tic-Tac-Toe Challenge (Yellow/Embossing/Get Well).

If you have not had a chance to visit the Challenge sites, I hope you will find the time to do so- great Design Team samples as well as fabulous inspiration from their galleries!!

To create this card:

Use the Embossing Buddy® to de-static a piece of Basic Gray cardstock, ink the Backgrounds Rule stamp using Versamark™ ink and stamp onto the prepared Basic Gray cardstock.  Apply White Stampin’ Emboss® and heat with the Heat Tool. 
 
Distress the edges of the Basic Gray layer with the Distressing Tool.  Use a sewing machine to adhere to a piece of Pool Party cardstock and distress the edges of the Pool Party layer with the Distressing Tool.

Adhere a piece of the retired Epic Day This and That Designer Series Paper (DSP) onto a piece of Basic Gray cardstock and add to the Background Rules layer with the sewing machine. 

Use a Sponge Dauber with Basic Gray Classic Ink to antique the DSP layer as well as the embossing (wipe off the ink from the embossing)  and add additional distress with Gorgeous Grunge using Basic Gray Classic Ink onto the Epic Day layer.

Add a layer of the Hello Honey Moonlight DSP onto a piece of Basic Gray cardstock.  Adhere another strip of Basic Gray cardstock to the center of the DSP layer and mount onto the front of the card.  

Adhere the strip of 3/8” Hello Honey Stitched Satin Ribbon and mount the entire panel onto the Whisper White card base.

Using Memento™ Tuxedo Black Ink, stamp the Bloom with Hope image onto a piece of Whisper White cardstock.  Using an AquaPainter™ apply Pool Party Classic Ink to the background.

Use Stampin’ Write markers to color the image- Hello Honey for the blossoms and Basic Gray for the stems and leaves.  Add a few highlights with the Chalk Marker. 

Mask the image and stamp the retired script stamp from Notable Notions onto the background along with the splatter stamp from Gorgeous Grunge using Basic Gray Classic Ink.

Trim the floral panel and mount onto a piece of Basic Gray cardstock, trim again and mount onto Pool Party cardstock.  Add a partial panel of Basic Gray cardstock to the left side of the panel and use a Sponge Dauber with Basic Gray Classic Ink to distress the edges. 

Add the 3/8” Hello Honey Stitched Satin Double Ribbon Bow to the corner and mount the panel to the card front using Stampin’ Dimensionals®.

Stamp the sentiment using Basic Gray Classic Ink onto Whisper White cardstock, punch out with the Large Oval Punch.  Mount the sentiment onto two ovals punched from the Large Oval punch and mount again onto two ovals from Pool Party cardstock.

Use an AquaPainter™ with Pool Party Classic Ink to the background and Hello Honey Classic Ink to the flower.   Use a Sponge Dauber to apply Basic Gray Classic Ink to distress the edges a bit.  Mount the sentiment to the card front using Stampin’ Dimensionals®.

Add a few Pearls to the sentiment as well as the upper left corner of the DSP panel to finish off the card.

Use a Sponge Dauber to apply Basic Gray Classic Ink onto the huff onto the floral stamp to re-moisten the ink and stamp over the sentiment.

Stamp Sets: Bloom with Hope, Backgrounds Rule, Gorgeous Grunge, Notable Notions, Express Yourself

Ink:  Memento™ Tuxedo Black Ink, Basic Gray, Hello Honey, Pool Party; Stampin’ Write Markers- Hello Honey, Basic Gray; Chalk Marker

Paper: Whisper White, Basic Gray, Pool Party, Moonlight DSP, Epic Day This and That DSP (retired)

Accessories: Embossing Buddy®, Heat Tool, Stampin’ Emboss® White Embossing Powder, AquaPainter™, Distressing Tool, Sponge Daubers, Large Oval Punch, 3/8” Hello Honey Stitched Satin Ribbon, Pearls, Sewing Machine


Thanks again for stopping by- I will be sharing a few more cards shortly :-)  Have a great week!!

Tuesday, April 1, 2014

PPA197 Go in the Direction of Your Dreams

Hi Stampers!

I hope all of you are having a great week so far!  I have been busy preparing for an upcoming Demo meeting with my upline and fellow Demonstrators so I have not been able to share any creations yet but decided to create a quick card using the Pals Paper Arts PPA197 Sketch along with Designer Series Paper (DSP) along with another homemade map from My Digital Studio (MDS).

I hope you have the time to stop by the Pals Paper Arts site- great inspiration from the Design Team as well as the other entries!

To create this card:

Using My Digital Studio (MDS), position the images onto an 8.5x11 blank page and print out.  I used the World Map stamp brush image (I reduced the size) as well as the sentiment from Word Play stamp brush set.  One thing that I love about MDS for cards- the images may be retired in the rubber stamp catalog but are still current in MDS :-)

Color the map using AquaPainter™ and Pool Party Classic Ink for the water, Gumball Green and Crumb Cake Classic Ink for the land masses.  Trim and mount onto a piece of Early Espresso cardstock.

Add a piece of Soho Subway DSP onto the Early Espresso card base.  

Adhere a piece of Epic Day This and That DSP onto Early Espresso cardstock for the second diagonal layer on the card front and add the Naturals Button with Natural Linen Thread.  Mount this onto the card front on an angle per the sketch. 
  
Layer the 1 ¼” Burlap Ribbon onto the card front overlapping the diagonal layer with the button at the bottom.  Add a few pieces of Natural Linen Thread knotted on the one side over the burlap ribbon.

Add the map image to the card front using Stampin’ Dimensionals®.

Adhere the sentiment to a piece of Early Espresso cardstock, trim and stamp with Off the Grid using Crumb Cake Classic Ink.  Use a Sponge Dauber to add additional Crumb Cake Classic Ink to tone down the white of the paper and adhere the knotted Natural Linen Thread to the corners and add to the front of the map/burlap using Stampin’ Dimensionals® to finish off the card. 

Stamp Sets:  World Map, Word Play (both MDS versions), Off the Grid

Ink: Printer Ink- Black, Crumb Cake, Gumball Green, Pool Party Classic Ink

Paper:  Whisper White, Early Espresso, Epic Day This and That DSP, Soho Subway DSP

Accessories:  AquaPainter™, Natural Linen Thread, 1 ¼” Burlap Ribbon, Naturals Button, Sponge Dauber


Thanks again for stopping by- I hope you have a wonderful week!

Sunday, February 9, 2014

Vintage Old World Map- Handmade Map for Masculine Birthday :-)


Hi Stampers! 

I wanted to create a masculine birthday card to have on hand for my stash and decided to use the Nacho Average Challenges NAC75 Sketch and since it is a birthday card, it qualifies again for the Seize the BirthdayAnything Goes Challenge :-)

Again, I hope that you have had a chance to check out both sites- wonderful examples and inspiration from all!

I was able to utitilze scraps and a previously printed image from My Digital Studio (MDS) for this "hybrid" card (again, when I print in MDS, I fill up the page prior to printing and use the other images at a later date- the map was one of the "other" images from a previous print :-)).

To create this card:

In My Digital Studio (MDS), open a blank 8.5 x 11 custom page and insert the Old World Map image- I have this stamp set but again, since I already had this image printed and ready to go so decided to use it…

Print out onto Whisper White cardstock and color the map using Stampin’ Write markers in Pool Party, Pistachio Pudding and use the AquaPainter™ with ink from both of the corresponding Classic Ink Pads to fill in the areas. 

To antique the map, use the AquaPainter™ with the retired Tea Stain Vintage Stampin’ Ink (I dilute this ink by placing a drop in the lid of the Crumb Cake Classic Ink pad and add a bit of water). 

Cut the image into thirds (per the sketch), distress the edges with the Distressing Tool, hand tear at the top and bottom of the outer layers of the map to shorten them (again, per the sketch) and apply Baked Brown Sugar Classic Ink to the distressed edges using a Sponge Dauber.   Adhere to strips of Early Espresso cardstock and distress the edges (again, with the Distressing Tool and by hand). 

Distress a piece of Epic Day Designer Series Paper (DSP) by stamping the Off The Grid along with Gorgeous Grunge (splatter stamp and diagonal line stamp) using Baked Brown Sugar Classic Ink.  Lightly distress the edges with the Distressing Tool and sponge Baked Brown Sugar to hide the white core).

Mount the map to the DSP layer using Stampin’ Dimensionals® for the outer edges and adhere the entire panel onto a piece of Early Espresso cardstock. 

Stamp the sentiment and the compass image using Basic Black Ink, “antique” with the diluted Tea Stain Vintage Ink , the Gorgeous Grunge stamps with Baked Brown Sugar Classic Ink, Stampin’ Write markers for the compass and mount both onto Early Espress cardstock (use the Hexagon Punch to create the banner and the 1 3/8” Circle Punch to punch out the compass image before layering the Early Espresso cardstock pieces behind the compass/banner). 

Add the Vintage Trinket brad to the center of the compass and the knotted Hemp Twine (retired) to the edge of the banner and top corner of the card front. Adhere the entire panel to a Whisper White or card base of your choice to finish off the card.   

Stamp Sets:  Old World Map- MDS version, Gorgeous Grunge, The Open Sea, Express Yourself, Off the Grid

Ink: Printer Ink- Black, Classic Ink- Basic Black, Baked Brown Sugar, Pistachio Pudding, Pool Party; Stampin’ Write markers- Pistachio Pudding, Pool Party, Sahara Sand, retired Tea Stain Vintage Ink

Paper: Whisper White, Early Espresso, Epic Day DSP

Accessories: AquaPainter™, Sponge Dauber, Punches- 1 3/8” Circle, Hexagon; Vintage Trinket (brad), retired Hemp Twine, Distressing Tool


Thanks again for stopping by!  Hope you have a fantastic weekend- God Bless!

Tuesday, September 24, 2013

SUO80 Welcome Little One!!

Hi Stampers! 

The SUO80 Stampin’ Up! Only Challenge is “Welcome Baby”- to create a baby card or project using Stampin’ Up! Only products- hope you can join us and drop by to visit to see the rest of the Design Team projects. 

As I reviewed my current SU! stamps, I realized that I do not own any baby type stamps (will need to rectify that :-) so I decided to turn to My Digital Studio (MDS).  The retired rubber stamp set, Two by Two is still available as a digital download and I also had the Nursery Necessities on MDS  :-)

To create this card:

In My Digital Studio (MDS), open a blank 8.5 x 11 custom page and insert the stamp image from Two by Two  and the sentiment from Nursery Necessities- resize the image and print the image using your computer printer. 

Using Stampin’ Write markers in So Saffron, Pink Pirouette, Chocolate Chip, Soft Suede, Sahara Sand and Pool Party to color the image.   Use the Chalk Marker to create a few highlights in the water and on the elephant ears/head :-)

Use the Big Shot™ with the Deco Labels Framelits™ to cut out the label behind the focal image from Sweater Weather Designer Series Paper (DSP) and another one from Pool Party cardstock.  Cut the Pool Party label in half vertically and adhere behind the Sweater Weather DSP layer. 

Cut the Two by Two image out with the Big Shot™ and the Circle Collection Framelits™.  Add the “Welcome Little One” sentiment over the Congratulations on the stamped image, along with the Pool Party Candy Dot. 
  
Layer the Gumball Green Polka Dot DSP from Epic Day This and That onto a piece of Pool Party cardstock, add the focal image using Stampin’ Dimensionals®.  Adhere the ½” Pool Party Seam Binding Triple Ribbon Bow along with the Naturals button (use a very small strip of Pool Party cardstock to mimic thread in the button). 

Stamp Sets:  Two by Two, Nursery Necessities  (both MDS)   
  
Ink: Printer Ink- Black, Stampin’ Write Markers- So Saffron, Pink Pirouette, Pool Party, Sahara Sand, Soft Suede, Chocolate Chip

Cardstock: Whisper White, Pool Party, Sweater Weather DSP, Epic Day This and That DSP

Accessories:  Big Shot™, Circle Collection and Deco Labels Framelits™,  ½” Pool Party Seam Binding Ribbon, Pool Party Candy Dots


Thanks again for visiting- I hope you will have time to create a SUO “Welcome Baby” project of your own and join in on the fun

Tuesday, July 23, 2013

Thinking of You- A Sketch and Color Challenge

Hi Again Stampers!!

I am having a great time in my stamping room today so I think this may be a record for posts in one day for me..

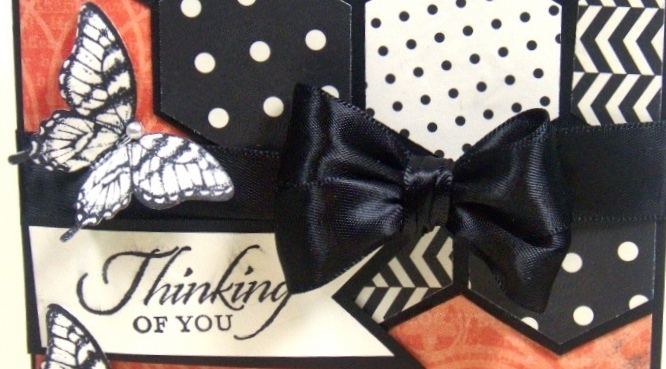
While my hubby watches his baseball games, I decided to create a card using the HSSSC164Sketch at Hand Stamped Sentiments (I flipped the sketch over) and the DD62 Challenge Colors from The Dynamic Duos.  

Again, if you have not visited these sites yet- stop by and check out all of the inspiration!!

To create this quick CAS card:

Using the hexagon punch, punch out various pieces from the Modern Medley Designer Series Paper (DSP).  Adhere the hexagons per the sketch onto Basic Black cardstock and carefully trim around the outer edge by hand.

Adhere this panel onto a piece of Calypso Coral DSP from Epic Day This and That.  Add the 5/8” Basic Black Satin Ribbon bow along with the banner sentiment. 

Mount the entire panel onto Basic Black cardstock and add the butterflies and pearls to finish off the card.

Stamp Sets:  Papillon Potpourri, Wetlands

Ink: Basic Black

Paper: Very Vanilla, Basic Black, Epic Day This and That DSP, Modern Medley DSP

Accessories:  Punches- Elegant Butterfly, Hexagon, 1” Square, Pearls, 5/8” Basic Black Satin Ribbon (retired)

I think I will have to make this card again in a different color combo- it was definitely quick and easy!!  


Thanks again for stopping by and I hope you have a wonderful Wednesday!!

Friday, July 5, 2013

Gell Well Soon- Tic Tac Toe :-)

Hi Stampers! 

Happy day after the 4th of July!!  I hope all my friends in the US had a great time celebrating our country’s birthday yesterday- we were able to celebrate with friends and had a great time!!   I also apologize for the delay on this part of the post- I have been having a few issues with my internet connection and was unable to post prior to now:-)

I truly love patriotic colors and images and had created this card for our SUO73 Patriotic Challenge a few weeks ago and did not take the time to create another one for today (I must admit I normally do not mail cards for the 4th of July). 

In case you had not seen this post originally, I wanted to share what fun it was to create this "flag" with our Sunflower stamp!!

In reflection of today though, may we never forget the wisdom and bravery of our forefathers, the courage and commitment of our military and service men and women and that freedom is never truly free!!  May their sacrifices remind us daily to pray for our country and military and may God continue to Bless America!!

This evening (or actually early morning) I wanted to create a card to participate in LeAnne’s PP159 Tic Tac Toe Challenge at the Paper Players (I just love their challenges and the Tic Tac Toe is so fun!).  Also, I decided to use the CCMC259 Create with Connie and Mary Sketch and enter this card into the ABC35 'Anything Goes' Challenge at ABCChallenges (a new challenge site for me). 
 
If you have had the chance to do so, I hope you can take the time to visit each challenge site to check out the Design Team projects as well as the other entries!

To create this card:

Using Basic Gray Classic Ink, stamp the bird image onto Whisper White cardstock and color with an AquaPainter™ (using ink from the Basic Gray and Gumball Green Classic Ink pads).  Once dry, touch up a bit with Stampin’ Write markers in the same colors and use the retired Color Spritzer Tool along with the Basic Gray marker to apply a bit of distressing.

Cut out the bird image using the Big Shot™ along with the Chalk Talk Framelits™ (I pre-cut the tail feathers and folded them up prior to cutting with the Framelit™ so they could protrude from the image).  Also from Basic Gray cardstock, cut another Framelit™ using the same die and by hand, cut this piece in half horizontally.

Use a Sponge Dauber with Baked Brown Sugar Classic Ink to lightly sponge the edges of the bird image and adhere the split Basic Gray "frame" behind the focal image.

Emboss a piece of Epic Day Designer Series Paper (love this paper!) using the Big Shot™ with the Argyle Textured Impressions™ Embossing Folder and lightly sand with the Sanding Block and sponge a bit of Baked Brown Sugar Classic Ink over the white core.

Again, with the Big Shot™ cut two pieces of Whisper White cardstock using the Large Scallop Framelit™- emboss with the Delicate Designs (Lace) Textured Impressions™ Embossing Folder and use the Sponge Dauber with Baked Brown Sugar Classic Ink to lightly sponge ink over the embossing (to tone down the white cardstock).

Emboss a piece of Soho Subway DSP with the Honeycomb Textured Impressions™ Embossing Folder (this was actually a previous embossed scrap piece that I had intended to use with the other side of the DSP- love how our mistakes work out!).  Cut along the honeycomb edge to showcase a few of the hexagons.

Adhere the Argyle embossed piece of DSP to the lower portion of a Whisper White card base (cut a bit smaller than the A2 size) and add the non-embossed piece Epic Day DSP to the top portion. Adhere the Paper Tea Lace Doily (cut in half and sponged with Baked Brown Sugar) and layer the the Honeycomb/Lace border over the cut edge of the doily.

Add the Canadian Goose image with Stampin’ Dimensionals, adhere the 3/8” Gumball Green Satin Stitched Ribbon triple bow  and add the Pearls to the corners to finish off the card.

So they you are- Tic Tac Toe!  Bird, Get Well and Embossing- thanks Paper Players and  LeAnne for the inspiration!!

Stamp Sets:  Wetlands, Thoughts & Prayers  

Ink: Basic Gray, Baked Brown Sugar, Stampin’ Write markers- Basic Gray, Gumball Green

Paper: Whisper White, Basic Gray, Epic Day and Soho Subway Designer Series Paper

Accessories:  Big Shot™, Argyle, Delicate Designs (Lace) and Honeycomb Textured Impressions™ Embossing Folders, Large Scallop and Chalk Talk Framelits™, AquaPainter™, Color Spritzer Tool, Sponge Daubers, Sanding Block, Paper Tea Lace Doily, 3/8” Gumball Green Stitched Satin Ribbon, Pearls


Thanks again for stopping by- I hope all of you have a wonderful Friday!!
Related Posts Plugin for WordPress, Blogger...