Saturday, February 14, 2015

Vintage Mixed Media Get Well Card- A Color, Sketch and Theme Challenge :-)


Hi Stampers!!

I decided to spend some time in my craft room this past evening and create a Mixed Media card using the PPA239Color Challenge along with the Mojo Monday #384 Sketch and FM197 "We're Heading to the Farm" Theme

 Again, I hope you will take the time to visit the above sites- gorgeous Design Team creations as well as wonderful galleries and inspiration from all! 


To create this card:

Cut the rooster image from the retired Beau Château Designer Series Paper and use Stampin’ Write markers to add additional color- Real Red, Crumb Cake and Soft Suede.

Use Soft Suede Classic Ink with the large splatter stamp from Gorgeous Grunge to add additional distressing and sponge Crumb Cake along with Soft Suede Classic Ink around the edges with a Sponge Dauber.

Use a Faber-Castell White Pitt Pen marker to add the white highlights and apply Plaid® Gloss Mod Podge®,  over the entire image (be careful around the colored areas since the Mod Podge® is also water based). 

Mount the rooster image onto Real Red cardstock and carefully cut around the edge, sponge with Soft Suede Classic Ink and distress with your fingernail.

Ink the retired background stamp, French Script with Soft Suede Classic Ink and stamp onto a piece of Crumb Cake cardstock.  

Distress the edges with the Distressing Tool and add additional Soft Suede Classic Ink using a Sponge Dauber. 

Mount the distressed Crumb Cake background onto a piece of Real Red cardstock.  Use a Sponge Dauber with Soft Suede Classic Ink and a honeycomb stencil to add additional detail to the background.

Adhere the 7/8” Sahara Sand Lace Trim to the sides and add the previously embossed Real Red strips (embossed with the retired Finial Press Textured Impressions™ Embossing Folder and Soft Suede Classic Ink sponged over the embossing and the edges were distressed as well). 

Cut a panel from Soft Suede cardstock and emboss using the Big Shot™ and the Honeycomb Textured Impressions™ Embossing Folder.  Use your finger to apply Gesso® to the honeycomb background and when dried, “huff” onto the French Script background stamp to re-moisten the Soft Suede ink and stamp over the embossed panel.

Add a layer of Plaid® Gloss Mod Podge®, to the honeycomb panel and mount onto the background panel.

Add the knotted Hemp Twine and adhere the entire panel onto the Crumb Cake card base. 

Create the rolled roses from Real Red cardstock using the 1 ¼” and 1 ¾” Scallop Circle Punches (punch two from the 1 ¾” Punch and one from the 1 ¼” Punch, hand cut a wavy spiral toward the center on each one, run each through the retired Crimping Tool, roll up and adhere the center using a Hot Glue Gun).

Add the Soft Suede cardstock leaves and roses to the panel and use your finger to apply Gesso® to both the petals and leaves.   Once the Gesso® has dried, add Plaid® Gloss Mod Podge® over the roses and leaves.

Stamp the sentiment using Soft Suede Classic Ink onto Whisper White cardstock, trim and create the banner ends using the Hexagon Punch.  Use a Sponge Dauber with Crumb Cake and Soft Suede Classic Ink to add distressing and stamp with the large splatter image and Soft Suede Classic Ink. 

Mount the sentiment onto Real Red cardstock, add the banners with the Hexagon Punch, apply Plaid® Gloss Mod Podge® and adhere to the card front along with the rooster image using Stampin’ Dimensionals®.

Add Pearls to the corners of the card and sentiment.  Use a Sponge Dauber to apply Soft Suede Classic Ink along all of the edges of the Crumb Cake card base to finish off the card.

Stamp Sets:  Express Yourself, Gorgeous Grunge, French Script background

Ink: Crumb Cake, Soft Suede; Stampin’ Write Markers- Crumb Cake, Soft Suede, Real Red; Faber-Castell White Pitt Pen

Paper: Whisper White, Crumb Cake, Soft Suede, Real Red; retired Beau Château DSP

Accessories: Big Shot™, Honeycomb and retired Finial Press Textured Impressions™ Embossing Folders, Punches- 1 ¾”and 1 ¼” Scallop Circle, Hexagon, Bird Builder; Foam Brush, Plaid® Gloss Mod Podge®, Gesso®, Sponge Daubers, 7/8” Sahara Sand Lace Trim, Pearls, Mini Punchenella stencil (Balzar Designs), retired Hemp Twine


Thanks again for taking the time to visit- it is such an encouragement to me!  Have a fabulous weekend!!

Thursday, February 12, 2015

TLC519 Icicle Christmas

Hi Again Stampers!!

This Clean and Simple (CAS) card was created for the Splitcoaststampers’ TLC519Sentiment Down Under Challenge along with the CCC15 Christmas Card Challenge.

Again, I hope you will find the time to visit each of the galleries- such wonderful  inspiration from all!

To create this card:

Position and apply the retired Icicle rub-ons onto the Night of Navy cardstock.

Tear the cardstock along the center to create an opening for the sentiment.

Stamp the sentiment using Night of Navy Classic Ink on a diagonal in the center of the Whisper White panel (hand position the torn top and bottom to make sure that the sentiment is centered in the right area). 

Mount the Whisper White panel onto a piece of Smoky Slate cardstock, trim and mount onto the Night of Navy card base.

Add the decorated Night of Navy panels and Rhinestones to finish off the card.

Stamp Sets:  Beauty of the Season

Ink: Night of Navy

Paper: Whisper White, Night of Navy

Accessories: Rhinestones, retired Icicle Rub-Ons


Thanks again for visiting- have a blessed Thursday, my friends!

CAS Christmas- Nature Gives to Every Time and Season

Hi Stampers!!

This Monochromatic Clean and Simple (CAS) card was created for the ‘Tis the Season TTS35 “A CampyChristmas” (I was inspired by the trees and the navy truck- the scene reminds me of camping out in the woods)  along with Splitcoaststampers’ CCC15 ChristmasCard Challenge, SCSCCJAN15 Challenge (JAN12 Something New) and USEIT2015 Challenge (the focal image stamp had not seen ink yet). 


Again, if you have not had the chance to do so, I hope you will find the time to visit each of the sites/galleries- terrific inspiration from all!

To create this card:

Ink the focal image using Night of Navy Classic Ink and stamp onto a piece of Whisper White cardstock.  Trim around the image and mount onto a piece of Night of Navy cardstock, trim and mount onto a piece of Whisper White cardstock.

Stamp the sentiment using Night of Navy Classic Ink onto the Whisper White background panel, trim and mount onto a piece of Night of Navy cardstock, trim and mount onto the Whisper White card base.

Add the focal image using Stampin’ Dimensionals®.

Use the Big Shot™ with the Memory Box Lindeman Snowflake Die to cut the snowflake from Whisper White cardstock.  

Adhere the snowflake to the Designer Silver Basics Button and add a Large Rhinestone to the center of the button.

Mount the snowflake to the card front using Stampin’ Dimensionals® to finish off the card.

Stamp Sets:  Beauty of the Season, Snowy Night (Hero Arts®)

Ink: Night of Navy

Paper: Whisper White, Night of Navy

Accessories: Big Shot™, Memory Box Lindeman Snowflake Die, Desi gner Silver Basics Button, Large Rhinestone


Thanks again for stopping by- have a marvelous Thursday!

Wednesday, February 11, 2015

CC517 & SC526 Sunflower Get Well Soon

Hi Stampers! 

I had a chance to play in my craft room and decided to create a Mixed Media card using Stampin' Blendabilities™, Distress Inks and regular Stampin' Write Markers for the Splitcoaststampers CC517 Color Challenge (Bermuda Bay, Coastal Cabana and Old Olive with the dessert option of four layers or more) and the SC526 Sketch (flipped the sketch). 

If you have not already visited the above sites, I hope you will the chance to check out the wonderful Design Team samples as well as the galleries!!

To create this card:

Stamp the main image (Sunflower Collage- non SU!) using Memento™ Tuxedo Black Ink onto Whisper White cardstock. 

Color the image using Stampin’ Blendabilities™- Coastal Cabana for the background (Light and Medium), Old Olive for the leaves and Daffodil Delight for the petals (again, Light and Medium). 

Add a few shadows with the Bermuda Bay Stampin’ Write Marker and distress the panel using Ranger® Tim Holtz® Vintage Photo Distress Ink.

Use a Faber-Castell® Black Pitt Pen Marker to re-define the lines on the image and add a few highlights with a Faber-Castell® White Pitt Pen Marker.

Trim and mount the image onto a piece of retired Soft Sky Designer Series Paper and distress the edges with Ranger® Tim Holtz® Vintage Photo Distress Ink.

Using Bermuda Bay Classic Ink, stamp the Ex Libris background stamp onto a piece of Bermuda Bay cardstock.  Distress the edges with the Distressing Tool and mount onto a piece of Soft Suede cardstock (also using the Distressing Tool to distress the edges). 

Using Coastal Cabana Classic Ink, stamp the En Francais background onto a strip of Coastal Cabana cardstock, distress the edges with the Distressing Tool and mount onto a distressed piece of Soft Suede cardstock.  Adhere this strip to the background panel and mount onto the Whisper White card base.

Cut a White Tea Lace Paper Doily in half and distress with Ranger® Tim Holtz® Vintage Photo Distress Ink.  Mount the doily behind the focal image panel and adhere the focal image to the card front using Stampin’ Dimensionals®.

Stamp the sentiment onto Whisper White cardstock, distress with Ranger® Tim Holtz® Vintage Photo Distress Ink and stamp the Ex Libris background over the image (“huff” to re-moisten the ink before applying to the sentiment).

Cut the banner points using the Hexagon Punch and mount onto the card front using Stampin’ Dimensionals®.

Add the Antique Brad and Pearls to finish off the card.

Stamp Sets: Ex Libris, En Francais, Express Yourself; Sunflower Collage (Inkadinkado®)

Ink: Memento™ Tuxedo Black,  Stampin’ Blendabilities™ Collection- Coastal Cabana, Daffodil Delight, Old Olive;  Stampin’ Write Marker- Bermuda Bay, Ranger® Tim Holtz® Vintage Photo Distress Ink, Faber-Castell® White and Black Pitt Pen Markers

Paper/Cardstock:  Whisper White, Bermuda Bay, Coastal Cabana, Soft Suede

Accessories: Distressing Tool, Sponge Daubers, Hexagon Punch, White Tea Lace Paper Doily, Antique Brad, Pearls


Thanks again for visiting- I hope all of you are having a fabulous week so far!

Tuesday, February 10, 2015

Sending Love & Sympathy- SUO116 & AW34

Hi Stampers!   

It’s time for the new SUO116 “Shape Up!” Challenge (any shape other than rectangle or square) and I decided to create a card using the AW34Color Challenge

I hope you will find the time to check the rest of the Design Team at both challenge sites and come join in on the fun!

To create this card:
Use the Big Shot™ with the large Window Frames Collection Framelits™ Die to cut out the shape of the card (fold the Very Vanilla card base in half and place the fold within the die so that the edge will not be cut).
Cut out another piece of Very Vanilla cardstock using the same size die and trim the top of the panel to match the card base.
Drop a few drops of So Saffron and Crisp Cantaloupe Classic Ink using re-inkers onto a craft mat and spritz with water.  Take the single die cut (from the step above) and lay face down into the ink and swirl it on the mat a bit, lift up and repeat until the coverage is to your liking :-)
Allow the panel to dry (I used a Heat Tool to speed up the process) and once dried, stamp the silhouette leaves using Crisp Cantaloupe and So Saffron Classic Ink onto the panel.
Stamp the stems with flower tops using Basic Gray Classic Ink and add the splatter with the large splatter stamp from Gorgeous Grunge using Crisp Cantaloupe Classic Ink. 
De-static the panel using the Embossing Buddy® and stamp the stems with flowers again using Versamark™ Ink, apply Stampin’ Emboss® Whtie Embossing Powder and heat with the Heat Tool. 
Stamp the butterflies onto So Saffron cardstock using Basic Gray Classic Ink and add additional color to the wings with the Crisp Cantaloupe Stampin’ Write marker.    Punch the butterflies out with the Elegant Butterfly Punch.
Stamp the sentiment onto Very Vanilla cardstock using Basic Gray Classic Ink and add a bit of distressing with the large splatter stamp (“huff” onto the stamp to re-moisten the existing Crisp Cantaloupe ink from the previous steps above).  
Punch out the sentiment using the Large Oval Punch and layer onto an extended Large Oval from Crisp Cantaloupe and So Saffron cardstock (punch out two ovals from each of the colored cardstock and adhere with just a bit of each color showing behind the sentiment layer).
Mount the background panel onto the card base and add the sentiment using Stampin’ Dimensionals®. 
Add the butterflies to the panel and adhere Pearls to the center of the butterflies. 
Create a bow from So Saffron cardstock using the Bow Builder Punch and adhere at the bottom of the card front (this bow will allow the card to remain upright since the die cut is curved). 
Add the Antique Brad to the center of the bow along with the Pearls in the corner to finish off the card.  
Stamp Sets:  Summer Silhouettes, Papillon Potpurri, Love & Sympathy, Gorgeous Grunge
Ink: Crisp Cantaloupe, So Saffron, Basic Gray, Versamark™,  Crisp Cantaloupe Stampin’ Write Marker
Paper/Cardstock: Very Vanilla, Crisp Cantaloupe, So Saffron
Accessories: Big Shot™,  Window Frames Collection Framelits™,  Embossing Buddy®, Heat Tool, Stampin’ Emboss® White Embossing Powder, Punches- Bow Builder, Elegant Butterfly, Large Oval; Pearls, Antique Brad

Thanks again for taking the time to visit – I hope that you will join in on in on the fun with your Stampin’ Up! Only creations and create your own “Shape Up!” project!

Sunday, February 8, 2015

Life Is Good- A Color and Sketch Challenge


Hi Stampers! 

I had a chance to play in my craft room today and decided to create a card using the FMS172 Sketch at Freshly Made Sketches along with the Pals Paper Arts PPA238 Color Challenge.

Again, if you not have already visited either site yet, I hope you will find the time to do so- wonderful ideas from all! 

To create this Mixed Media Clean and Layered (CAL) card:

Using My Digital Studio (MDS) position the Swallowtail butterfly image and re-size to a bit smaller than the actual size of the background stamp.  Print out onto Whisper White cardstock.

Color the butterfly using Stampin’ Write Markers- Pink Pirouette, Rose Red and Basic Gray.   Apply Frost White Shimmer Paint over the wings using a watercolor brush with a bit of water.

Allow to dry and re-define the black areas using a Faber-Castell Medium Pitt Pen Black marker and add a few highlights with a Faber-Castell Pitt Pen White marker.

Carefully cut out the butterfly and apply Mod Podge® over the entire butterfly image- set aside to dry.

Trim a piece of Whisper White cardstock to 4” x 5 ¼” and add the retired Eastern Elegance rub-on to the upper right hand corner.

Add a piece of Heart and Soul Collection Designer Paper (ODBD) to a layer of Basic Gray cardstock and adhere the vertical rub-on over the center.  Mount to the card front for the horizontal strip per the sketch.

Mount the panel onto a piece of Rose Red cardstock, trim and mount onto the Basic Gray card front.

Add the butterfly using Stampin’ Dimensionals® to finish off the card.

Stamp Sets: Swallowtail (MDS version)

Ink: Printer Ink- Black, Stampin’ Write Markers- Pink Pirouette, Rose Red, Basic Gray; Faber-Castell Pitt Pen Markers- Black and White

Paper: Whisper White, Rose Red, Basic Gray; Heart and Soul Designer Paper (ODBD)

Accessories: Frost White Shimmer Paint, Mod Podge®, Watercolor Brush, retired Eastern Elegance Rub-Ons


Thanks again for visiting- I hope you are having a fabulous weekend!  

Wednesday, February 4, 2015

The Card Concept #28- Thinking of You Mixed Media Easel Card

Hi Stampers!!

I had a great time creating this Mixed Media card for The Card Concept #28 Romantic Roses Challenge using the gorgeous photo for inspiration.  I was inspired by the neutral colors of the roses along with the wooden box :-)

Side view of easel card fold 
The Card Concept is a bi-weekly challenge that has an inspiration photo along with a number of design styles that you can choose from to create your card- Clean and Simple, Clean and Graphic, Clean and Layered, Shabby Chic, Freestyle Collage, Classy and Elegant and Mixed Media. 

I hope you will have a chance to check out the rest of the Design Team projects and create your own project to join in on the fun!


To create this easel card:

The background is a combination of Gesso on a 5" square piece of Whisper White cardstock, allowing it to dry and then applying various Ranger® Tim Holtz® Distress Stains and Alcohol Inks (spritzing with water and allowing the inks to drain down the panel, drying with the Heat Tool and repeating until the background is the color that you desire).

Ink the retired background stamp, French Script with Memento™ Tuxedo Black Ink and randomly stamp onto the background panel. 
Background panel before adding gesso stencil 

Add additional Gesso using a honeycomb stencil and allow to dry, trim the panel and mount onto a piece of Blushing Bride cardstock, trim again and mount onto a 5 ½” x 5 ½” Early Espresso panel.

Add the die cut border along with the 5/8” Early Espresso Satin Ribbon bow. 

Tear a piece of designer paper and distress the edges using a Distressing Tool and Ranger® Tim Holtz® Vintage Photo Distress Ink.   Adhere the torn panels to the background panel with one of the panels overlapping the ribbon and apply Mod Podge® to the torn panels.

Add the banners in the upper left hand corner attached to the Natural Linen knotted rope.

Using My Digital Studio (MDS), print out the bird image from Nature Walk onto Whisper White cardstock, color using Ranger® Tim Holtz® Distress Vintage Photo Distress Ink.  Apply Mod Podge® over the bird to give it more substance. 

Cut the heart die from brushed gold cardstock and add to the background panel.  Adhere the bird image and add the highlight to the eye with a Faber-Castell White Pitt Pen.

Create the easel card base (see tutorial here at Splitcoaststampers) and distress the cardstock using Ranger® Tim Holtz® Vintage Photo Distress Ink and randomly stamp the background stamp using Memento™ Tuxedo Black Ink.

Add the panel of distressed designer paper to the lower portion (mounted onto Blushing Bride cardstock and again onto Early Espresso cardstock), distress the paper with Ranger® Tim Holtz® Vintage Photo Distress Ink and add Mod Podge® to the entire designer paper panel.

Create the rolled flowers from Blushing Bride and retired Buckaroo Blue cardstock using the 1 ¾” and 1 ¼” Scallop Circle Punches (see basic tutorial here).  

Close up on angle - gesso stencil a bit more apparent
“Antique” the roses and edges of the panels using Ranger® Tim Holtz® Vintage Photo Distress Ink and add the roses to the center of the die cut heart as well as the inside panel with leaves created with the Bird Builder Punch from Mossy Meadow cardstock.

Apply Mod Podge® over the roses and leaves (the roses look ceramic up close) :-)

Print out the Wonderful Wings image using MDS onto Whisper White cardstock, color using a Blushing Bride Stampin’ Write Marker and Ranger® Tim Holtz® Old Paper Distress Ink.  

Add the butterfly to the lower portion of the card along with the stamped and distressed sentiment and apply additional Mod Podge® to the butterfly wings and sentiment.

Add the Pearls to the corners of the sentiment, lower panel and upper panel and adhere the main focal image panel to the easel card. 


Close up of opened bottom panel of card 
Adhere the Antique Brad to the center of the Satin Ribbon bow to finish off the card.

Stamp Sets:  Nature Walk (MDS), Wonderful Wings (MDS), Gorgeous Grunge, Kind and Caring Thoughts, French Script

Ink: Printer Ink- Black, Memento™ Tuxedo Black Ink, Ranger® Tim Holtz® Tattered Rose, Worn Lipstick, Frayed Burlap, Vintage Photo, Old Paper and Silver Metallic Distress Stains; Tim Holtz® Adirondack® Gold Alcohol Ink,  Ranger® Tim Holtz® Vintage Photo and Old Photo Distress Ink

Paper: Whisper White, Blushing Bride, Early Espresso, Mossy Meadow, retired Buckaroo Blue, Brushed Gold, Tim Holtz® Idea-ology® Wallpaper Designer Paper

Accessories: Big Shot™, Beautiful Borders Die (ODBD), Ornate Hearts Die (ODBD), Punches- Banner, Hexagon Punch (for sentiment banner points), Bird Builder, Scallop Circle- 1 ¾” and 1 ¼”, Gesso, Balzar Designs® Mini Punchenella stencil,  5/8” Early Espresso Satin Ribbon, Antique Brad, Pearls, Natural Linen Thread, Sponge Daubers


Thanks again for taking the time to stop by- again, I hope you will find the time to visit us at The Card Concept and join in on the fun!!

Monday, February 2, 2015

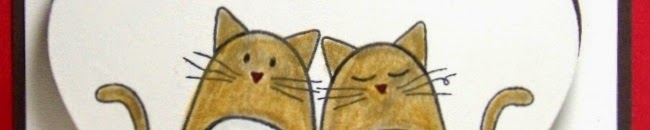
Wishing You A Purr-Fect Valentine Day- Three Challenges in One!

Hi Stampers!!

This Clean and Layered (CAL) card was created for the Splitcoaststampers CC515 Color Challenge (Real Red, Crumb Cake, Early Espresso with dessert option of two punches) along with the SR264 Stampin’ Royalty Love/Valentine Challenge and the Paper Players PP230 Critter Valentine Theme Challenge :-)

Again, if you have not had the chance to do so, I hope you will find the time to visit each of the above sites- wonderful inspiration from all!

To create this card:

Ink the stamp image using Memento™ Tuxedo Black Ink and stamp onto a piece of Whisper White cardstock. 

Color the image using Stampin’ Write markers – Crumb Cake for the cats and Real Red for the hearts ..FYI- my Crumb Cake marker was a bit dry (I have had the same marker for years)  so I also added a bit of color with a Derwent® Raw SiennaWatercolor Pencil to even the tone :-)). 

Ink the heart border from Chalk Lines using Real Red Classic Ink and stamp onto the bottom part of the image (below the kitties :-)).

Center the image on the Big Shot™ with the Hearts Collection Framelits™ and cut out the main image along with another heart from Early Espresso cardstock.

Cut the Early Espresso heart in half and layer behind the main image panel.

Stamp the sentiment using Memento™ Tuxedo Black Ink onto another piece of Whisper White cardstock and color the hearts with the Real Red marker.  

Trim the sentiment panel and mount onto a piece of Early Espresso cardstock, trim and mount onto the Real Red card base.

Mount the heart focal image panel onto the card front using Stampin’ Dimensionals®.

Use the Bow Builder Punch to create a bow from Real Red cardstock.   Add the Early Espresso button (with a strip of Real Red cardstock to mimic thread) to the center and mount onto the card front to finish off the card.

Stamp Sets:  Chalk Lines, Furry Kisses (Simon Says Stamp)

Ink: Memento™ Tuxedo Black, Real Red; Stampin’ Write Markers- Crumb Cake, Real Red; Derwent® Watercolor Pencil- Raw Sienna

Paper: Whisper White, Early Espresso, Real Red

Accessories: Big Shot™, Hearts Collection Framelits™, Bow Builder Punch, Neutrals Button Collection


Thanks again for visiting- have a fabulous week, my friends!
Related Posts Plugin for WordPress, Blogger...